Body Front Structure Parts Replacement
Materials Structure Adhesive Metal Panel Bonding Structure Rivet [SR1 18x] Fastener Specifications Structure Rivet [SR2 4x] Fastener Specifications Removal Procedure
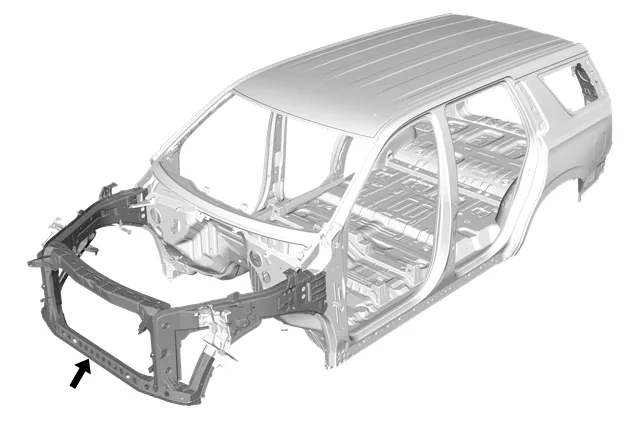
- Disable the SIR system. SIR Disabling and Enabling.
- Disconnect the battery negative cable. Battery Negative Cable Disconnection and Connection
- Remove all related panels and components.
- Remove both front fender bracket. Front Fender Bracket Replacement
- Remove both front fender rear bracket. Front Fender Rear Bracket Replacement
- Remove the sealers and anti-corrosion materials from the repair area as necessary. Anti-Corrosion Treatment and Repair
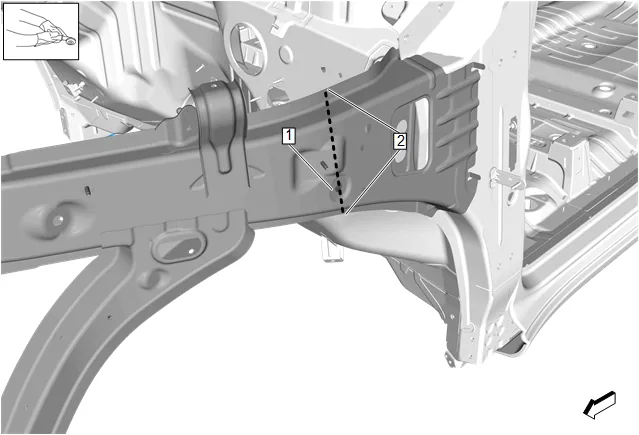
Click Image For Video

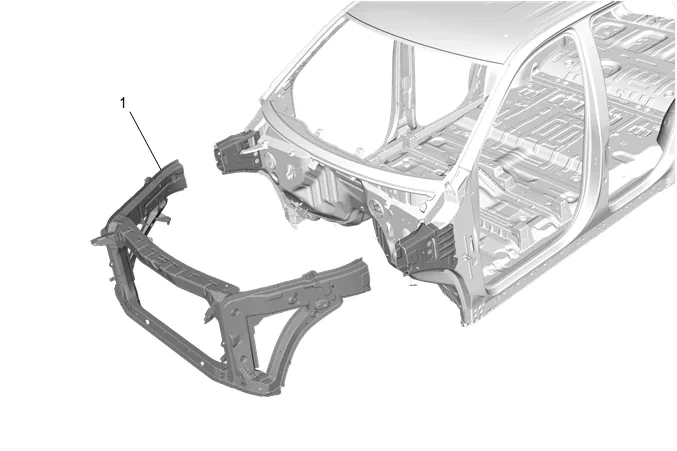
- Remove front end section (1) from the vehicle.
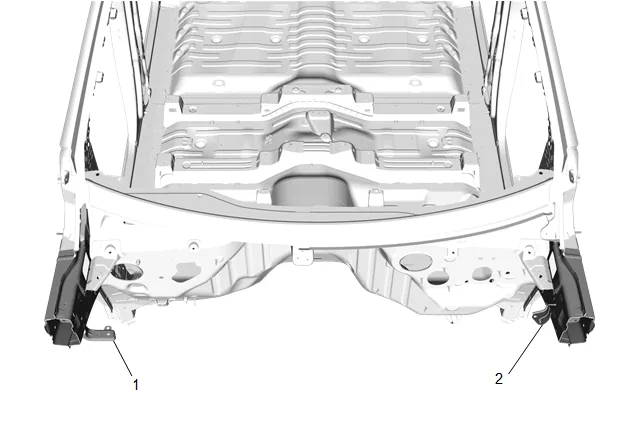
- Remove front compartment side rail bracket (1) – rear right. Front Compartment Side Rail Bracket Replacement - Rear
- Remove front compartment side rail bracket (2) – rear left. Resistance Spot Welded Full Panel Replacement
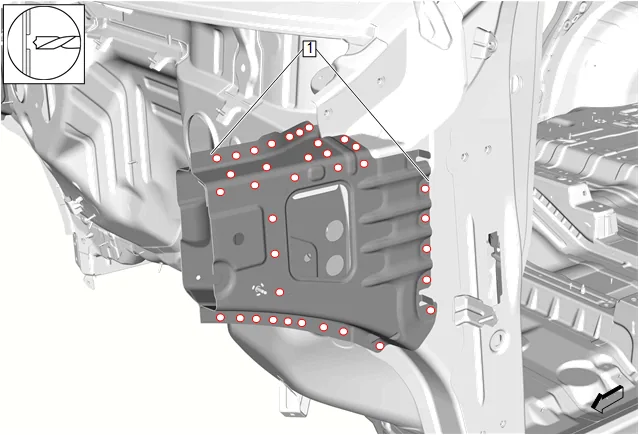
- Remove all spot welds (1). [36x]
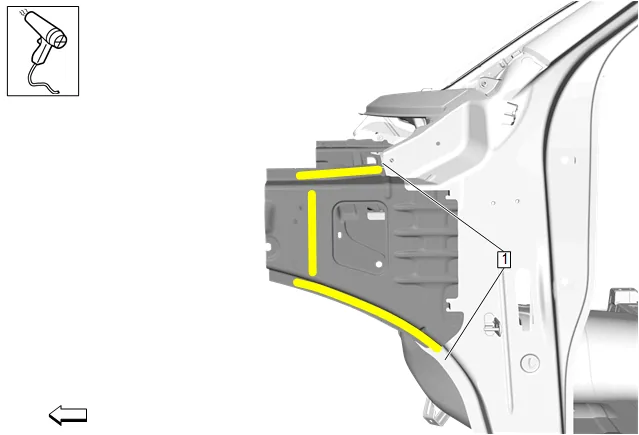
- Apply heat to shaded area (1) to release adhesive.
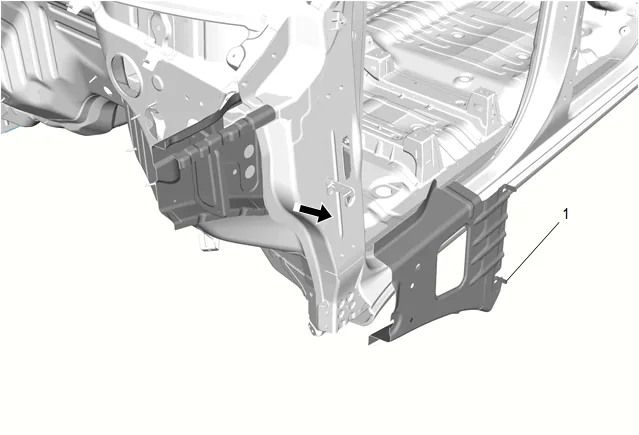
- Remove outer rail sections (1) from the vehicle.
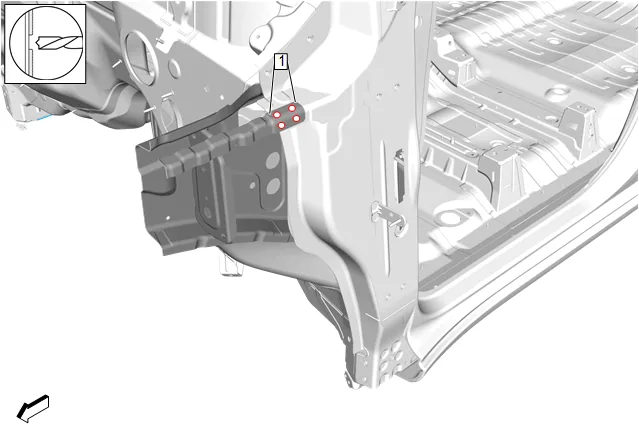
- Remove all spot welds (1). [4x]
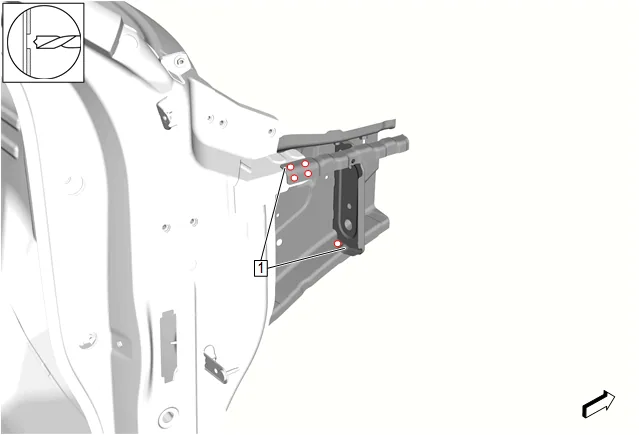
- Remove all spot welds (1). [5x]
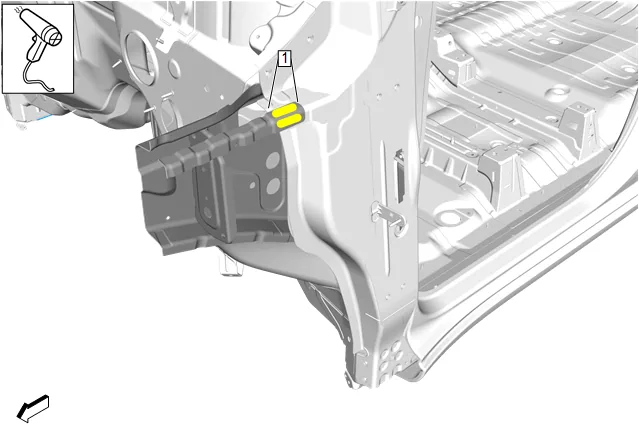
- Apply heat to shaded area (1) to release adhesive.
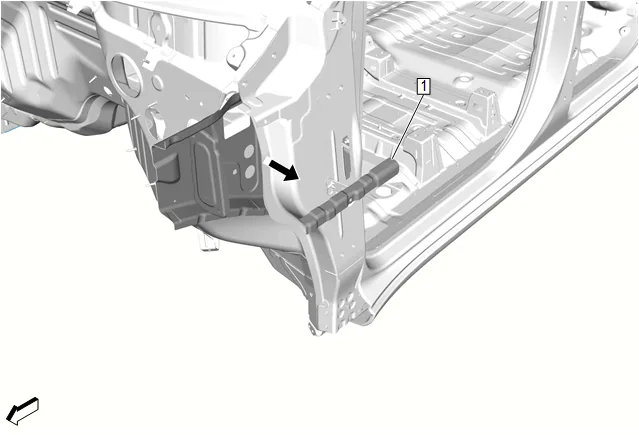
- Remove outer rail reinforcements (1) from the vehicle.
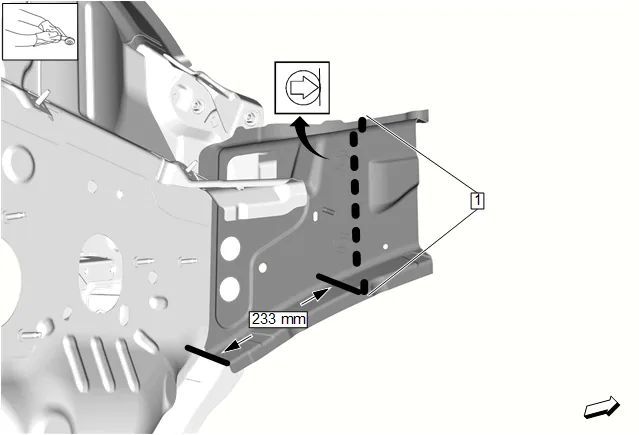
- Cut the inner side rail at the marked location (1).
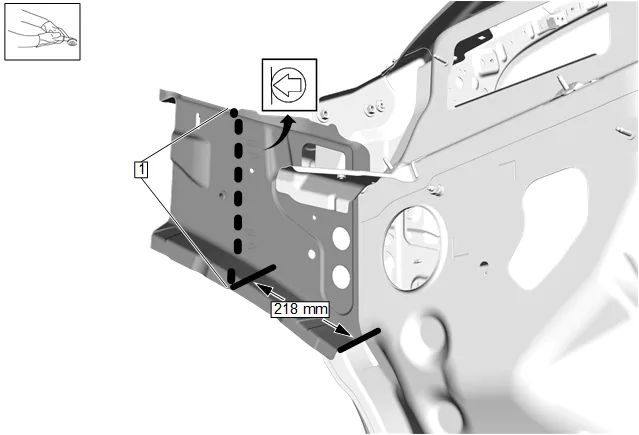
Click Image For Video
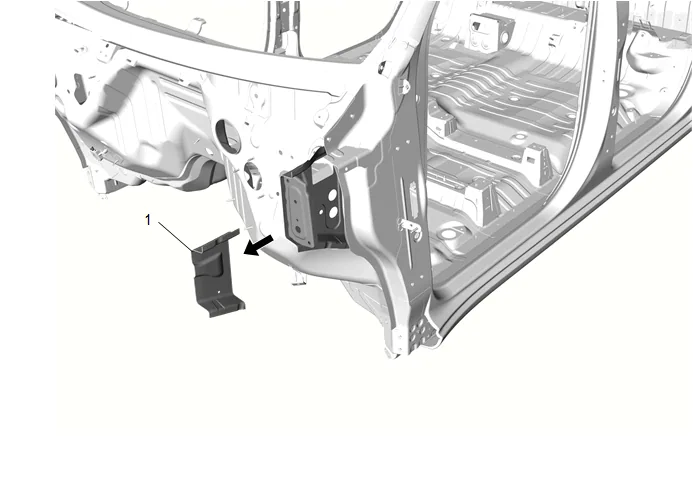
- Remove inner rail sections (1) from the vehicle.
- Remove remaining adhesive from vehicle. Installation Procedure
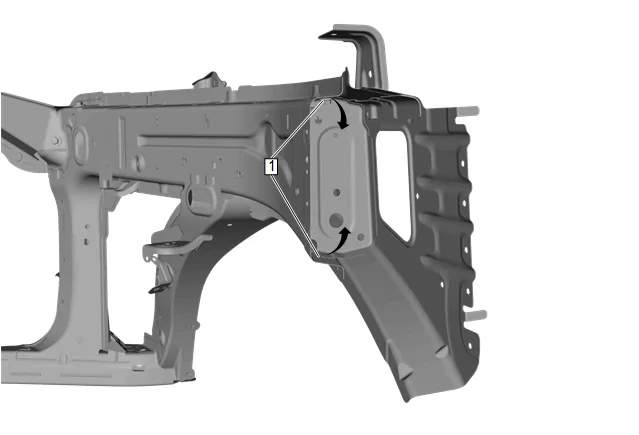
Click Image For Video
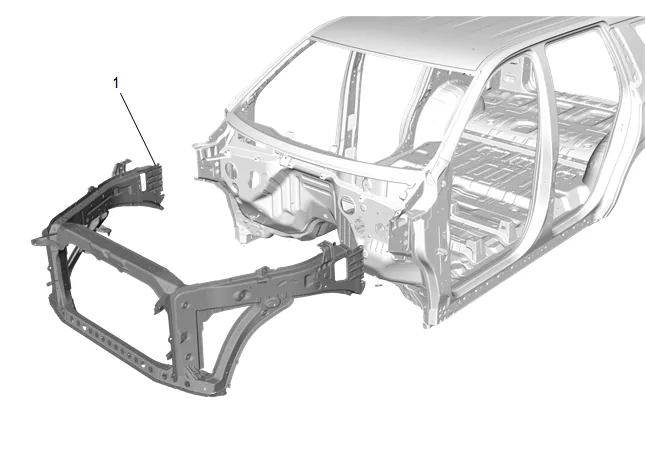
- Position front end (1) to vehicle using 3-dimensional measuring equipment and clamp into place.
- Temporarily install radiator support body mounting bolts to ensure proper alignment.
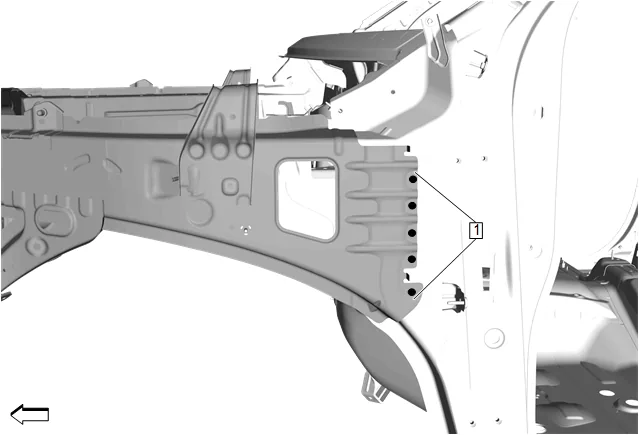
- Drill 6.7 mm (17/64”) hole (1) on outer side rail and vehicle for rivet installation. [5x]
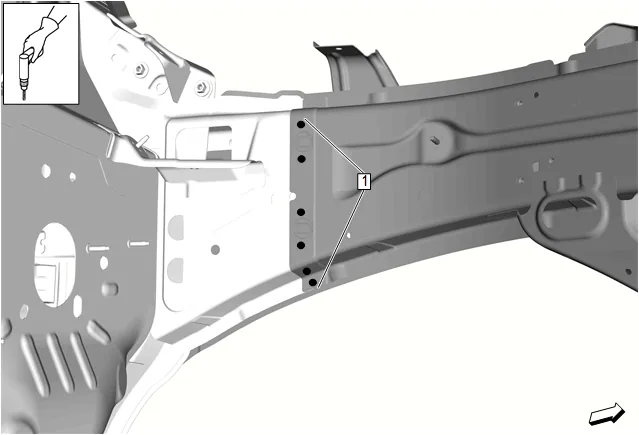
-
Drill 6.7 mm (17/64”) hole (1) on inner side rail and vehicle for rivet installation. [6x]
-
Remove the front end (1) and radiator support body mounting bolts from the vehicle.
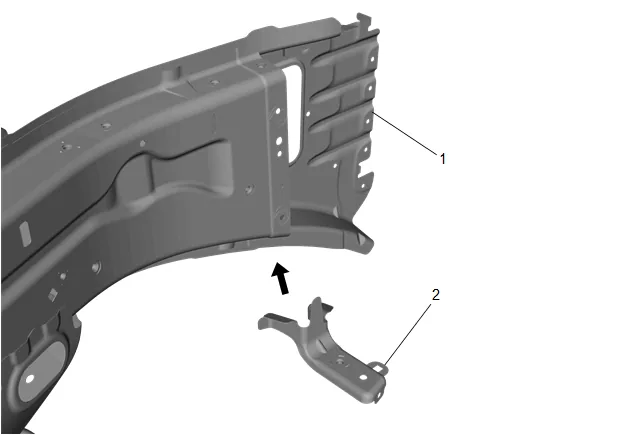
- Position rear rail bracket (2) to front end (1) using 3-dimensional measuring equipment and clamp into place.
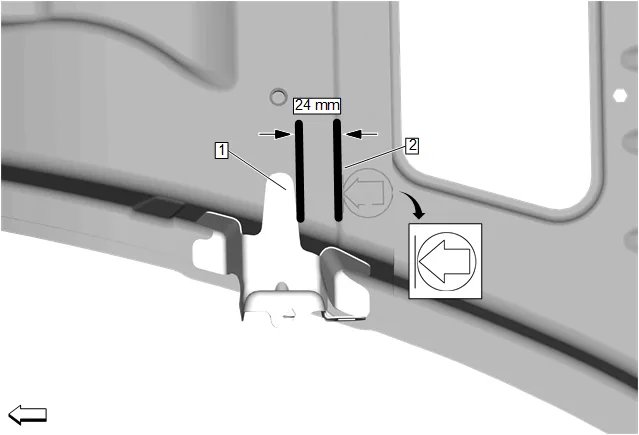
- Rear rail bracket (1) will be located 24 mm (0.9”) from inner side rail sectioning mark (2).
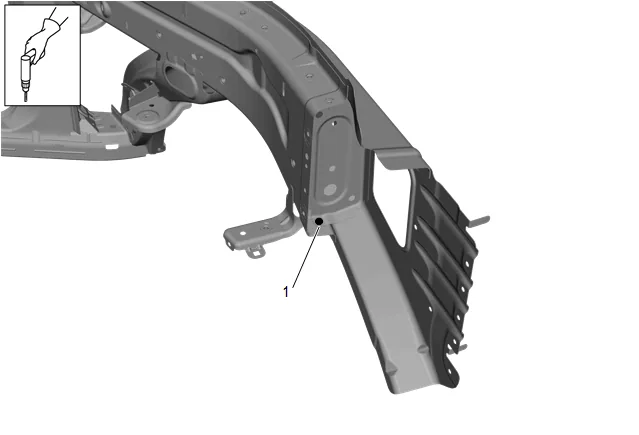
- Drill 6.7 mm (17/64”) hole (1) on rear rail bracket and vehicle for rivet installation. [1x]
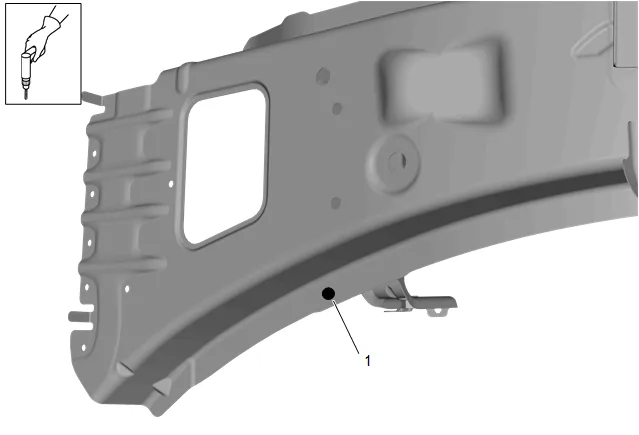
- Drill 6.7 mm (17/64”) hole (1) on rear rail bracket and vehicle for rivet installation. [1x]
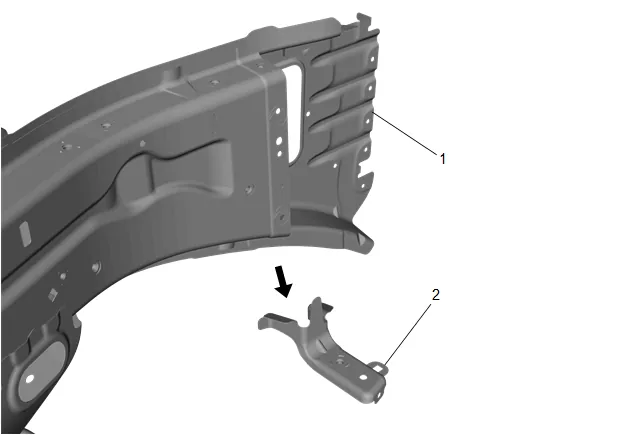
- Remove the rear rail bracket (2) from the front end (1).
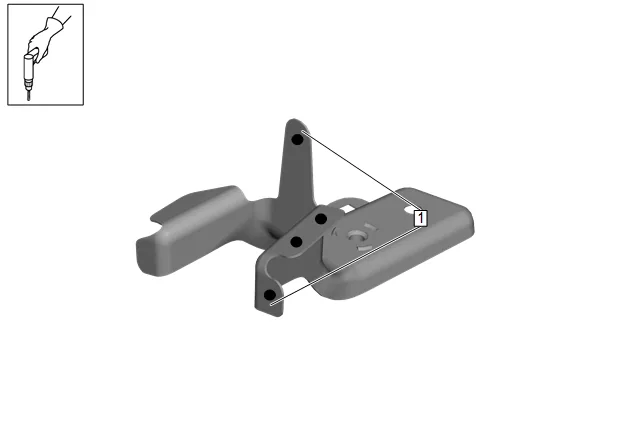
- Drill 8 mm (5/16”) plug weld holes (1). [4x]
- Prepare all joining surfaces for welding as necessary.
- Apply GM-approved weld-thru coating or equivalent to all welding surfaces. Anti-Corrosion Treatment and Repair
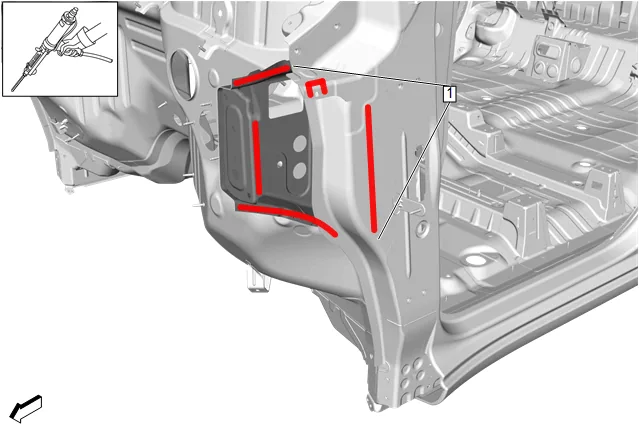
- Clean and prepare side rails and vehicle for adhesive according to adhesive manufacturer’s recommendations. Metal Panel Bonding
- Apply structural adhesive (1) on the mating surfaces of side rails and vehicle according to adhesive manufacturer’s recommendations. Metal Panel Bonding
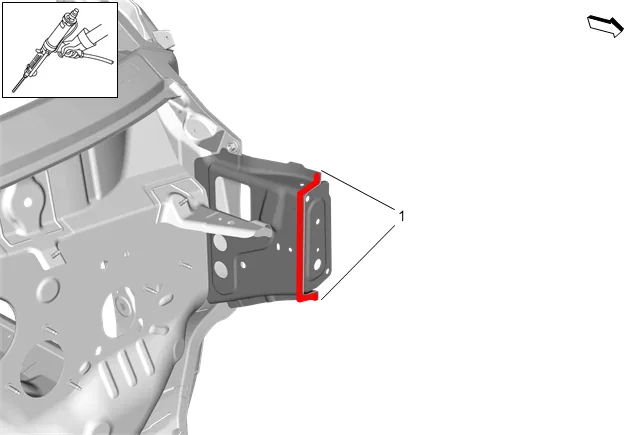
- Apply structural adhesive (1) on the mating surfaces of side rails and vehicle according to adhesive manufacturer’s recommendations. Metal Panel Bonding
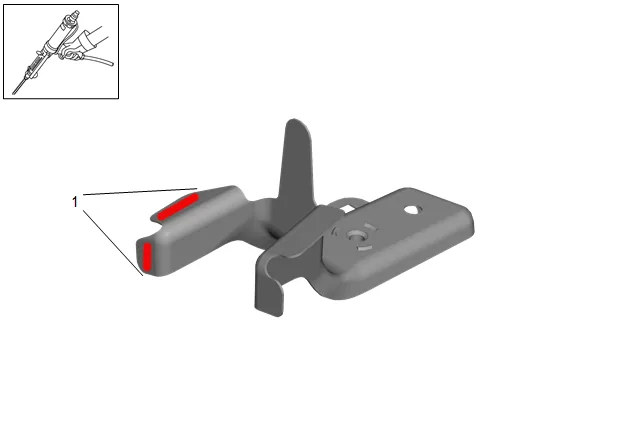
-
Apply structural adhesive (1) on the mating surfaces of side rails and rear rail bracket according to adhesive manufacturer’s recommendations. Metal Panel Bonding
-
Install front end (1) to vehicle and clamp into place.
-
Install radiator support body mounting bolts to ensure proper alignment. Body Upgrade Mount Replacement
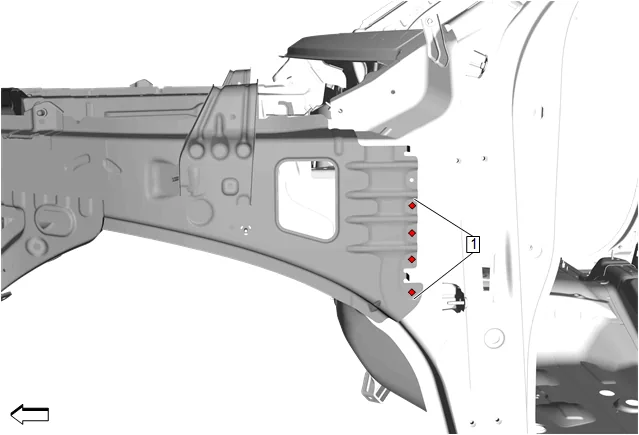
- Install rivets (1) in outer side rail. [SR1 4x] Fastener Specifications
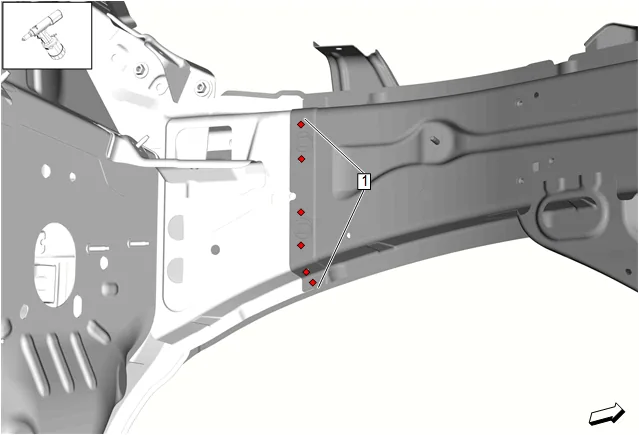
- Install rivets (1) in inner side rail. [SR1 6x] Fastener Specifications
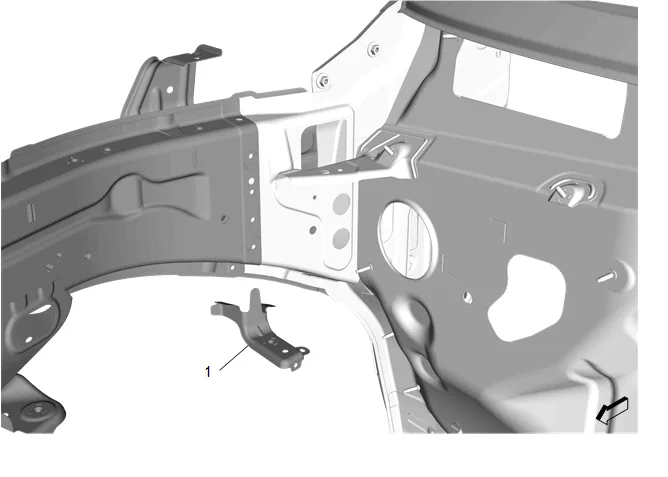
- Install rear rail bracket (1) to vehicle and clamp into place.
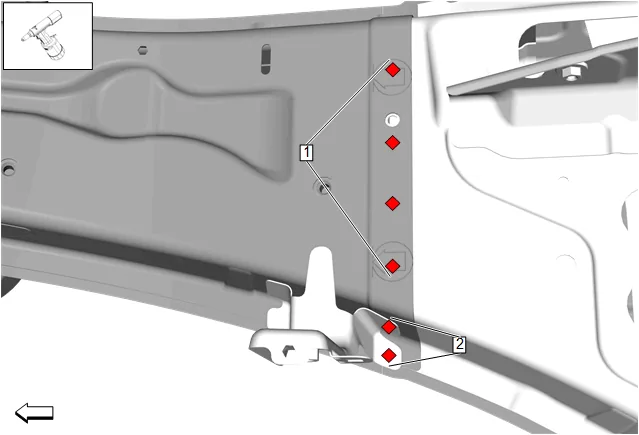
- Install rivets (1) in inner side rail. [SR1 4x] Fastener Specifications
- Install rivets (2) in inner side rail. [SR2 2x] Fastener Specifications
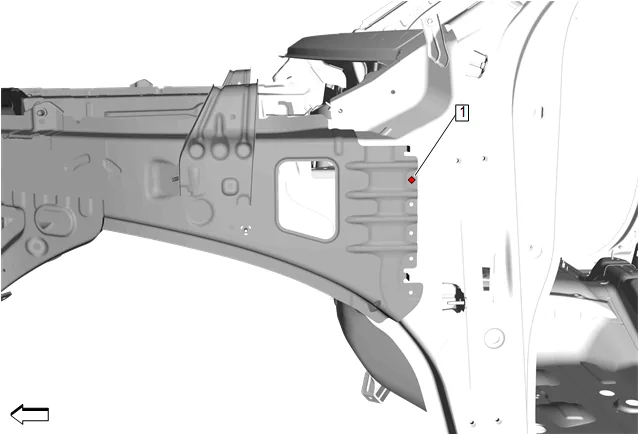
- Install rivet (1) in outer side rail. [SR2 1x] Fastener Specifications
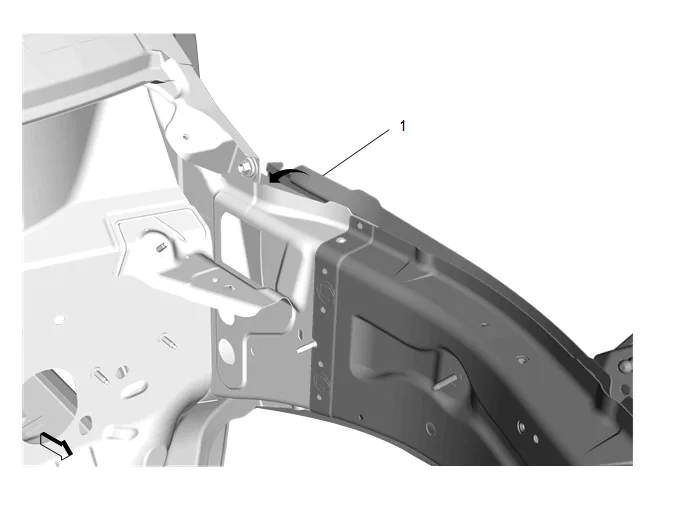
Click Image For Video
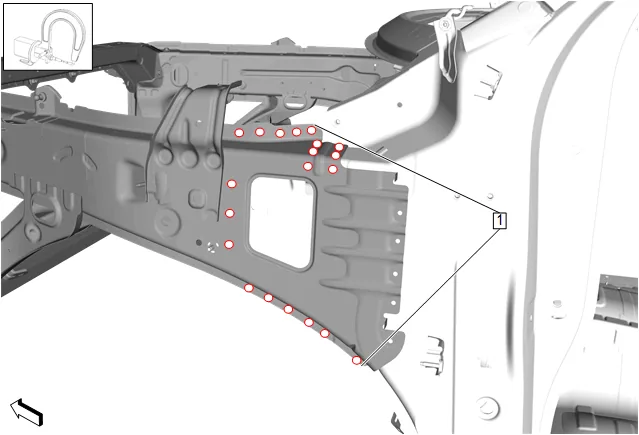
- Install spot welds (1). [20x]
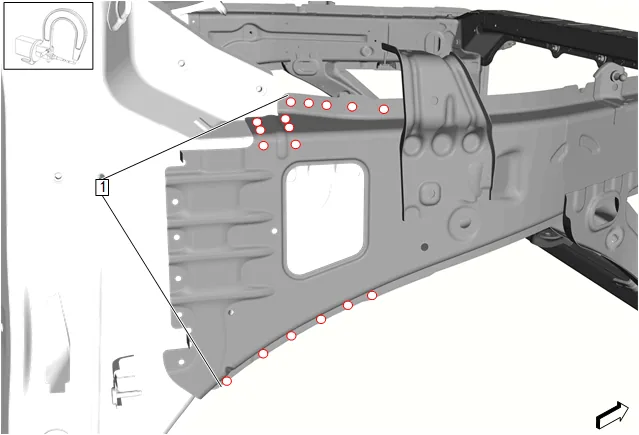
- Install spot welds (1). [17x]
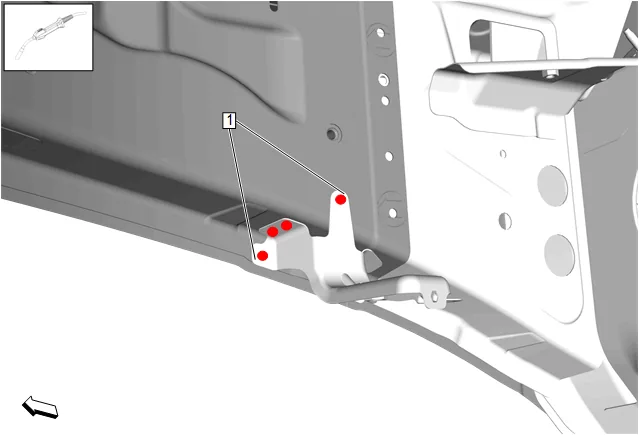
- Install MIG/MAG welds (1). [4x]
- Install front compartment side rail bracket – rear left. Resistance Spot Welded Full Panel Replacement
- Install both front fender rear brackets. Front Fender Rear Bracket Replacement
- Install both front fender brackets. Front Fender Bracket Replacement
- Apply the sealers and anti-corrosion materials to the repair area as necessary. Anti-Corrosion Treatment and Repair
- Paint the repaired area. Basecoat/Clearcoat Paint Systems.
- Install all related panels and components.
- Connect the battery negative cable. Battery Negative Cable Disconnection and Connection
- Enable the SIR System. SIR Disabling and Enabling.