Emergency Vehicle Warning Rear Lamp Replacement
Removal Procedure
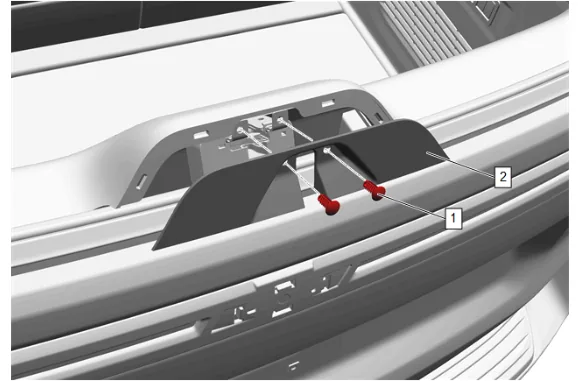
- Open the liftgate window.
- Use a small flat-bladed tool to remove the 2 panel locators (1).
- Liftgate Lower Trim Finish Panel Access Hole Cover(2) » Remove
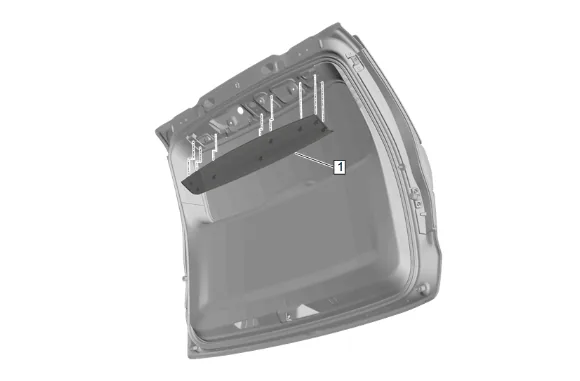
- Use the appropriate trim tool to release the liftgate upper center trim finish panel (1) from the liftgate inner panel.
- Liftgate Upper Center Trim Finish Panel (1) » Remove
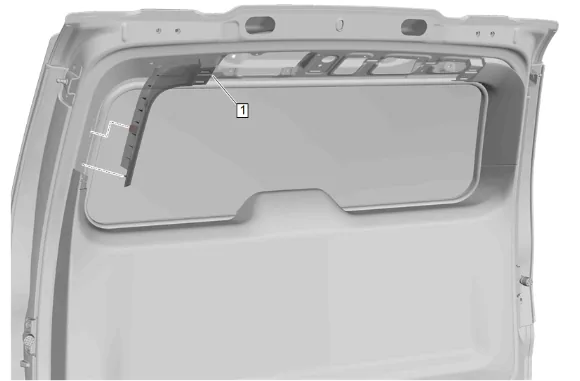
- Use a flat-bladed trim tool to aid in the removal of the liftgate upper side trim finish panels (1) from the liftgate.
- Liftgate Upper Side Trim Finish Panel (1) » Remove [2x]
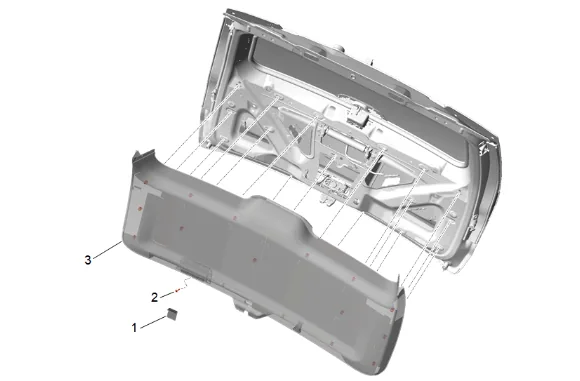
- Use a flat-bladed trim tool to aid in the removal of the rear compartment lid inner panel trim hole plug (1).
- Liftgate Lower Trim Finish Panel Bolt (2) » Remove
- Disconnect the electrical connector.
- Liftgate Lower Trim Finish Panel (3) » Remove
-
Disconnect the electrical connector.
-
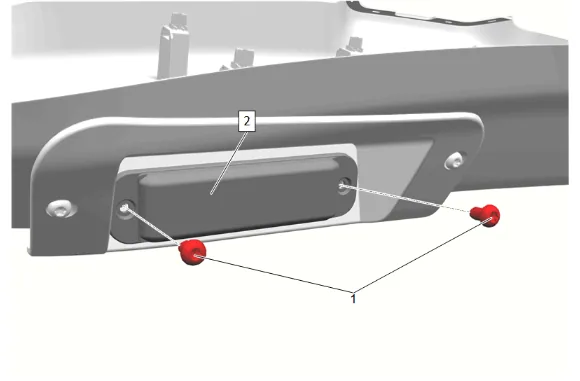
Emergency Vehicle Warning Rear Lamp Bolts (1) » Remove [2x]
-
Emergency Vehicle Warning Rear Lamp (2) » Remove Installation Procedure
-
Emergency Vehicle Warning Rear Lamp (2) » Install
-
Emergency Vehicle Warning Rear Lamp Bolts (1) » Install and tighten [2x] — Fastener Specifications
-
Connect the electrical connector.
-
Connect the electrical connector.
-
Liftgate Lower Trim Finish Panel (3) » Install
-
Liftgate Lower Trim Finish Panel Bolt (2) » Install and tighten — Fastener Specifications
-
Rear Compartment Lid Inner Panel Trim Hole Plug(1) » Install
-
Liftgate Upper Side Trim Finish Panel (1) » Install [2x]
-
Liftgate Upper Center Trim Finish Panel (1) » Install
-
Liftgate Lower Trim Finish Panel Access Hole Cover(2) » Install
-
Liftgate Trim Finish Panel Locator(1) » Install [2x]
-
Close the liftgate window.