Radio Control Switch Replacement - Steering Wheel
- Disable the SIR system. SIR Disabling and Enabling
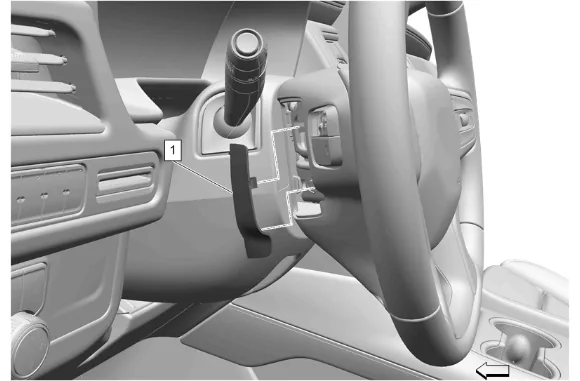
- Use a flat bladed trim tool to depress the steering wheel airbag access hole cover detents to remove the 2 steering wheel airbag access hole covers (1).
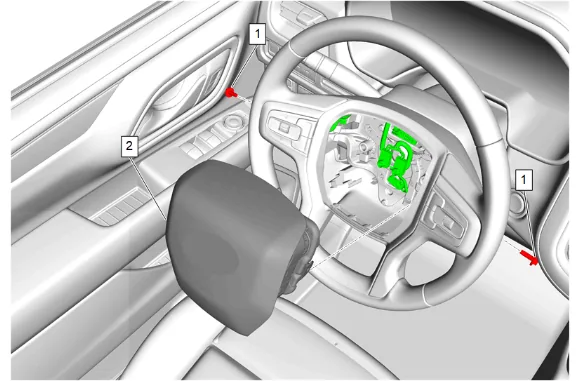
- Steering Wheel Airbag Bolt (1) » Remove [2x]
- Release the connector position assurance (CPA) retainer.
- Disconnect the electrical connectors.
- Steering Wheel Airbag (2) » Remove
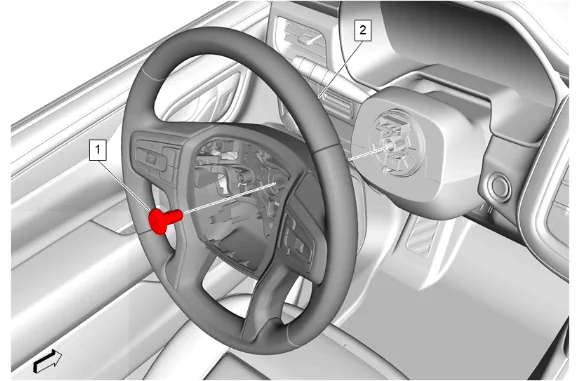
- Loosen the steering wheel bolt (1) so that 2 - 3 threads are engaged.
- Wiggle the steering wheel until the wheel disengages completely.
- Steering Wheel Bolt (1) » Remove
- Steering Wheel (2) » Remove
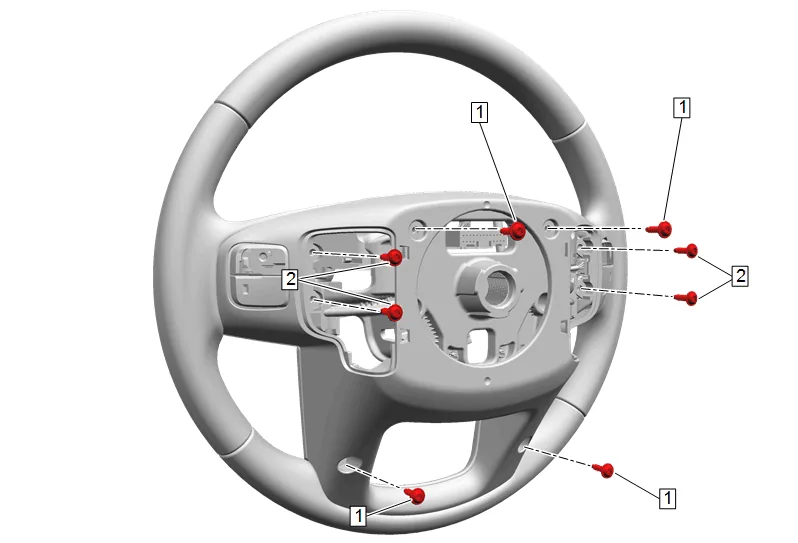
- Remove the 4 steering wheel spoke cover bolts (1).
- Remove the 4 steering wheel bolts (2).
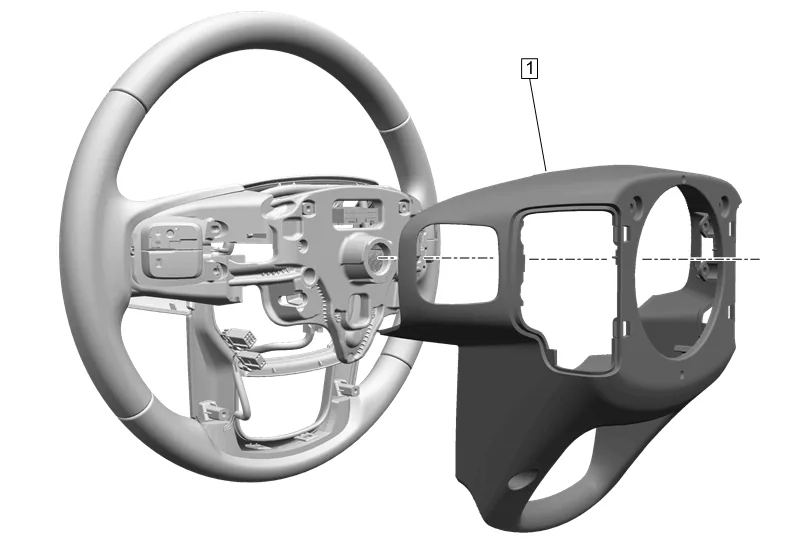
- Steering Wheel Shroud (1) » Remove
- Disconnect the heated steering wheel module electrical connectors, if equipped.
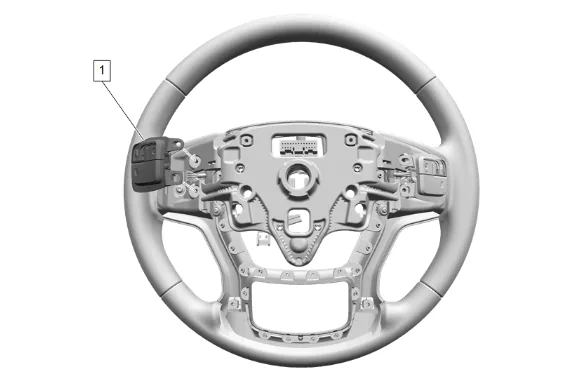
- Disconnect the electrical connector.
- Radio Volume Switch (1) » Remove
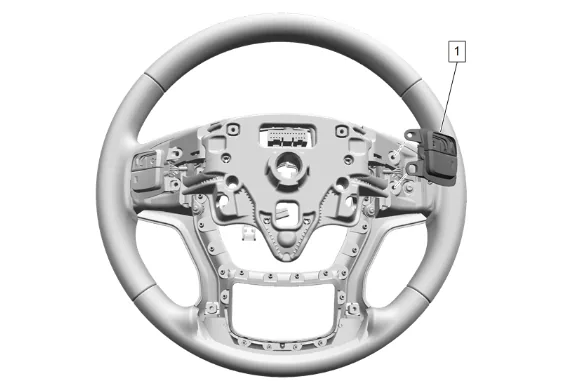
- Disconnect the electrical connector.
- Radio Favorites Switch (1) » Remove
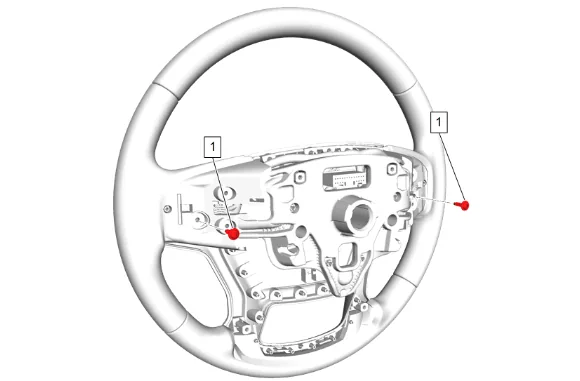
- Steering Wheel Spoke Cover Bolt (1) » Remove [2x]
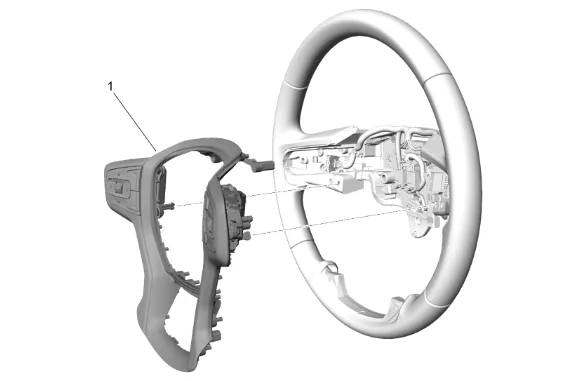
- Steering Wheel Spoke Cover (1) » Remove
- Disconnect the electrical connectors.
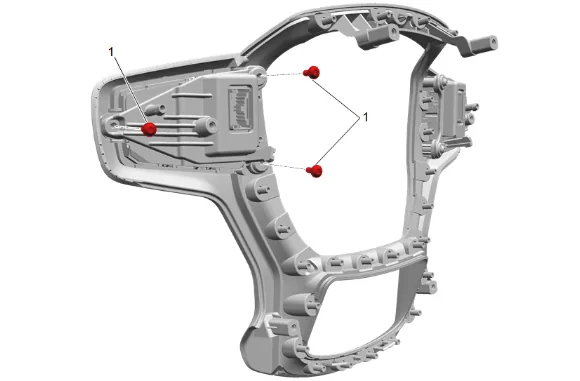
- Steering Wheel Bolt (1) @ Radio Control Switch » Remove [3x]
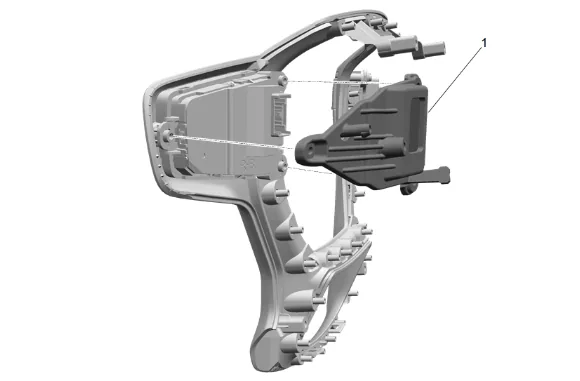
- Radio Bracket (1) » Remove
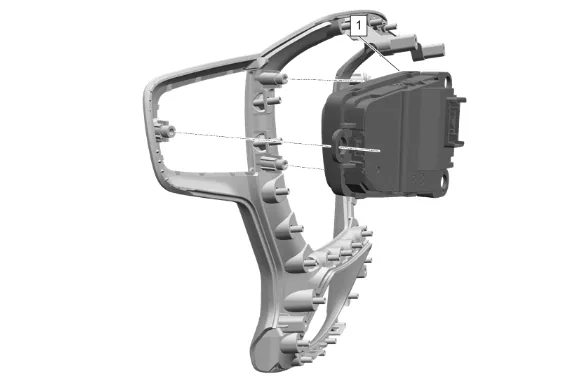
-
Radio Control Switch (1) » Remove Installation Procedure
-
Radio Control Switch (1) » Install
-
Radio Bracket (1) » Install
-
Steering Wheel Bolt (1) @ Radio Control Switch » Install and tighten [3x] — Fastener Specifications
-
Steering Wheel Spoke Cover (1) » Install
-
Connect the electrical connectors.
-
Steering Wheel Spoke Cover Bolt (1) » Install and tighten [2x] — Fastener Specifications
-
Radio Favorites Switch (1) » Install
-
Connect the electrical connector.
-
Radio Volume Switch (1) » Install
-
Connect the electrical connector.
-
Steering Wheel Shroud (1) » Install
-
Connect the heated steering wheel module electrical connectors, if equipped.
-
Install and tighten the 4 steering wheel spoke cover bolts (1). Fastener Specifications
-
Install and tighten the 4 steering wheel bolts (2). Fastener Specifications
-
Steering Wheel (2) » Install
-
If a NEW threaded component is being installed, loosen the adhesive using a metal pick or similar tool before proceeding. If threaded component is reused, prepare the threaded component using the following steps: 16.1. Remove any loose cured adhesive from the external threads of the component using a lint free cloth. 16.2. Thread the cleaned component into the internal mating threads and remove to loosen trapped cured adhesive. 16.3. Remove loose debris from internal and external threads using compressed air. 16.4. Apply liquid thread locking adhesive in a strip along half of the length of the external threads, starting at the tip, just prior to installation. Adhesives, Fluids, Lubricants, and Sealers
-
Steering Wheel Bolt (1) » Install and tighten — Fastener Specifications
-
Connect the electrical connectors.
-
Install any connector position assurance (CPA) devices or secondary locks.
-
Steering Wheel Airbag (2) » Install
-
Steering Wheel Airbag Bolt (1) » Install and tighten [2x] — Fastener Specifications
-
Install the 2 steering wheel airbag access hole covers (1).
-
Enable the SIR System. SIR Disabling and Enabling