Propeller Shaft Flange Replacement (2WD)
Single Use Fasteners and Components Propeller Shaft Universal Joint Special Tools J-9522-3 U-Joint Bearing Separator J-9522-5 U-Joint Bearing Spacer Remover Equivalent regional tools: Special Tools Removal Procedure
- Place the transmission in neutral service mode. Neutral Service Mode
- Raise and support the vehicle. Lifting and Jacking the Vehicle
- Mark the relationship of the propeller shaft to the differential drive pinion gear yoke.
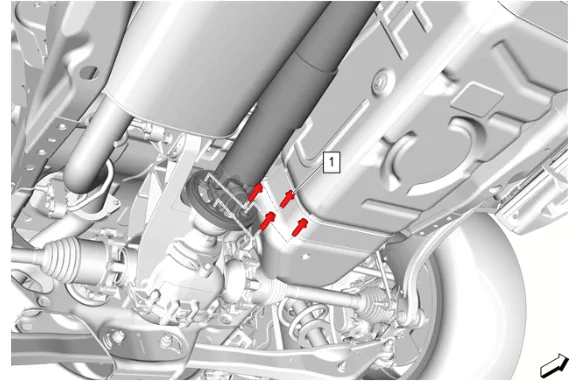
- Rear Propeller Shaft Bolt (1) » Remove [4x]
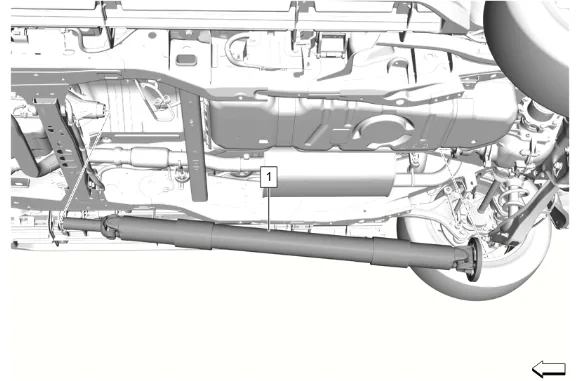
- Propeller Shaft (1) » Remove Disassembly Procedure
- Support the propeller shaft in line horizontal with the table of a press.
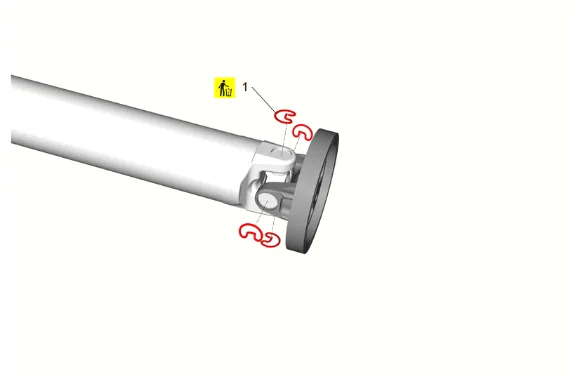
- Propeller Shaft Universal Joint Spider Bearing Retaining Ring (1) » Remove and DISCARD [4x]
- If the propeller shaft universal joint spider bearing retaining ring (1) does not readily snap out of the groove in the propeller shaft yoke, tap the end of the propeller shaft bearing lightly in order to relieve the pressure from the propeller shaft universal joint spider bearing retaining ring (1).
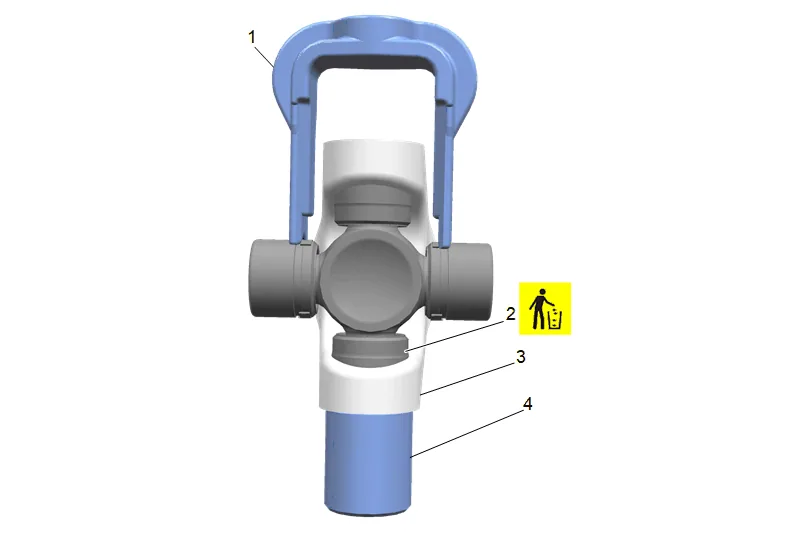
- Place the propeller shaft yoke (3) in the press, so that the lower ear of the propeller shaft (3) is supported by an appropriate size socket (4). The socket (4) should be deep enough to allow the propeller shaft bearing (2) to completely pass through the bore of the propeller shaft (3).
- Place J-9522-3 U-Joint Bearing Separator (1) on the open horizontal propeller shaft bearings.
- Press the lower propeller shaft bearing (2) out of the ear of the propeller shaft (3).
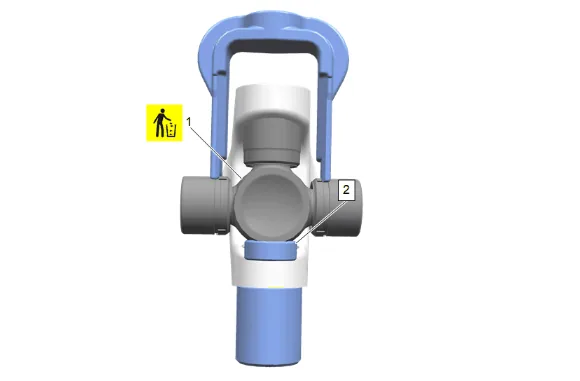
- If you do not completely remove the propeller shaft bearing, lift the propeller shaft universal joint (1) and insert J-9522-5 U-Joint Bearing Spacer Remover (2) between the propeller shaft universal joint and the propeller shaft bearing you are removing. Continue pressing the propeller shaft bearing out of the propeller shaft yoke.
- Repeat steps 5-7 for the remaining propeller shaft bearings in the propeller shaft.
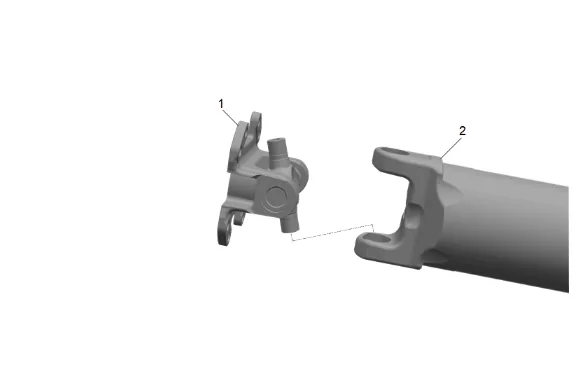
- Remove the propeller shaft flange (1) from the propeller shaft (2).
- Inspect and clean the propeller shaft bearing bores and the propeller shaft universal joint spider bearing retaining ring grooves from corrosion, dirt or pieces of retaining ring that may prevent proper installation of the NEW propeller shaft bearings. Assembly Procedure
- Remove the propeller shaft bearings from the NEW universal joint and inspect inside the propeller shaft bearings to ensure none of the needle bearings become loose or have fallen out.
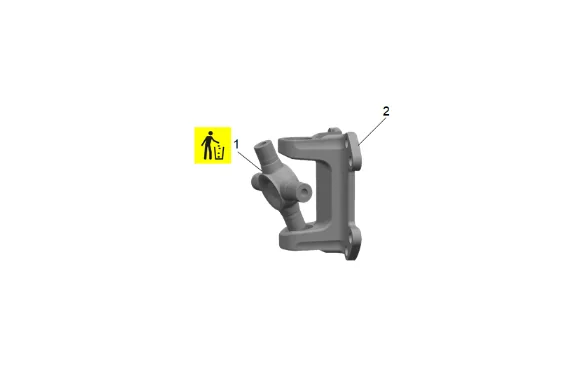
- Install the NEW propeller shaft universal joint spider (1) into the propeller shaft flange (2).
-
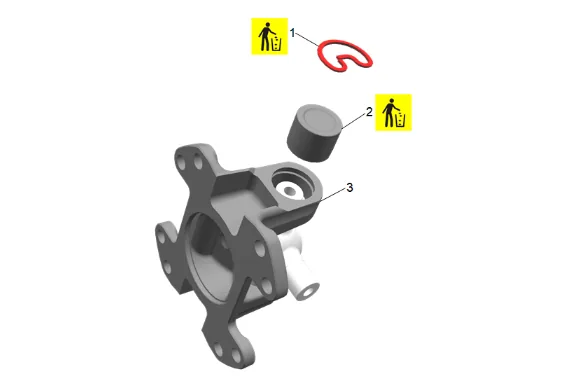
Install the NEW propeller shaft bearing (2) in either side of the propeller shaft flange (3).
-
Install the propeller shaft universal joint spider until it is seated in the propeller shaft bearing (2).
-
Using an appropriate tool, press in the propeller shaft bearing (2) until there is enough space to install the propeller shaft universal joint spider bearing retaining ring (1).
-
Install the NEW propeller shaft universal joint spider bearing retaining ring (1).
-
Rotate the propeller shaft flange and repeat steps 3-6 for the opposite propeller shaft bearing.
-
Rotate the propeller shaft universal joint spider to ensure that the propeller shaft universal joint moves freely. If not, use a hammer and lightly tap the propeller shaft flange to seat the propeller shaft bearing against the universal joint spider bearing retaining ring.
-
Position the propeller shaft flange (1) in the propeller shaft (2).
-
Repeat steps 3-8 to install remaining propeller shaft bearings. Installation Procedure
-
Propeller Shaft (1) » Install
-
If NEW threaded components are being installed, loosen the adhesive using a metal pick or similar tool before proceeding. If threaded components are reused, prepare the threaded components using the following steps: 2.1. Remove any loose cured adhesive from the external threads of the components using a lint free cloth. 2.2. Thread the cleaned components into the internal mating threads and remove to loosen trapped cured adhesive. 2.3. Remove loose debris from internal and external threads using compressed air. 2.4. Apply liquid thread locking adhesive in a strip along half of the length of the external threads, starting at the tip, just prior to installation. Adhesives, Fluids, Lubricants, and Sealers
-
Align the reference marks made between the differential drive pinion gear yoke and the propeller shaft.
- Install the 4 rear propeller shaft bolts (1) and tighten in a crisscross pattern. Fastener Specifications.
- Remove the support and partially lower the vehicle, open the door and place the vehicle in park.
- Fully lower the vehicle.