Automatic Transmission Fluid Cooling Exchanger Replacement (LM2)
Automatic Transmission Fluid Cooling Exchanger Replacement (LM2) Single Use Fasteners and Components Transmission Fluid Cooler Pipe Seal [2x] Removal Procedure
- Place a drain pan under the vehicle.
- Drain the cooling system. Cooling System Draining and Filling
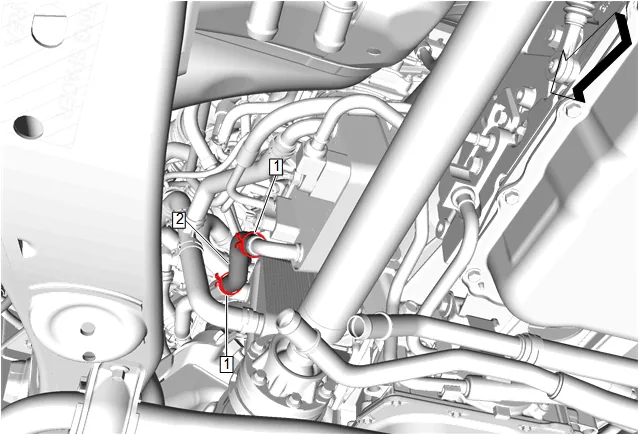
- Automatic Transmission Fluid Cooling Heat Exchanger Outlet Hose Clamp (1) » Disengage [2x] — Hose Clamp Replacement Guidelines - Spring Type
- Automatic Transmission Fluid Cooling Heat Exchanger Outlet Hose (2) » Remove
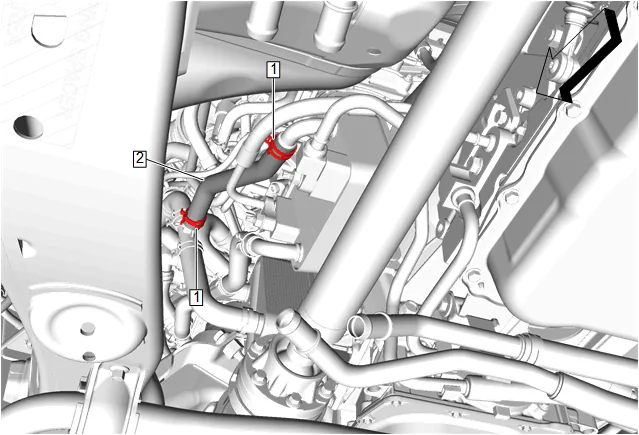
- Automatic Transmission Fluid Cooling Heat Exchanger Inlet Hose Clamp (1) » Disengage [2x] — Hose Clamp Replacement Guidelines - Spring Type
- Automatic Transmission Fluid Cooling Heat Exchanger Inlet Hose (2) » Remove
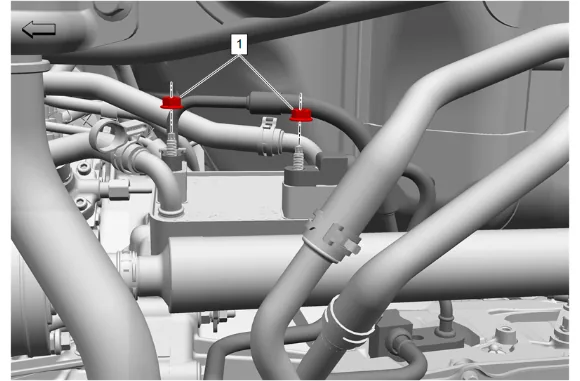
- Transmission Fluid Cooler Pipe Nut (1) @ Automatic Transmission Fluid Cooling Exchanger » Remove [2x]
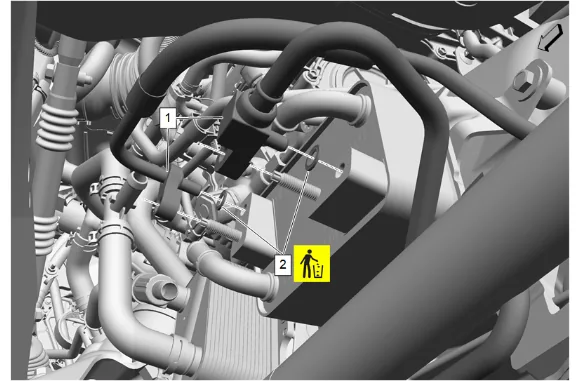
- Separate and reposition the transmission fluid cooler inlet and outlet pipe (1) at the automatic transmission fluid cooling exchanger.
- Transmission Fluid Cooler Pipe Seal (2) » Remove and DISCARD [2x]
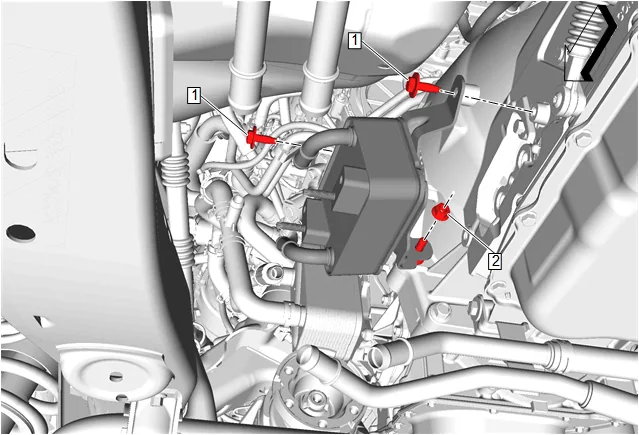
- Automatic Transmission Fluid Cooling Exchanger Nut (2) » Remove
- Automatic Transmission Fluid Cooling Exchanger Bolt (1) » Remove [2x]
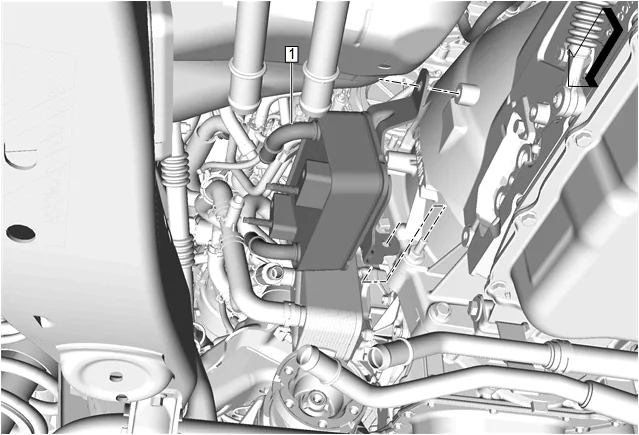
-
Automatic Transmission Fluid Cooling Exchanger (1) » Remove Installation Procedure
-
Automatic Transmission Fluid Cooling Exchanger (1) » Install
-
Automatic Transmission Fluid Cooling Exchanger Bolt (1) » Install and tighten [2x] — Fastener Specifications
-
Automatic Transmission Fluid Cooling Exchanger Nut (2) » Install and tighten — Fastener Specifications
-
Transmission Fluid Cooler Pipe Seal (2) » Install NEW [2x]
-
Transmission Fluid Cooler Inlet and Outlet Pipe (1) @ Automatic Transmission Fluid Cooling Exchanger » Install
-
Transmission Fluid Cooler Pipe Nut (1) @ Automatic Transmission Fluid Cooling Exchanger » Install and tighten [2x] — Fastener Specifications
-
Automatic Transmission Fluid Cooling Heat Exchanger Inlet Hose (2) » Install
-
Automatic Transmission Fluid Cooling Heat Exchanger Inlet Hose Clamp (1) » Engage [2x] — Hose Clamp Replacement Guidelines - Spring Type
-
Automatic Transmission Fluid Cooling Heat Exchanger Outlet Hose (2) » Install
-
Automatic Transmission Fluid Cooling Heat Exchanger Outlet Hose Clamp (1) » Engage [2x] — Hose Clamp Replacement Guidelines - Spring Type
-
Check the transmission fluid level. Transmission Fluid Level and Condition Check
-
Fill the cooling system to the proper level. Cooling System Draining and Filling
-
Start the engine and check for leaks.
-
Remove the drain pan.