Air Conditioning Clutch Replacement (LM2)
Removal Procedure
- Remove the charge air cooler, air conditioning condenser, engine cooler fan and engine radiator as an assembly. Charge Air Cooler, Condenser, Fan, and Radiator Assembly Removal and Installation
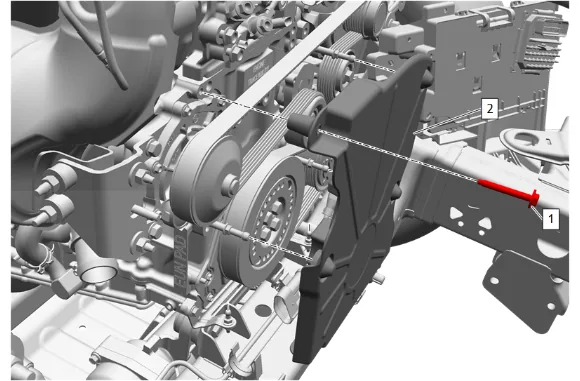
- Engine Front Cover Bolt (1) » Remove
- Engine Front Cover (2) » Remove
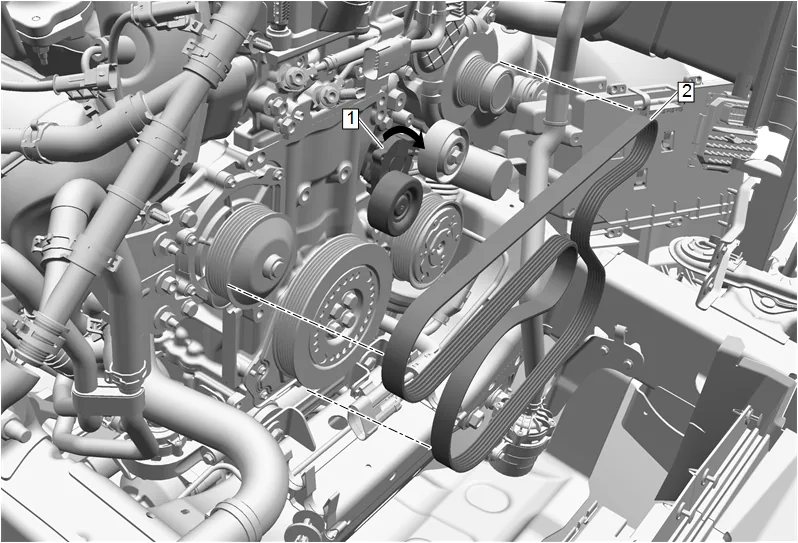
- Rotate the accessory drive primary belt tensioner (1) clockwise to release the drive belt tension.
- Slide the accessory drive primary belt (2) off of the belt idler pulley and slowly release the accessory drive primary belt tensioner (1).
- Remove the accessory drive primary belt (2) from the air conditioning compressor pulley.
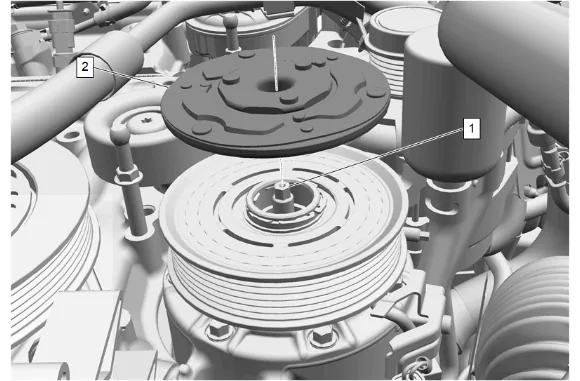
- Use the appropriate size socket to hold the air conditioning compressor shaft (1), and the appropriate size wrench to turn air conditioning clutch drive plate (2) counterclockwise to loosen and remove.
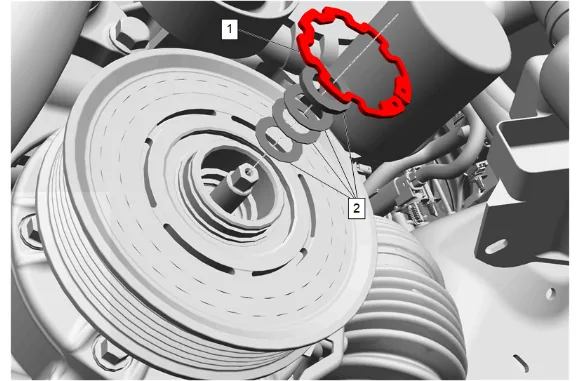
- Air Conditioning Compressor Pulley Bearing Retaining Ring (1) » Remove
- Air Conditioning Clutch Shim(s) (2) » Remove
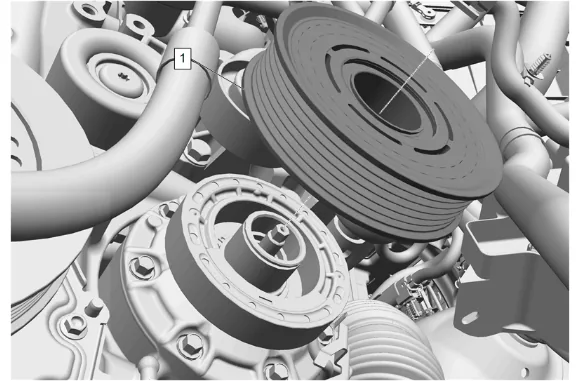
- Air Conditioning Compressor Pulley (1) » Remove
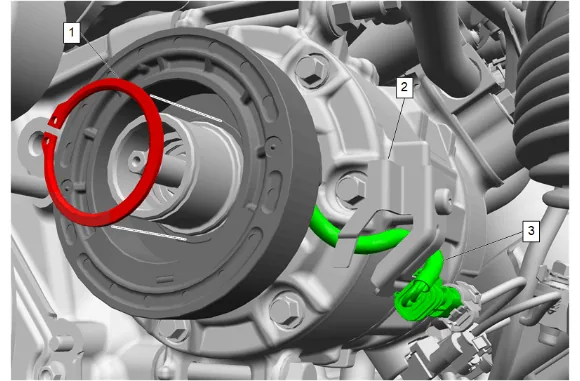
- Air Conditioning Clutch Coil Retaining Ring (1) » Remove
- Disconnect the electrical connector.
- Unclip the wiring harness (3) from the air conditioning compressor bracket (2).
-
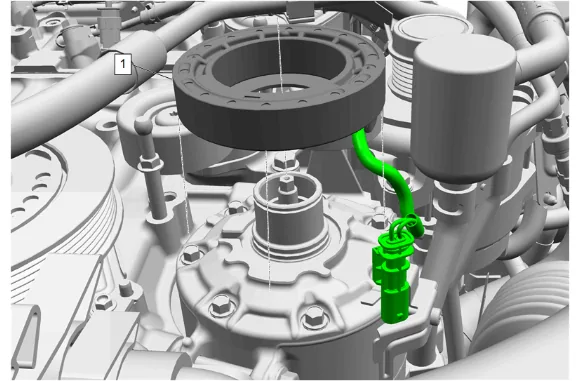
Air Conditioning Compressor Clutch Coil (1) » Remove Installation Procedure
-
Air Conditioning Compressor Clutch Coil (1) » Install
-
Clip the wiring harness (3) into the air conditioning compressor bracket (2).
-
Connect the electrical connector.
-
Air Conditioning Clutch Coil Retaining Ring (1) » Install
-
Air Conditioning Compressor Pulley (1) » Install
-
Air Conditioning Compressor Pulley Bearing Retaining Ring (1) » Install
- Install the air conditioning clutch shim(s) (2) as needed to achieve the appropriate air gap of 0.16–0.41 mm (0.006–0.016 in).
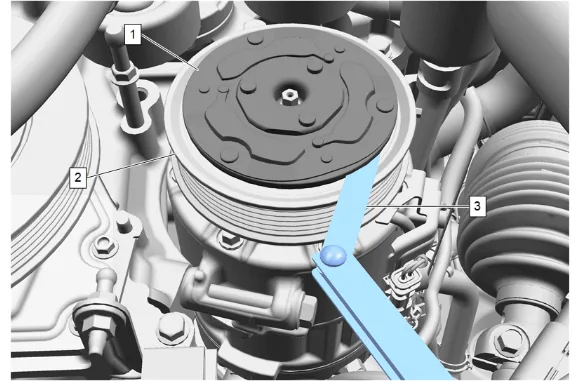
- Air Conditioning Compressor Clutch Drive Plate (1) » Install and hand tighten
- Measure the air gap between air conditioning clutch drive plate (1) and the air conditioning compressor pulley (2) using the appropriate feeler gauge (3).
- If the air gap is out of range remove the air conditioning clutch drive plate, and add or remove shim(s) as need to achieve the appropriate air gap.
- Repeat steps 8, 9, and 10 as needed to achieve the appropriate air gap.
-
Use the appropriate size socket to hold the air conditioning compressor shaft (1), and the appropriate size wrench to turn air conditioning clutch drive plate (2) clockwise to tighten. Fastener Specifications
-
Install the accessory drive primary belt (2) to the vehicle.
-
Rotate the accessory drive primary belt tensioner (1) clockwise.
-
Install the accessory drive primary belt (2) around all pulleys.
-
Slowly release the accessory drive primary belt tensioner (1).
-
Engine Front Cover (2) » Install
- Engine Front Cover Bolt (1) » Install and tighten — Fastener Specifications
- Install the charge air cooler, air conditioning condenser, engine cooler fan and engine radiator as an assembly. Charge Air Cooler, Condenser, Fan, and Radiator Assembly Removal and Installation