Drivetrain and Front Suspension Frame Front Crossmember Replacement (4WD)
Drivetrain and Front Suspension Frame Front Crossmember Replacement (4WD) Single Use Fasteners and Components Front Differential Carrier Bolt Special Tools EN-45059–A Angle Meter Equivalent regional tools: Special Tools Removal Procedure
- Raise and support the vehicle. Lifting and Jacking the Vehicle
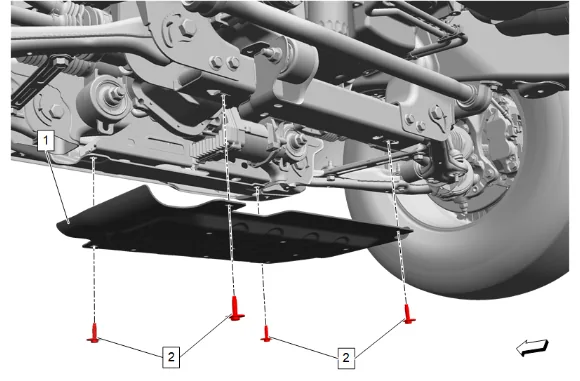
- Underbody Skid Shield Bolt (2) » Remove [4x]
- Underbody Skid Shield (1) » Remove
- Support the differential carrier with a suitable jack.
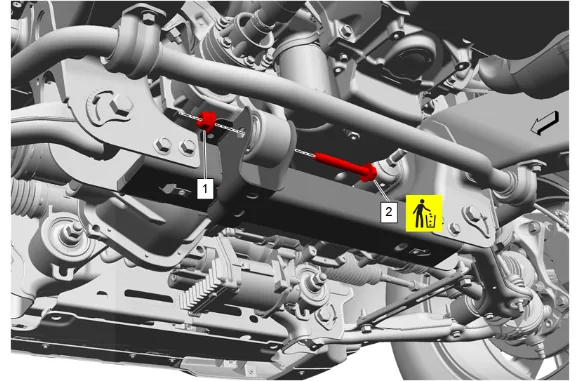
- Front Differential Carrier Nut (1) » Remove
- Front Differential Carrier Bolt (2) » Remove and DISCARD
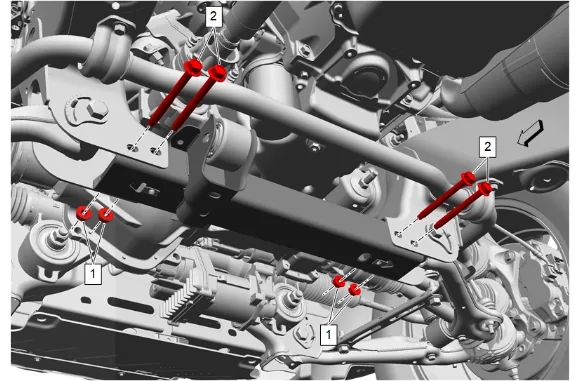
- Drivetrain and Front Suspension Frame Reinforcement Nut (1) » Remove [4x]
- Drivetrain and Front Suspension Frame Reinforcement Bolt (2) » Remove [4x]
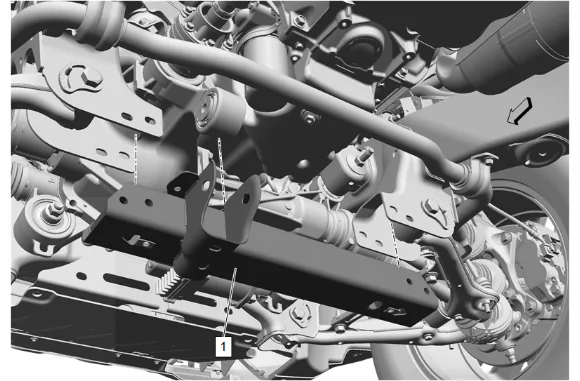
-
Drivetrain and Front Suspension Frame Front Crossmember (1) » Remove Installation Procedure
-
Drivetrain and Front Suspension Frame Front Crossmember (1) » Install
- Drivetrain and Front Suspension Frame Reinforcement Bolt (2) » Install [4x]
- Drivetrain and Front Suspension Frame Reinforcement Nut (1) » Install [4x]
- Using the EN-45059–A Angle Meter, tighten the 4 drivetrain and front suspension frame reinforcement nuts (1). Fastener Specifications
-
Front Differential Carrier Bolt (2) » Install NEW
-
Front Differential Carrier Nut (1) » Install
-
Using the EN-45059–A Angle Meter, tighten the front differential carrier nut (1). Fastener Specifications
-
Remove the jack supporting the differential carrier.
-
Underbody Skid Shield (1) » Install
-
Underbody Skid Shield Bolt (2) » Install and tighten [4x] — Fastener Specifications
-
Lower the vehicle.