Rear Axle Shaft Replacement - Left Side (G86)
Special Tools DT-52903 Axle Flange Remover GE-02619-A Slide Hammer w/Adapter Equivalent regional tools: Special Tools Removal
- Raise and support the vehicle. Lifting and Jacking the Vehicle
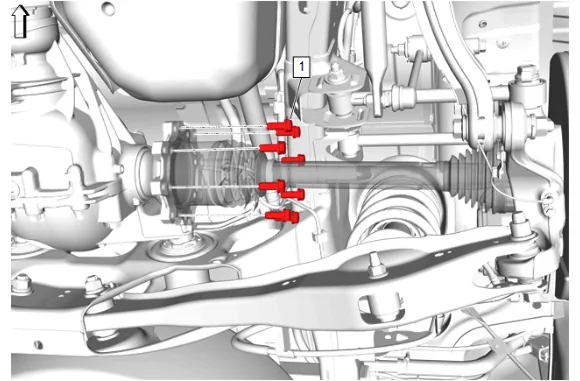
- Rear Wheel Drive Shaft Bolt (1) » Remove [8x]
- Rear Wheel Drive Shaft » Reposition
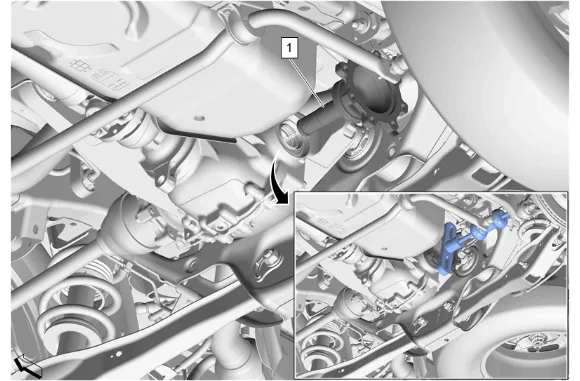
-
Using DT-52903 Axle Flange Remover and GE-02619-A Slide Hammer w/Adapter, Remove the rear axle shaft (1). Installation
-
Rear Axle Shaft (1) » Install
-
Rear Wheel Drive Shaft » Reposition
-
If NEW threaded components are being installed, loosen the adhesive using a metal pick or similar tool before proceeding. If threaded components are reused, prepare the threaded components using the following steps: 3.1. Remove any loose cured adhesive from the external threads of the components using a lint free cloth. 3.2. Thread the cleaned components into the internal mating threads and remove to loosen trapped cured adhesive. 3.3. Apply thread locking adhesive to the external threads of the components. Adhesives, Fluids, Lubricants, and Sealers 3.4. Ensure there are no gaps in the thread locking adhesive once applied to the component.
- Rear Wheel Drive Shaft Bolt (1) » Install and tighten [8x] — Fastener Specifications
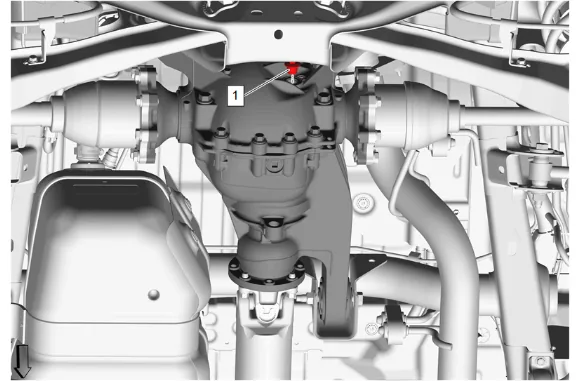
- Rear Axle Housing Fill Plug (1) » Remove
- Inspect the axle lubricant level, it should be 0 - 5 mm(0.0 - 0.20 in) below bottom of the plug opening.
- If the level is low, add axle lubricant until the level is 0 - 5 mm(0.0 - 0.20 in) below bottom of the fill plug opening. Use the appropriate axle lubricant: Adhesives, Fluids, Lubricants, and Sealers
- Rear Axle Housing Fill Plug (1) » Install and tighten — Fastener Specifications
- Remove the support and lower the vehicle.