Heater Replacement
Single Use Fasteners and Components Air Conditioning Evaporator Seal - Small Air Conditioning Evaporator Seal - Large Air Conditioning Evaporator Thermal Expansion Valve Seal - Large [2x] Air Conditioning Evaporator Thermal Expansion Valve Seal - Small [2x] Removal Procedure
- Heater and Air Conditioning Evaporator and Blower Module » Remove — Heater and Air Conditioning Evaporator and Blower Module Removal and Installation
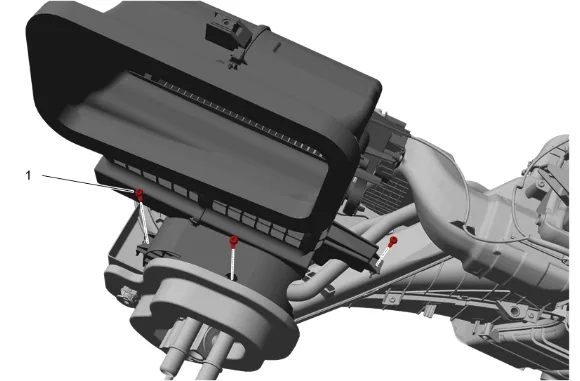
- Air Inlet Housing Bolt (1) » Remove [3x]
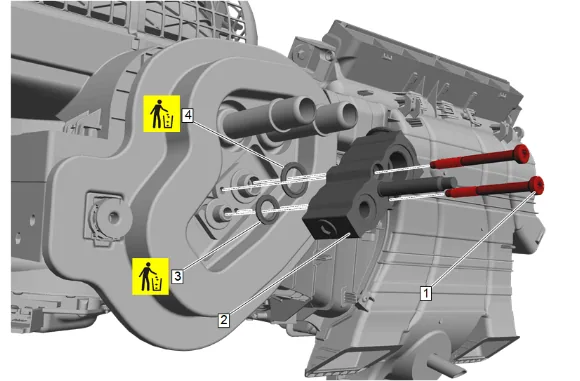
- Air Conditioning Evaporator Thermal Expansion Valve Bolt (1) » Remove [2x]
- Air Conditioning Evaporator Thermal Expansion Valve (2) » Remove
- Air Conditioning Evaporator Seal - Small (3) » Remove and DISCARD
- Air Conditioning Evaporator Seal - Large (4) » Remove and DISCARD
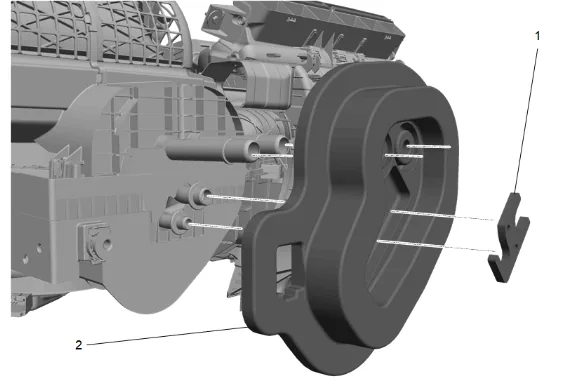
- Air Conditioning Evaporator Tube Bracket (1) » Remove
- Heater And Air Conditioning Evaporator Tube Seal (2) » Remove
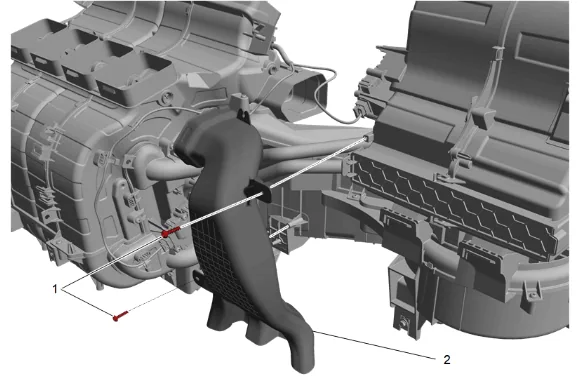
- Heater and Air Conditioning Evaporator and Blower Module Bolt (1) » Remove [2x]
- Floor Front Air Outlet Duct - Right Side (2) » Remove
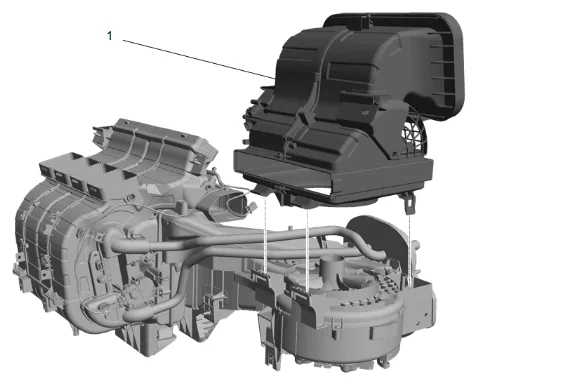
- Air Inlet Housing (1) » Remove
- Disconnect the electrical connector.
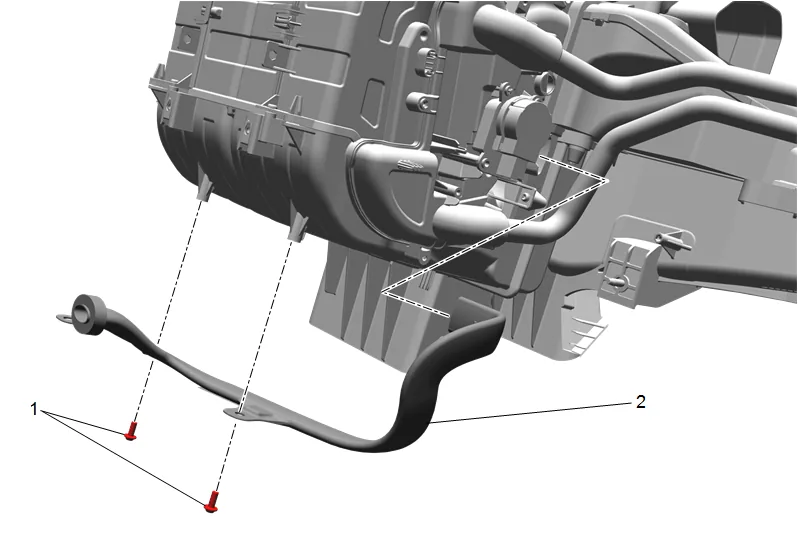
- { If equipped } Front Floor Console Auxiliary Cooling Duct Bolt (1) » Remove [2x]
- { If equipped } Front Floor Console Auxiliary Cooling Duct (2) » Remove
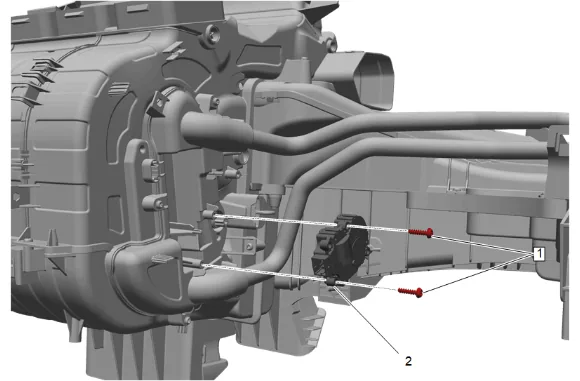
- Heater and Air Conditioning Evaporator and Blower Module Bolt (1) » Remove [2x]
- { If equipped } Temperature Valve Actuator - Right Side (2) » Remove
- Disconnect the electrical connector.
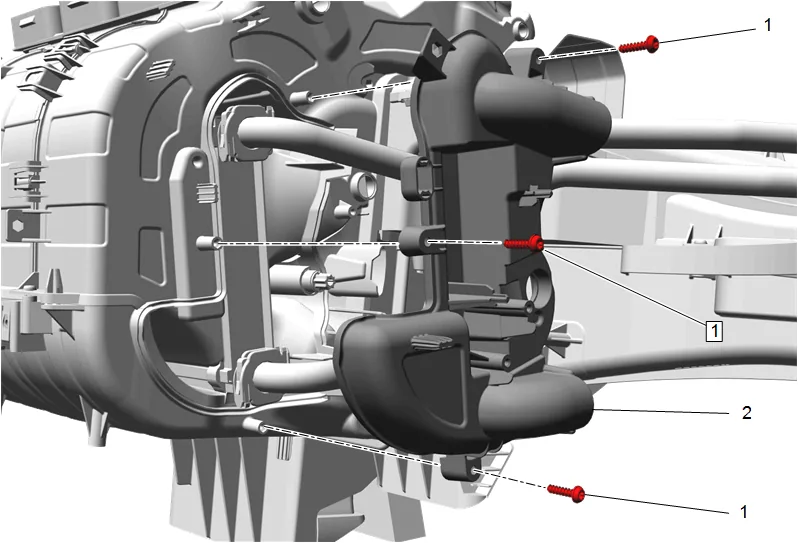
- Heater and Air Conditioning Evaporator and Blower Module Bolt (1) » Remove [3x]
- Heater Cover (2) » Remove
-
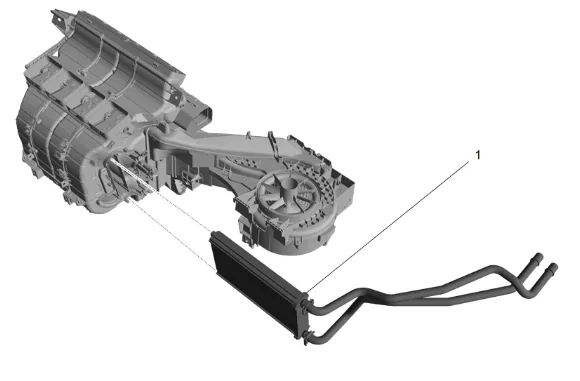
Heater (1) » Remove Installation Procedure
-
Heater (1) » Install
-
Heater Cover (2) » Install
-
Heater and Air Conditioning Evaporator and Blower Module Bolt (1) » Install and tighten [3x] — Fastener Specifications
-
{ If equipped } Temperature Valve Actuator - Right Side » Install
-
Heater and Air Conditioning Evaporator and Blower Module Bolt (1) » Install and tighten [2x] — Fastener Specifications
-
Connect the electrical connector.
-
{ If equipped } Front Floor Console Auxiliary Cooling Duct (2) » Install
-
{ If equipped } Front Floor Console Auxiliary Cooling Duct Bolt (1) » Install and tighten [2x] — Fastener Specifications
-
Air Inlet Housing (1) » Install
-
Floor Front Air Outlet Duct - Right Side (2) » Install
-
Heater and Air Conditioning Evaporator and Blower Module Bolt (1) » Install and tighten [2x] — Fastener Specifications
-
Heater And Air Conditioning Evaporator Tube Seal (2) » Install
-
Air Conditioning Evaporator Tube Bracket (1) » Install
-
Air Conditioning Evaporator Seal - Large (4) » Install NEW
-
Air Conditioning Evaporator Seal - Small (3) » Install NEW
-
Air Conditioning Evaporator Thermal Expansion Valve (2) » Install
-
Air Conditioning Evaporator Thermal Expansion Valve Bolt (1) » Install and tighten [2x] — Fastener Specifications
-
Air Inlet Housing Bolt (1) » Install and tighten [3x] — Fastener Specifications
-
Connect the electrical connector.
-
Heater and Air Conditioning Evaporator and Blower Module » Install — Heater and Air Conditioning Evaporator and Blower Module Removal and Installation