Front Floor Console Carrier Replacement (DCH)
Removal Procedure
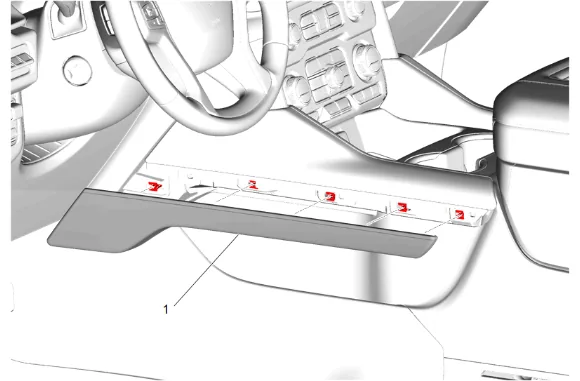
- Using a flat-bladed plastic trim tool, release the retaining clips.
- Front Floor Console Lower Applique (1) » Remove
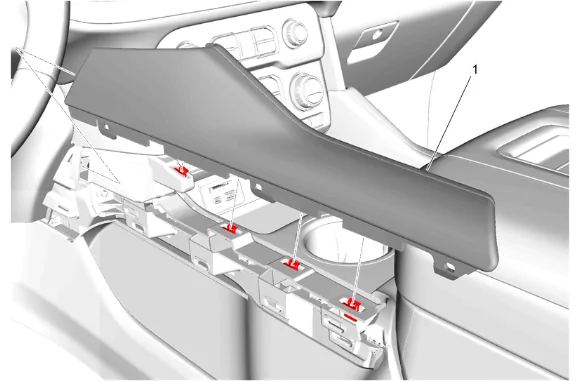
- Using a flat-bladed plastic trim tool, release the retaining clips.
- Front Floor Console Applique (1) » Remove
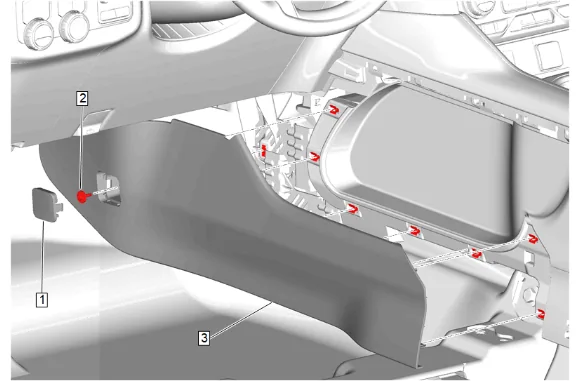
- Front Floor Console Extension Panel Bolt Access Hole Cover (1) » Remove
- Front Floor Console Extension Bolt (2) » Remove
- Move the front seat to access the retainers.
- Front Floor Console Extension Panel (3) » Remove
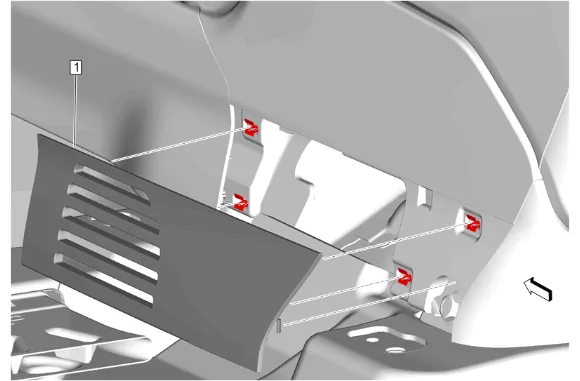
- Using a flat-bladed plastic trim tool, release the retaining clips.
- Front Floor Console Bolt Access Hole Cover (1) » Remove
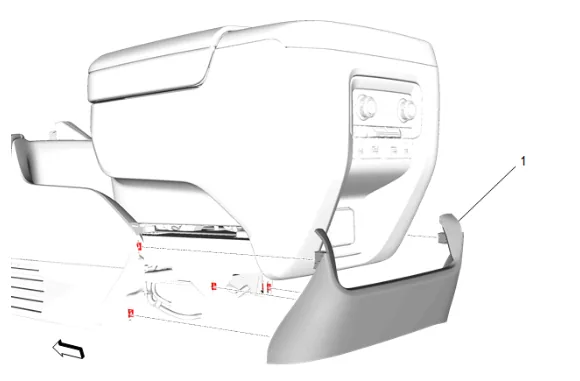
- Using a flat-bladed plastic trim tool, release the retaining clips.
- Front Floor Console Rear Trim Lower Panel (1) » Remove
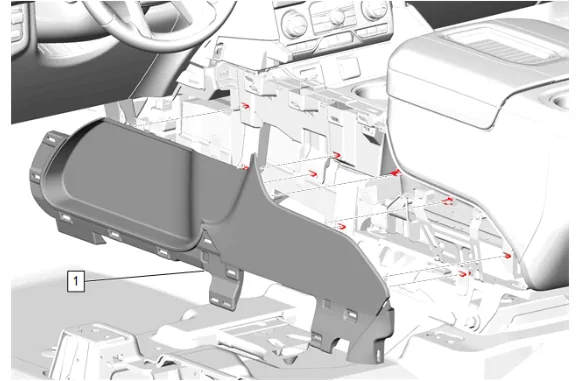
- Using a flat-bladed plastic trim tool, release the retaining clips.
- Front Floor Rear Console Side Trim Panel (1) » Remove
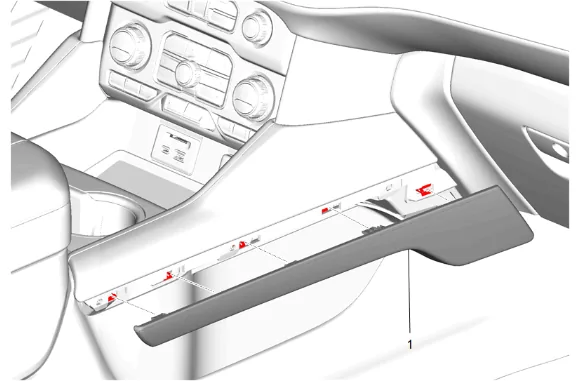
- Using a flat-bladed plastic trim tool, release the retaining clips.
- Front Floor Console Lower Applique (1) » Remove
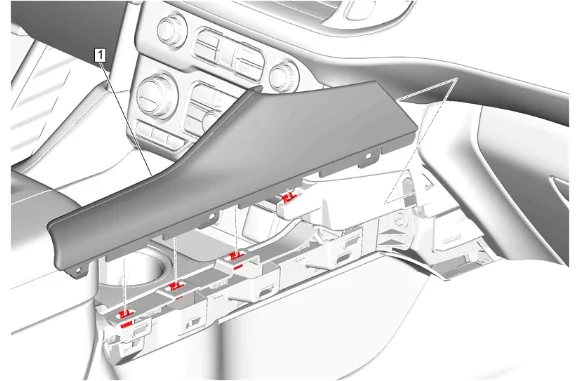
- Using a flat-bladed plastic trim tool, release the retaining clips.
- Front Floor Console Applique (1) » Remove
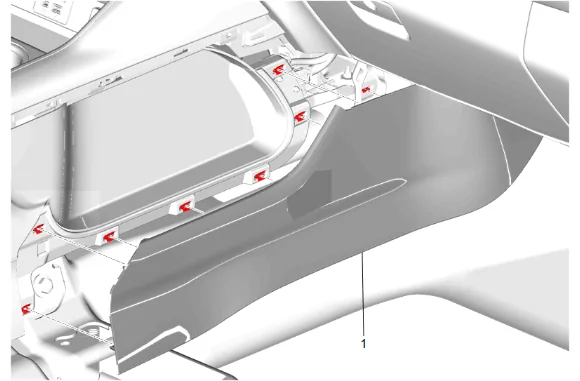
- Move the front seat to access the retainers.
- Front Floor Console Extension Panel (1) » Remove
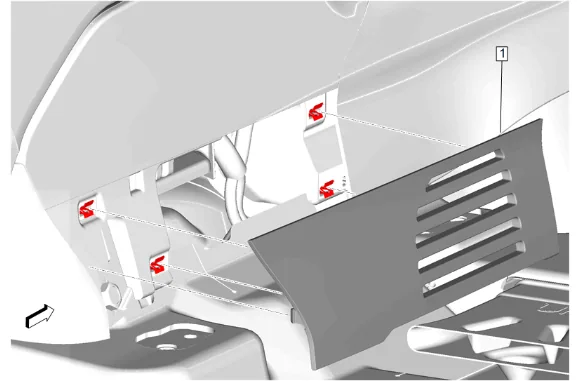
- Using a flat-bladed plastic trim tool, release the retaining clips.
- Front Floor Console Bolt Access Hole Cover (1) » Remove
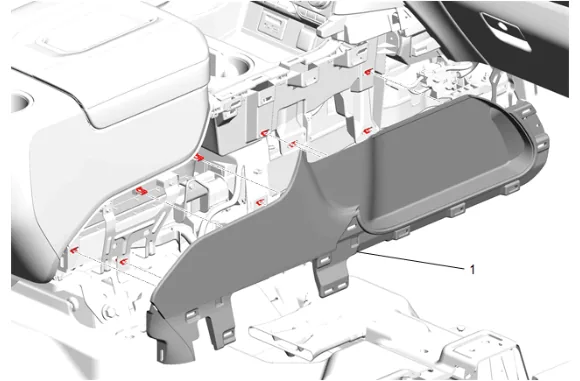
- Using a flat-bladed plastic trim tool, release the retaining clips.
- Disconnect and reposition harness as necessary.
- Front Floor Rear Console Side Trim Panel (1) » Remove
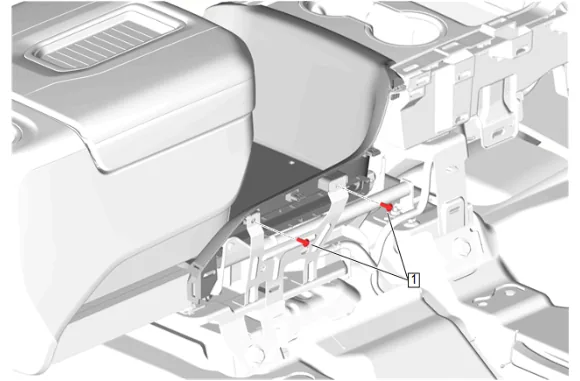
- Front Floor Console Storage Tray Bolt (1) » Remove [2x]
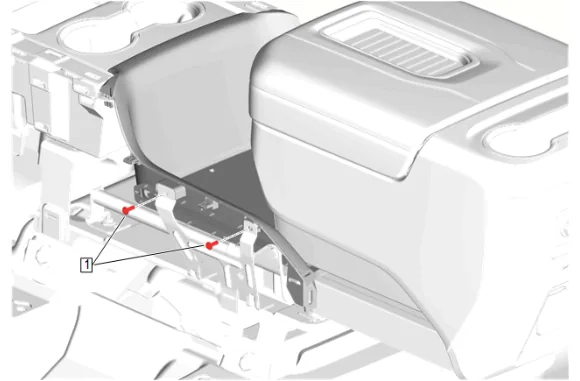
- Front Floor Console Storage Tray Bolt (1) » Remove [2x]
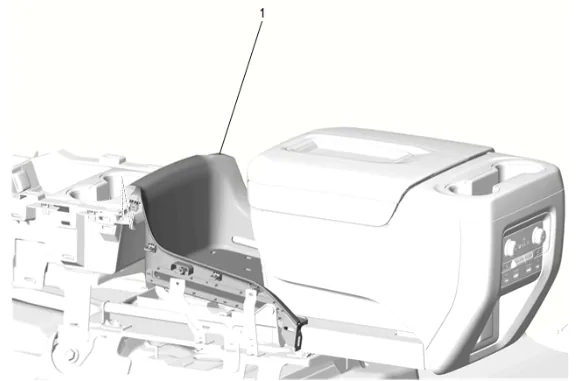
- Front Floor Console Stowage Tray (1) » Reposition
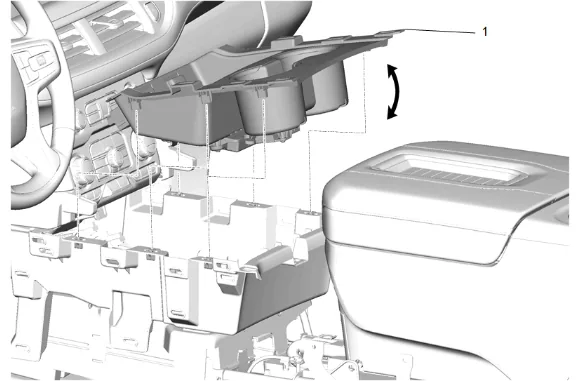
- Pull up on the rear of the front floor console cup holder trim plate (1) to start to release the retainer clips and work your way forward.
- Disconnect the electrical connectors.
- Front Floor Console Cup Holder Trim Plate (1) » Remove
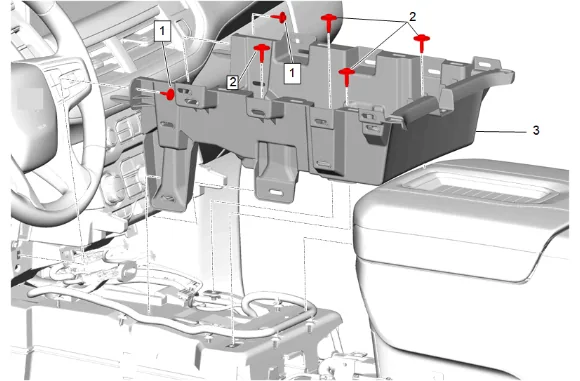
- Disconnect and reposition harness as necessary.
- Front Floor Console Retainer Bolt (1) » Remove [2x]
- Front Floor Console Intermediate Bracket Bolt (2) » Remove [4x]
- Front Floor Console Carrier (3) » Remove
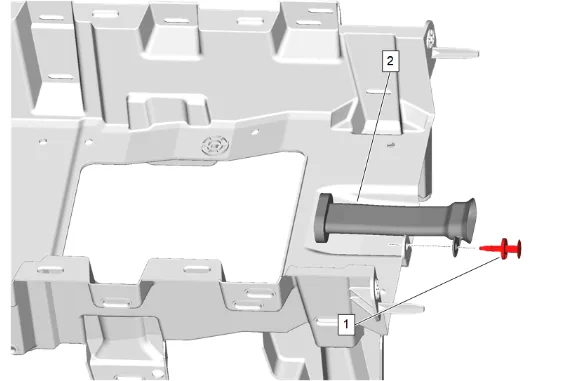
-
Front Floor Console Auxiliary Cooling Duct Retainer (1) » Remove
-
Front Floor Console Auxiliary Cooling Intermediate Duct (2) » Remove Installation Procedure
-
Front Floor Console Auxiliary Cooling Intermediate Duct (2) » Install
-
Front Floor Console Auxiliary Cooling Duct Retainer (1) » Install
-
Connect and position the wiring harness.
-
Front Floor Console Carrier (3) » Install
- Front Floor Console Intermediate Bracket Bolt (2) » Install and tighten [4x] — Fastener Specifications
- Front Floor Console Retainer Bolt (1) » Install and tighten [2x] — Fastener Specifications
-
Connect the electrical connectors.
-
Front Floor Console Cup Holder Trim Plate (1) » Install
-
Front Floor Console Stowage Tray (1) » Install
-
Front Floor Console Storage Tray Bolt (1) » Install and tighten [2x] — Fastener Specifications
-
Front Floor Console Storage Tray Bolt (1) » Install and tighten [2x] — Fastener Specifications
-
Connect and position the wiring harness.
-
Front Floor Rear Console Side Trim Panel (1) » Install
-
Front Floor Console Bolt Access Hole Cover (1) » Install
-
Front Floor Console Extension Panel (1) » Install
-
Front Floor Console Applique (1) » Install
-
Front Floor Console Lower Applique (1) » Install
-
Front Floor Rear Console Side Trim Panel (1) » Install
-
Front Floor Console Rear Trim Lower Panel (1) » Install
-
Front Floor Console Bolt Access Hole Cover (1) » Install
-
Front Floor Console Extension Panel (3) » Install
-
Front Floor Console Extension Bolt (2) » Install and tighten — Fastener Specifications
-
Front Floor Console Extension Panel Bolt Access Hole Cover (1) » Install
-
Front Floor Console Applique (1) » Install
-
Front Floor Console Lower Applique (1) » Install
-
Return the armrest compartment to the close position.
-
Return the seat to its original position.