Instrument Panel Carrier Replacement (without UV6)
- Disable the SIR system. SIR Disabling and Enabling
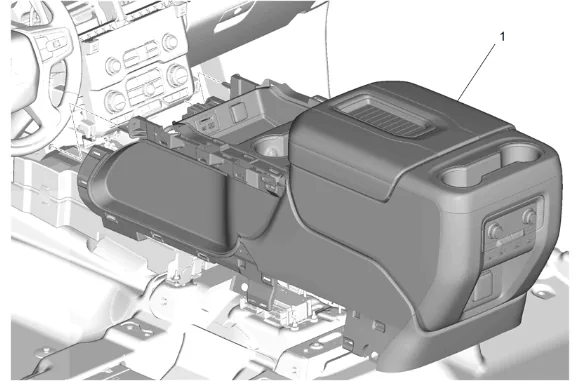
- Front Floor Console (1) » Remove — Front Floor Console Removal and Installation
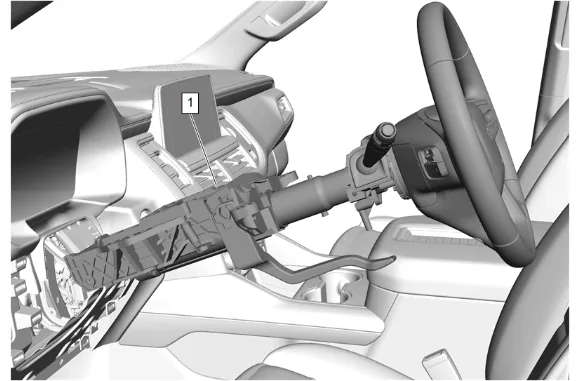
- Steering Column (1) » Remove — Steering Column Removal and Installation
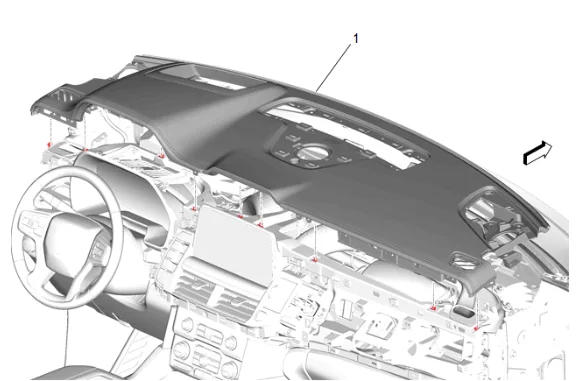
- Instrument Panel Upper Trim Panel (1) » Remove — Instrument Panel Upper Trim Panel Removal and Installation
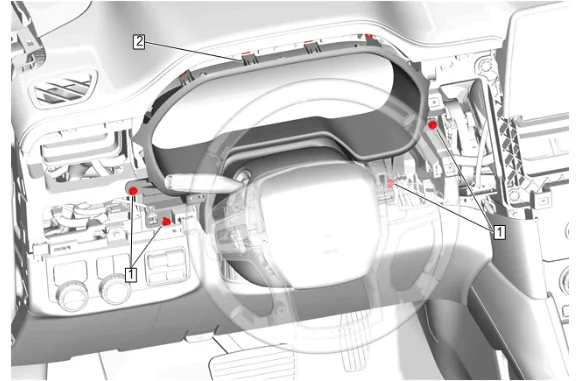
- Instrument Panel Cluster Trim Plate Bolt (1) » Remove [4x]
- Instrument Panel Cluster Trim Plate (2) » Remove
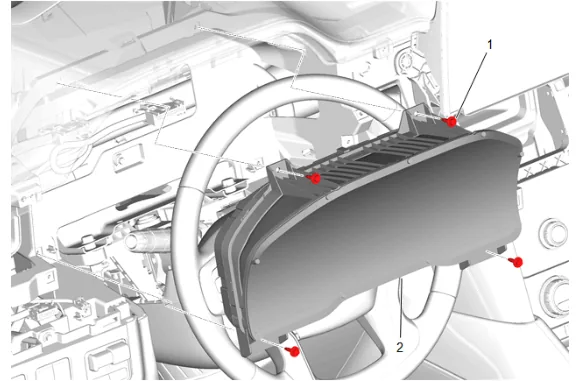
- Instrument Cluster Bolt (1) » Remove [4x]
- Disconnect the electrical connectors.
- Instrument Cluster (2) » Remove
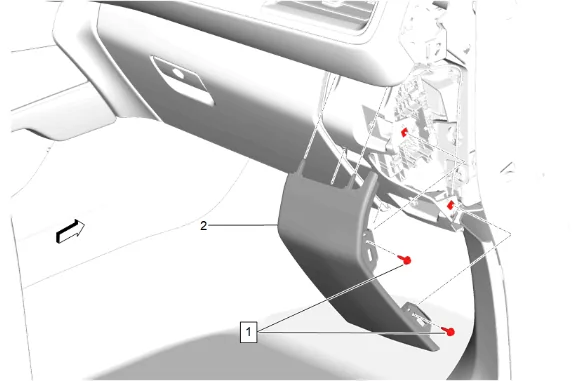
- Instrument Panel Compartment Bolt (1) » Remove [2x]
- Using a flat-bladed plastic trim tool, release the retaining clips.
- Instrument Panel Lower Trim Panel Outer Filler (2) » Remove
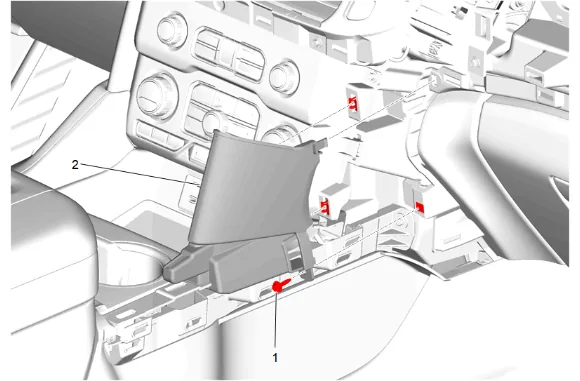
- Instrument Panel Lower Trim Panel Bolt (1) » Remove
- Using a flat-bladed plastic trim tool, release the retaining clips.
- Instrument Panel Lower Center Trim Plate Applique (2) » Remove
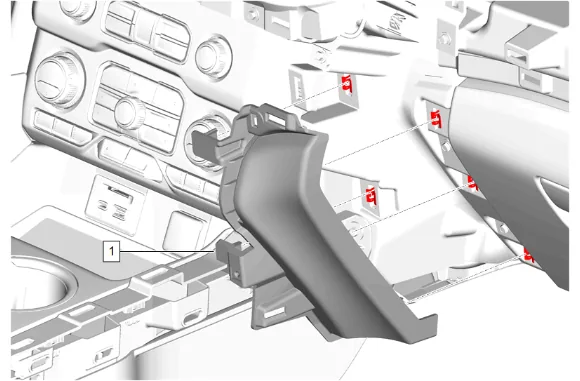
- Using a flat-bladed plastic trim tool, release the retaining clips.
- Instrument Panel Lower Trim Panel (1) » Remove
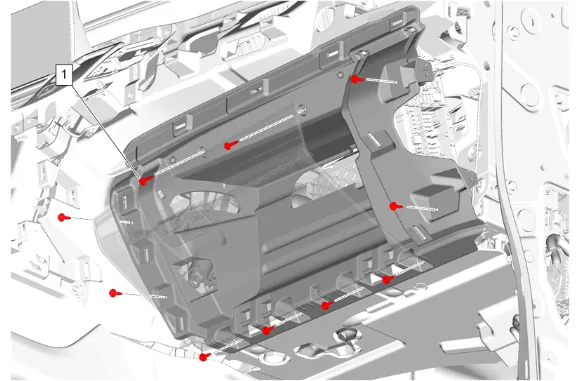
- Instrument Panel Compartment Bolt (1) » Remove [10x]
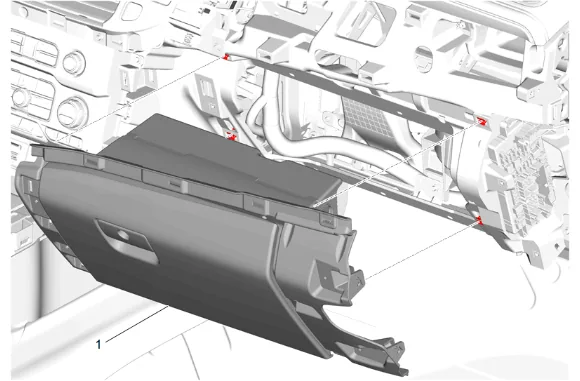
- Instrument Panel Compartment (1) » Remove
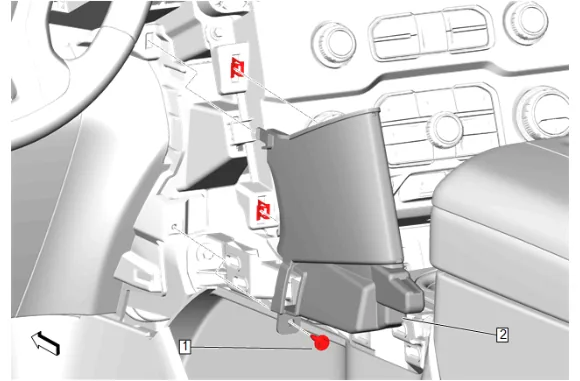
- Using a flat-bladed plastic trim tool, release the retaining clips.
- Instrument Panel Lower Trim Panel Bolt (1) » Remove
- Instrument Panel Lower Center Trim Plate Applique (2) » Remove
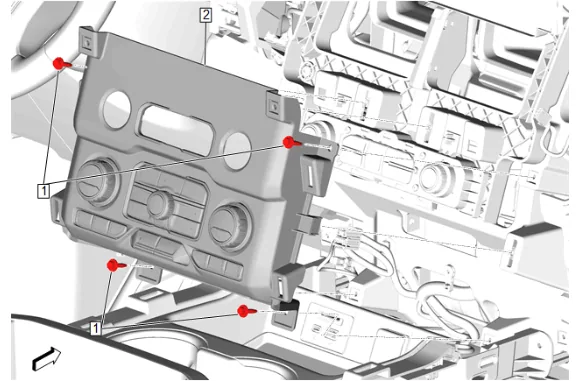
- Instrument Panel Accessory Bezel Bolt (1) » Remove [4x]
- Instrument Panel Accessory Bezel (2) » Remove
- Disconnect the electrical connectors.
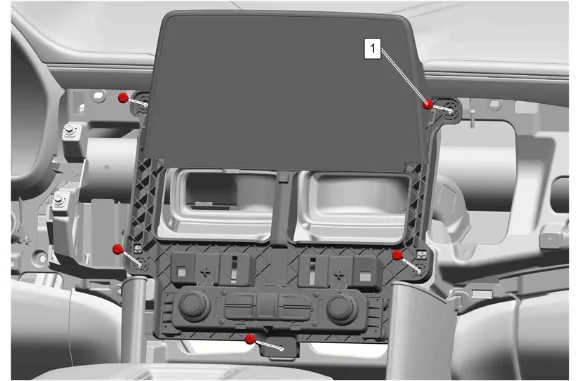
- Radio Control Bolt (1) » Remove [5x]
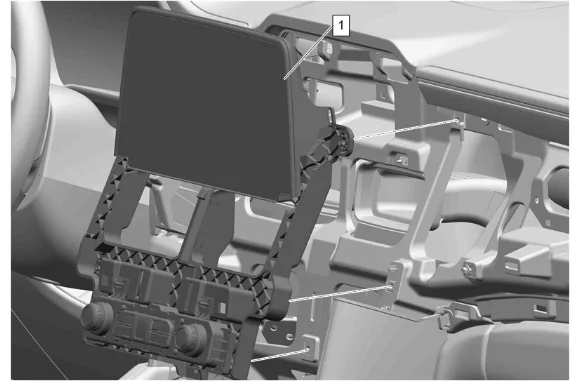
- Disconnect the electrical connectors.
- Radio Control (1) » Remove
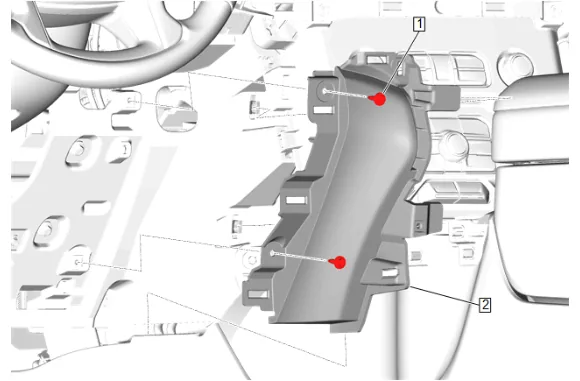
- Instrument Panel Lower Trim Panel Bolt (1) » Remove [2x]
- Instrument Panel Lower Trim Panel (2) » Remove
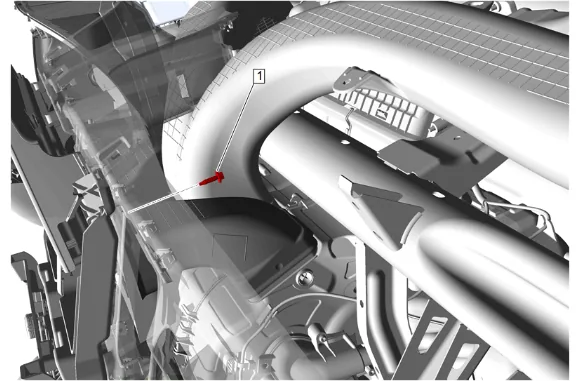
- Instrument Panel Center Air Outlet Duct Bolt (1) » Remove
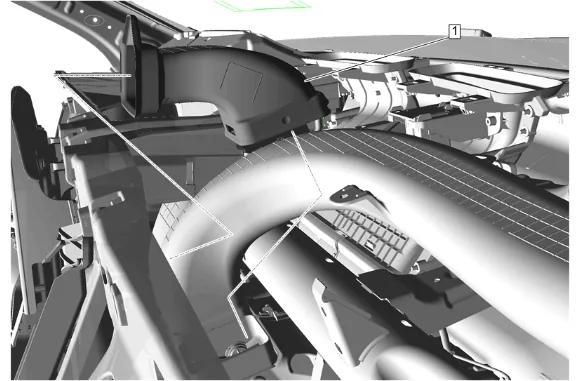
- Instrument Panel Center Air Outlet Duct - Right Side (1) » Remove
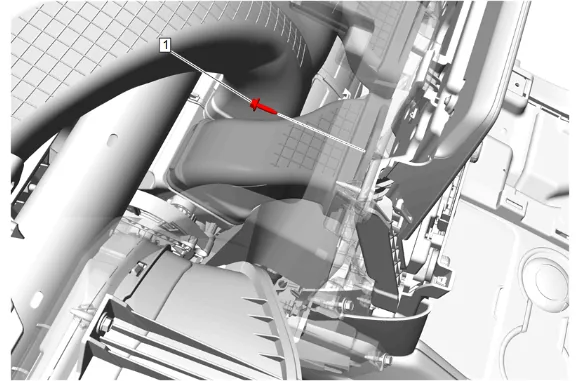
- Instrument Panel Center Air Outlet Duct Bolt (1) » Remove
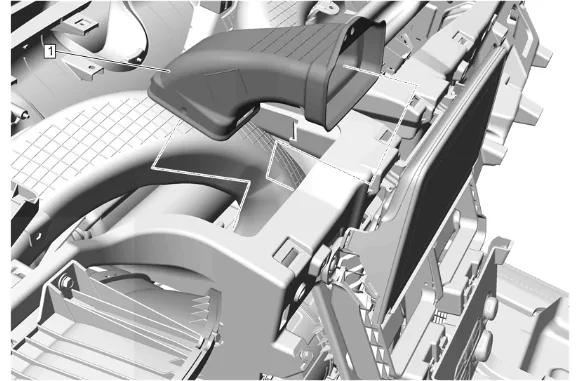
- Instrument Panel Center Air Outlet Duct - Left Side (1) » Remove
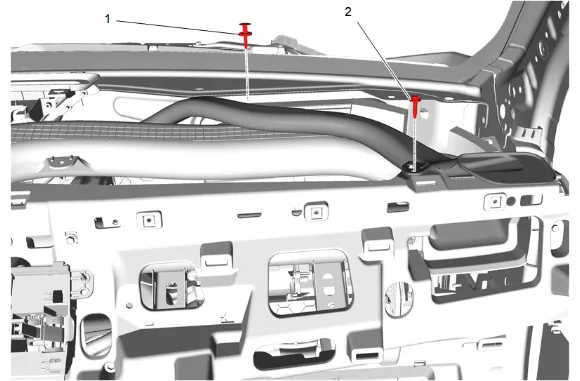
- Side Window Defogger Outlet Duct Retainer (1) » Remove
- Side Window Defogger Outlet Duct Bolt (2) » Remove
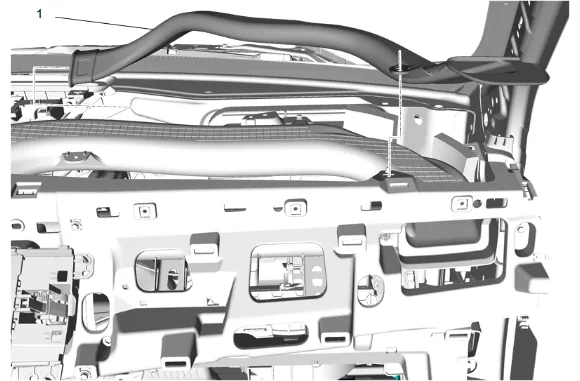
- Side Window Defogger Outlet Duct - Right Side (1) » Remove
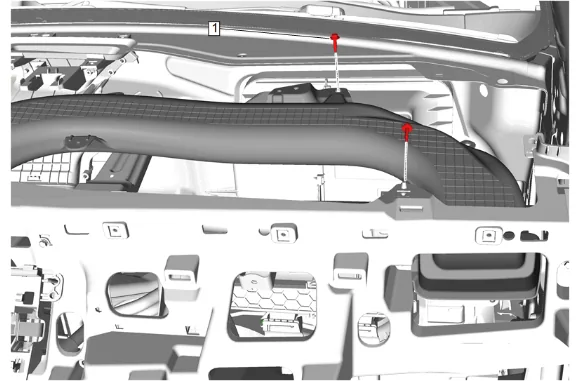
- Instrument Panel Outer Air Outlet Bolt (1) » Remove [2x]
- Remove the wiring harness retainers form the right instrument panel outer air outlet duct.
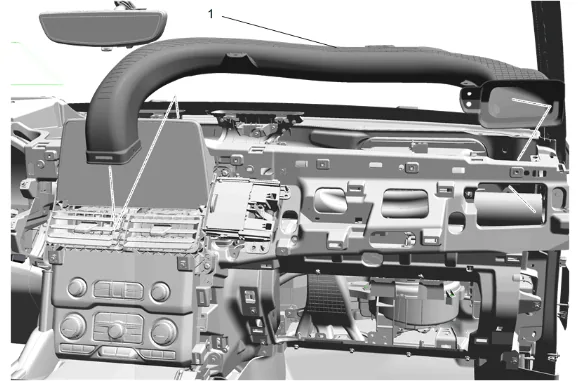
- Instrument Panel Outer Air Outlet Duct - Right Side (1) » Remove
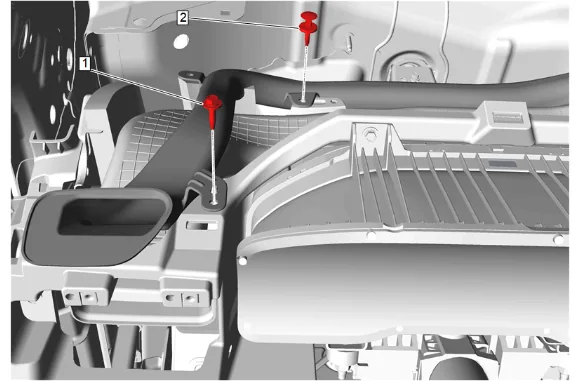
- Side Window Defogger Outlet Duct Bolt (1) » Remove
- Side Window Defogger Outlet Duct Retainer (2) » Remove
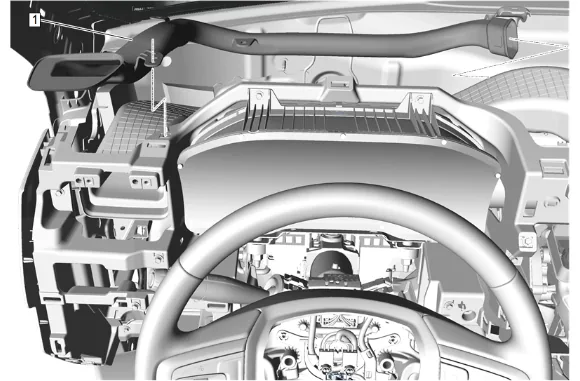
- Side Window Defogger Outlet Duct - Left Side (1) » Remove
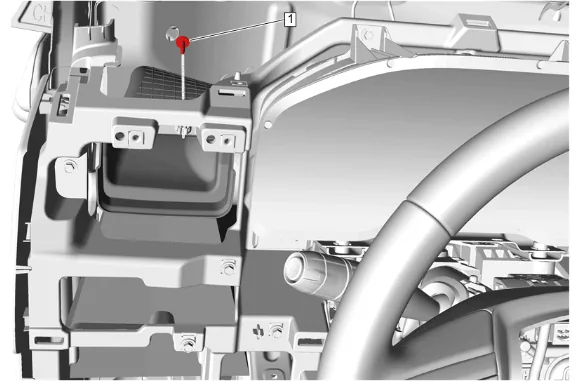
- Instrument Panel Outer Air Outlet Duct Bolt (1) » Remove
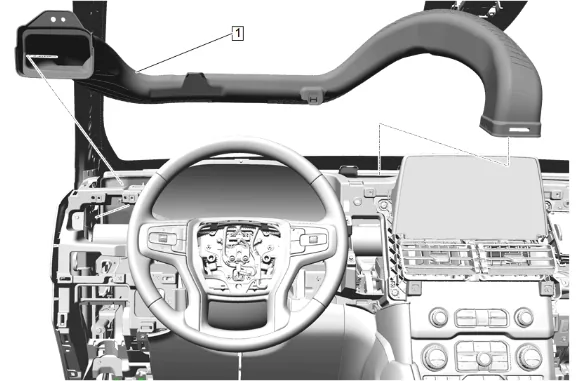
- Instrument Panel Outer Air Outlet Duct - Left Side (1) » Remove
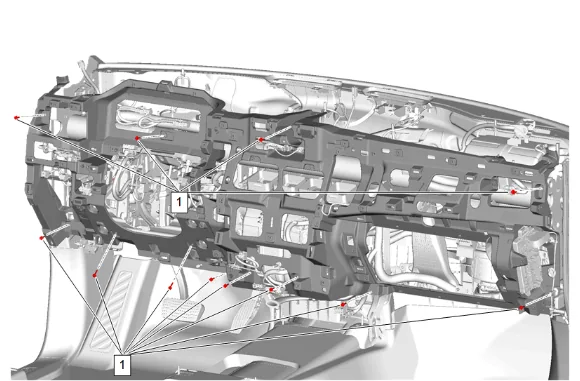
- Disconnect and reposition harness as necessary and remove the fuse block.
- Instrument Panel Carrier Bolt (1) » Remove [12x]
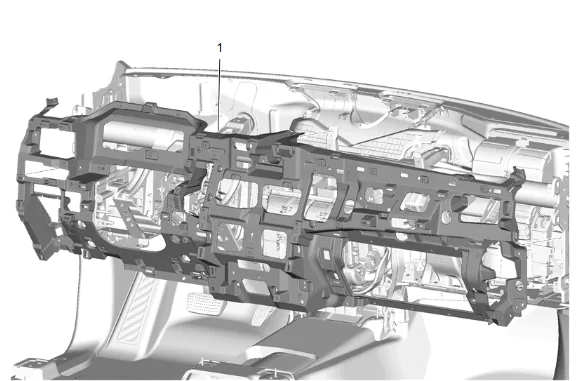
-
Be aware of any remaining harness retainers that may need to be disconnected before the removal of the instrument panel carrier (1).
-
Instrument Panel Carrier (1) » Remove Installation Procedure
-
Instrument Panel Carrier (1) » Install
-
Connect and position the wiring harness.
-
Instrument Panel Carrier Bolt (1) » Install and tighten [12x] — Fastener Specifications
-
Install the fuse block and connect the harness as noted when removed.
-
Instrument Panel Outer Air Outlet Duct - Left Side (1) » Install
-
Instrument Panel Outer Air Outlet Duct Bolt (1) » Install and tighten — Fastener Specifications
-
Side Window Defogger Outlet Duct - Left Side (1) » Install
-
Side Window Defogger Outlet Duct Bolt (1) » Install and tighten — Fastener Specifications
-
Side Window Defogger Outlet Duct Retainer (2) » Install
-
Instrument Panel Outer Air Outlet Duct - Right Side (1) » Install
-
Instrument Panel Outer Air Outlet Bolt (1) » Install and tighten [2x] — Fastener Specifications
-
Install the wiring harness retainers onto the right instrument panel outer air outlet duct.
-
Side Window Defogger Outlet Duct - Right Side (1) » Install
-
Side Window Defogger Outlet Duct Bolt (2) » Install and tighten — Fastener Specifications
-
Side Window Defogger Outlet Duct Retainer (1) » Install
-
Instrument Panel Center Air Outlet Duct - Left Side (1) » Install
-
Instrument Panel Center Air Outlet Duct Bolt (1) » Install and tighten — Fastener Specifications
-
Instrument Panel Center Air Outlet Duct - Right Side (1) » Install
-
Instrument Panel Center Air Outlet Duct Bolt (1) » Install and tighten — Fastener Specifications
-
Instrument Panel Lower Trim Panel (2) » Install
-
Instrument Panel Lower Trim Panel Bolt (1) » Install and tighten [2x] — Fastener Specifications
-
Connect the electrical connectors.
-
Radio Control (1) » Install
-
Radio Control Bolt (1) » Install and tighten [5x] — Fastener Specifications
-
Connect the electrical connectors.
-
Instrument Panel Accessory Bezel (2) » Install
-
Instrument Panel Accessory Bezel Bolt (1) » Install and tighten [4x] — Fastener Specifications
-
Instrument Panel Lower Center Trim Plate Applique (2) » Install
-
Instrument Panel Lower Trim Panel Bolt (1) » Install and tighten — Fastener Specifications
-
Instrument Panel Compartment (1) » Install
-
Instrument Panel Compartment Bolt (1) » Install and tighten [10x] — Fastener Specifications
-
Instrument Panel Lower Trim Panel (1) » Install
-
Instrument Panel Lower Center Trim Plate Applique (2) » Install
-
Instrument Panel Lower Trim Panel Bolt (1) » Install and tighten — Fastener Specifications
-
Instrument Panel Lower Trim Panel Outer Filler (2) » Install
-
Instrument Panel Compartment Bolt (1) » Install and tighten [2x] — Fastener Specifications
-
Connect the electrical connectors.
-
Instrument Cluster (2) » Install
-
Instrument Cluster Bolt (1) » Install and tighten [4x] — Fastener Specifications
-
Instrument Panel Cluster Trim Plate (2) » Install
-
Instrument Panel Cluster Trim Plate Bolt (1) » Install and tighten [4x] — Fastener Specifications
-
Instrument Panel Upper Trim Panel (1) » Install — Instrument Panel Upper Trim Panel Removal and Installation
-
Steering Column (1) » Install — Steering Column Removal and Installation
-
Front Floor Console (1) » Install — Front Floor Console Removal and Installation
-
Enable the SIR System. SIR Disabling and Enabling