Rear Bumper Fascia Removal and Installation
Removal Procedure
- Raise and support the vehicle. Lifting and Jacking the Vehicle
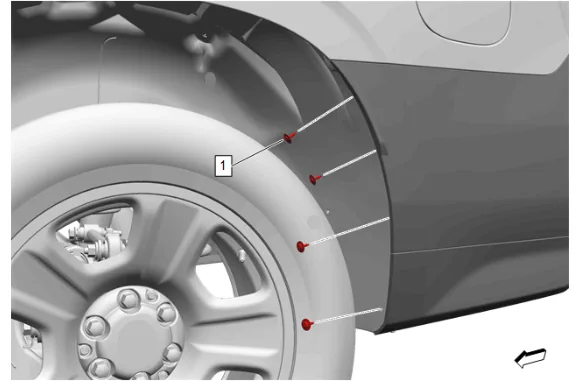
- Remove the 6 rear wheelhouse liner bolts (1) from the left and right rear wheelhouse liners to gain access to the rear fascia bolt.
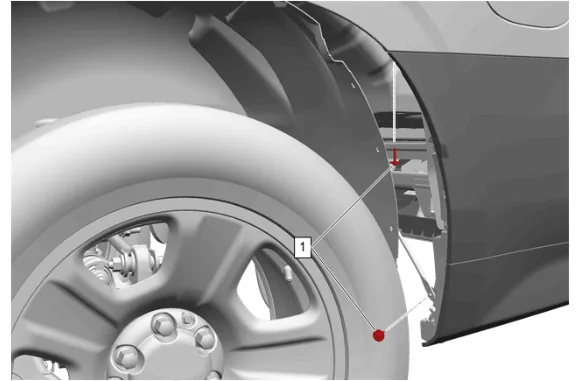
- Remove the 2 left and right side rear bumper fascia bolts (1).
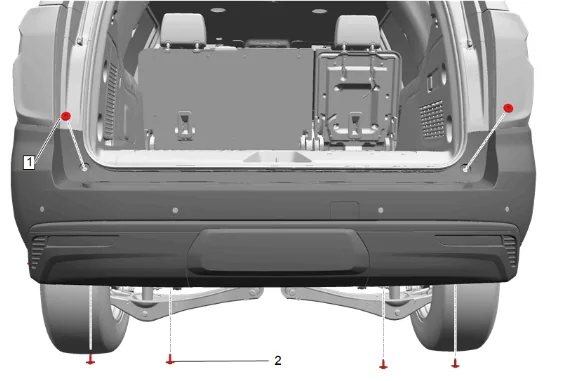
- Remove the 2 left and right side liftgate adjust bumper bolts (1).
- Rear Bumper Fascia Lower Bracket Bolt (2) » Remove [4x]
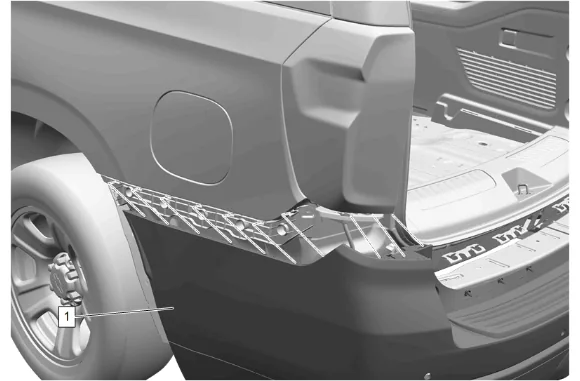
- Carefully push a small nylon wedge between the fascia (1) and the fascia guide. Insert a small flat-bladed tool into the fascia slot and depress the snaps one at a time and pull on the fascia at the same time to gradually remove the fascia.
- Disconnect all electrical connectors.
-
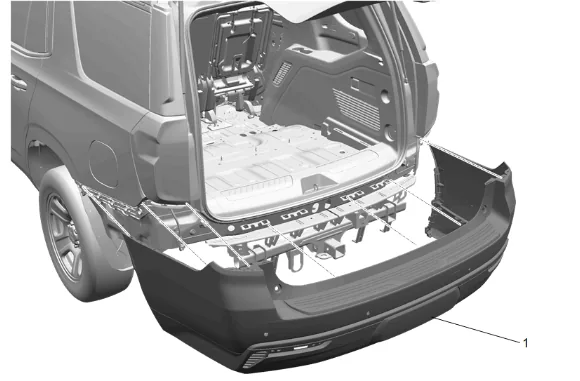
With the aid of an assistant, remove the fascia. (1) Installation Procedure
-
Connect the electrical connectors.
-
With the aid of an assistant, install the fascia. (1)
-
Install the rear bumper fascia (1) to the rear fascia guide.
-
Install and tighten the 2 left and right side liftgate adjust bumper bolts (1). Fastener Specifications
-
Rear Bumper Fascia Lower Bracket Bolt (2) » Install and tighten [4x] — Fastener Specifications
-
Install and tighten the left and right side rear fascia bolts (1). Fastener Specifications
-
Install and tighten the 6 left and right side wheel house liner bolts (1). Fastener Specifications
-
Lower the vehicle.