Door Lock Status Indicator Replacement
Removal Procedure
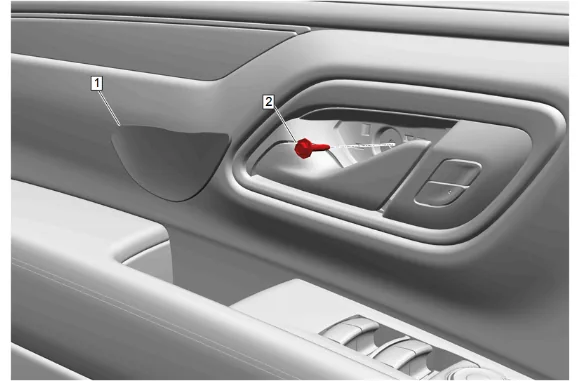
- Front Side Door Inside Handle Bolt Finish Cap (1) » Remove
- Front Side Door Inside Handle Bolt (2) » Remove
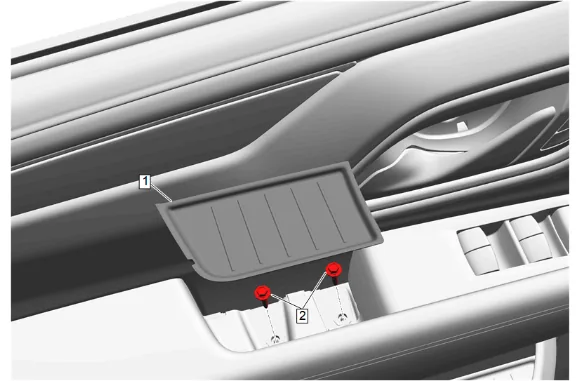
- Front Side Door Armrest Pull Cup Bolt Cap (1) » Remove
- Front Side Door Armrest Pull Cup Bolt (2) » Remove [2x]
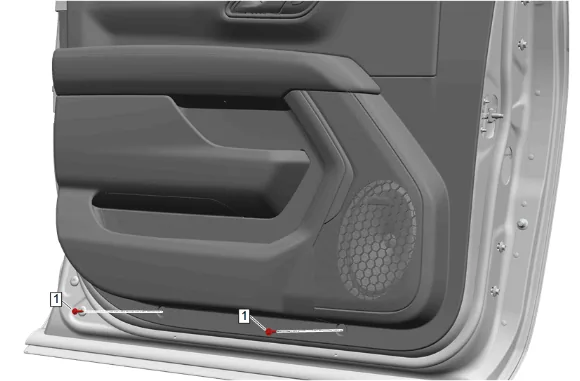
- Front Side Door Trim Panel Bolt (1) » Remove [2x]
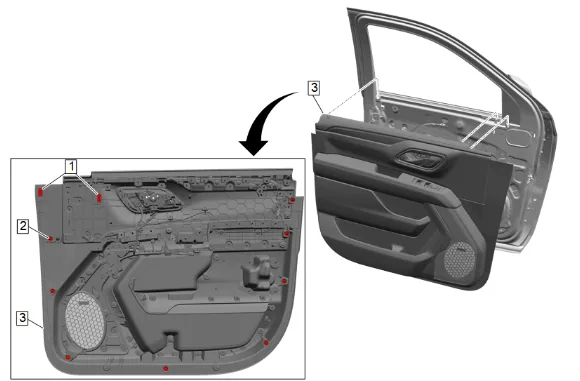
- Using an appropriate tool, start from the rear bottom corner and pull the front side door trim (3) from the sheet metal towards you to disengage perimeter retainers (2).
- When the front side door trim (3) is sufficiently loosened, place an appropriate tool at the rear portion of the door trim to disengage the remaining retainers (2) and clips (1).
- Unhook the front side door trim (3) from the belt line, pulling the door trim upwards using both hands.
- Disconnect the door lock retainer cable from the front side door trim (3) and the inside handle.
- Disconnect the electrical connectors.
- Front Side Door Trim (3) » Remove
- Place the front side door trim (3) on a clean flat surface.
- Remove the front side door trim panel insulator to gain access to the door lock status indicator wire harness.
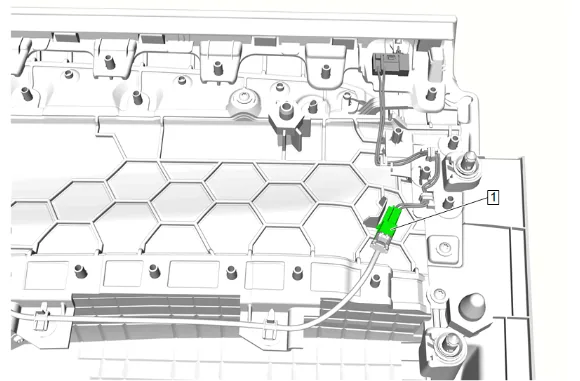
- Disconnect the electrical connector (1) and reposition the wire harness.
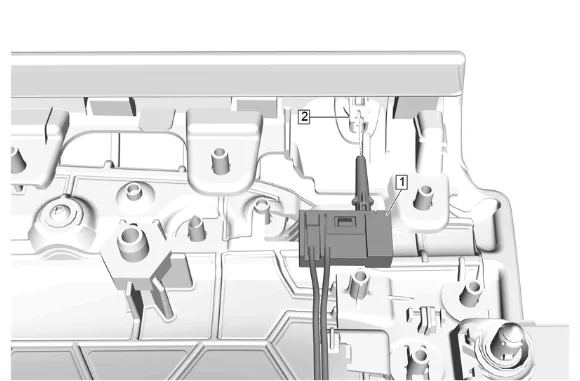
- Release the door lock status indicator (1) from the front side door lock bezel (2).
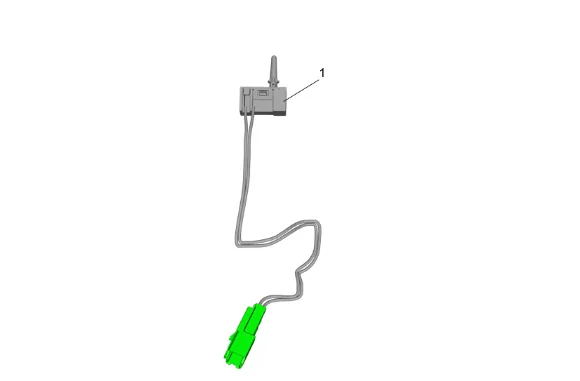
-
Remove the door lock status indicator (1). Installation Procedure
-
Install the door lock status indicator (1).
-
Install the door lock status indicator (1) into the front side door lock bezel (2).
-
Install the wire harness and connect the electrical connector (1).
-
Install the front side door trim panel insulator.
- Front Side Door Trim (3) » Install 5.1. Connect the electrical connectors. 5.2. Hook the integral front side door trim belt bracket to the front side door window inner sealing strip and the front side door window garnish molding and swing in to install. 5.3. Connect the door lock retainer cable to the front side door trim (3) and the inside handle. 5.4. Engage most forward locator pin. 5.5. Engage remaining retainers starting from the bottom to the front and rear.
-
Front Side Door Trim Panel Bolt (1) » Install and tighten [2x] — Fastener Specifications
-
Front Side Door Armrest Pull Cup Bolt (2) » Install and tighten [2x] — Fastener Specifications
-
Front Side Door Armrest Pull Cup Bolt Cap (1) » Install
-
Front Side Door Inside Handle Bolt (2) » Install and tighten — Fastener Specifications
-
Front Side Door Inside Handle Bolt Finish Cap (1) » Install