Plenum Front Panel Outer Reinforcement Removal and Installation
Plenum Front Panel Outer Reinforcement Removal and Installation Special Tools J–39822 Wiper Arm Puller Equivalent regional tools: Special Tools Removal Procedure
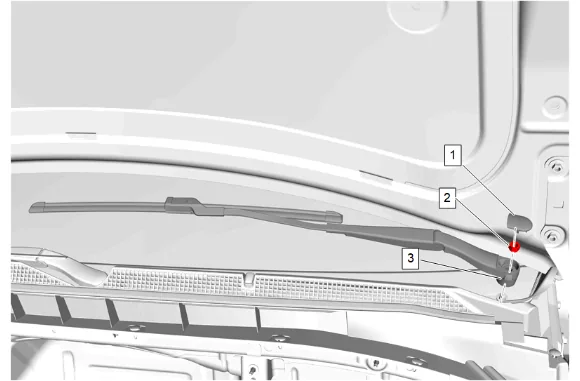
- Using the appropriate trim tool, remove the 2 windshield wiper arm finish caps (1) from both windshield wiper arms (3).
- Windshield Wiper Arm Nut (2) » Remove [2x]
- Use the J–39822 Wiper Arm Puller to remove the wiper arms (3) from the wiper motor pivot shaft.
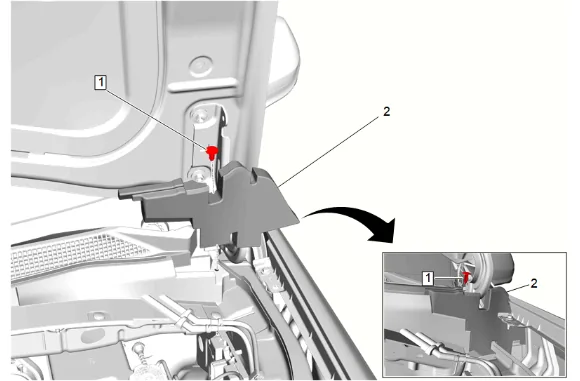
- Hood Rear Outer Air Inlet Seal Retainer (1) » Remove [2x]
- Hood Rear Outer Air Inlet Seal (2) » Remove [2x]
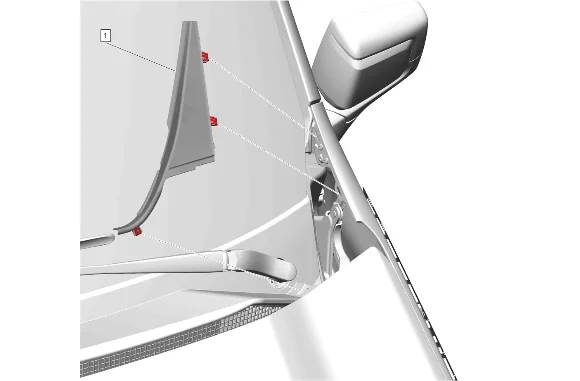
- Apply two layers of masking tape around the top edge of the service part to prevent paint damage.
- Using a suitable plastic trim tool, carefully release the 3 air inlet grille panel extension clips.
- Remove the air inlet grille panel extension (1)» Remove [2x]
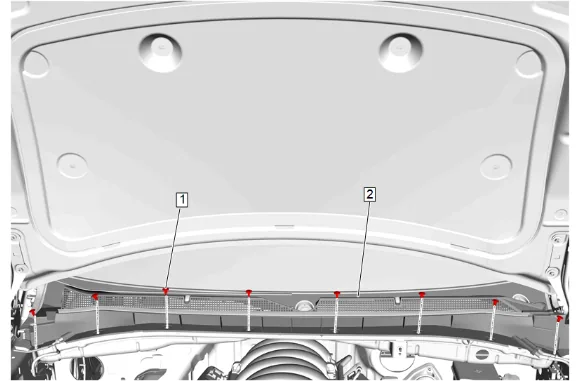
- Air Inlet Grille Panel Retainer (1) » Remove [8x]
- Disconnect the windshield washer nozzle hose from the windshield washer pump hose.
- Lift the front edge of the air inlet grille panel (2) and slide the panel forward from both hood hinges to remove.
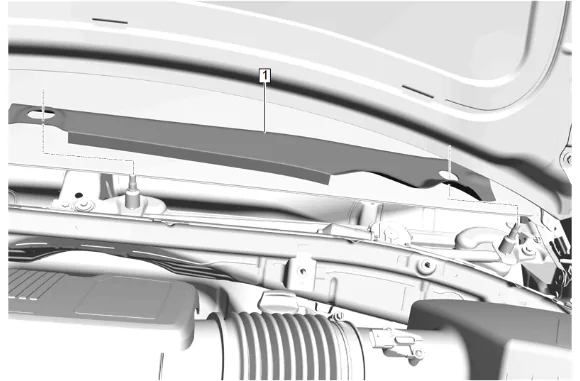
- Windshield Wiper System Module Shield (1) » Remove
- Disconnect the battery negative cable. Battery Negative Cable Disconnection and Connection
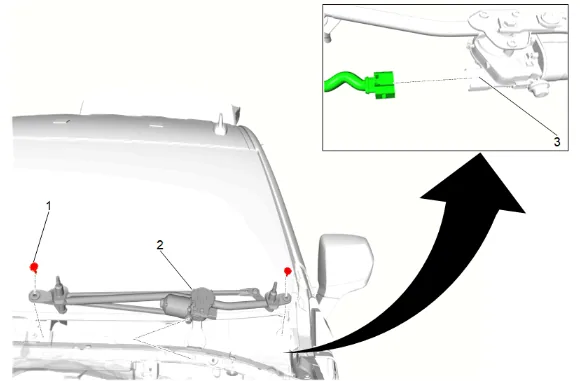
- Release the retainers.
- Windshield Wiper System Module Bolt (1) » Remove [2x]
- Slide the windshield wiper system module (2) inboard to release the grommet from the plenum and flip the windshield wiper system module upside down to gain access to the electrical connector.
- Push electrical connector together to unload the latch system. Then using a small pick or small flat bladed tool, lightly pry down and outboard on the locking tab (3) and pull the electrical connector away from the module mating connector. Do NOT attempt to pry anywhere else on the connector body or damage can occur.
- Verify the electrical connector and the windshield wiper system module mating connector (3) are not damaged.
- Windshield Wiper System Module (2) » Remove
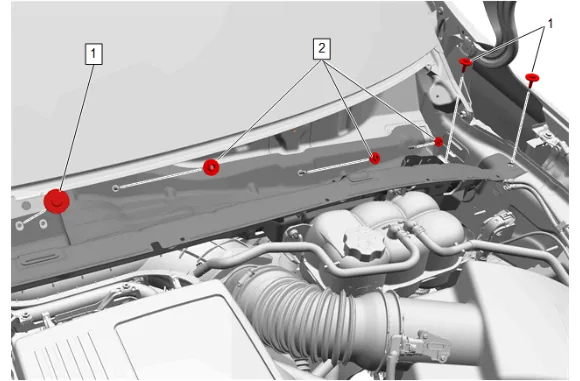
- Plenum Front Panel Bolt (1) » Remove [3x]
- Plenum Front Panel Nut (2) » Remove [3x]
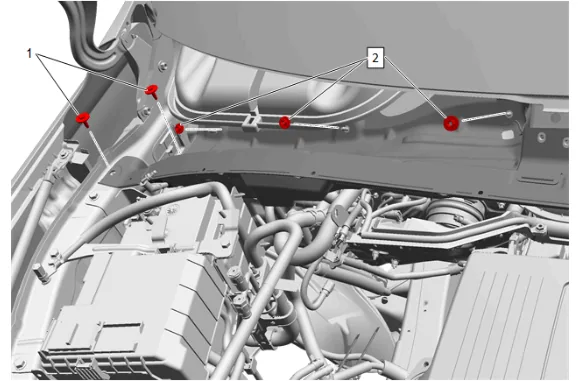
- Plenum Front Panel Bolt (1) » Remove [2x]
- Plenum Front Panel Nut (2) » Remove [3x]
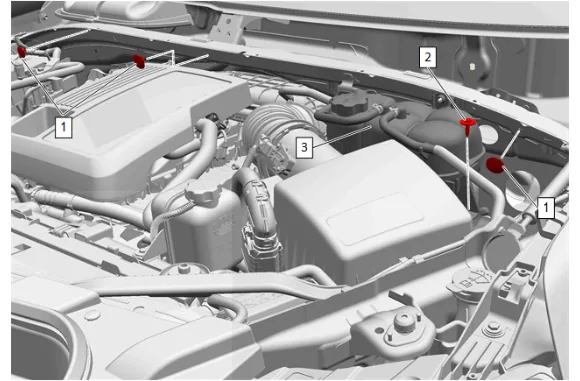
- Radiator Surge Tank Bolt (2) » Remove
- Reposition the radiator surge tank. (3)
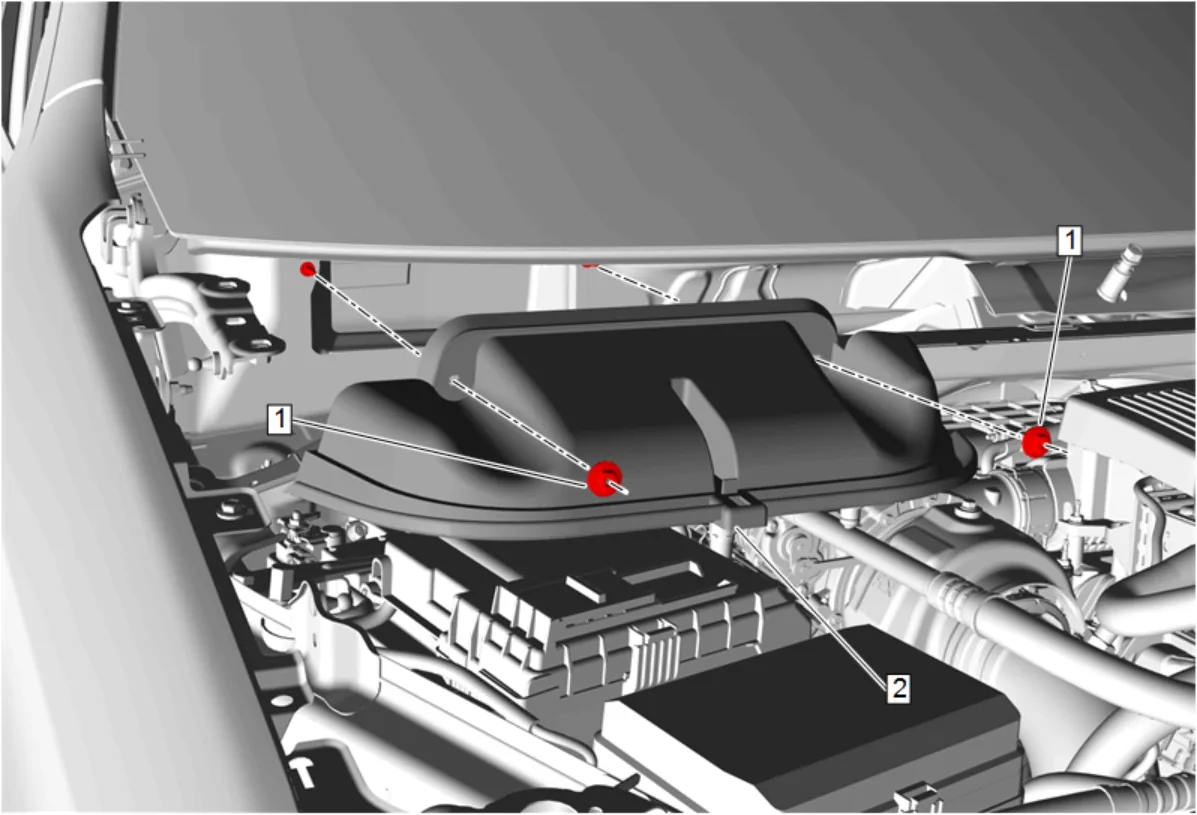
- Air Conditioning Evaporator and Blower Module Nut (1) » Remove [2x]
- Air Inlet Deflector Water Deflector (2) » Remove
- Disconnect the electrical connectors and detach the wiring harness as necessary.
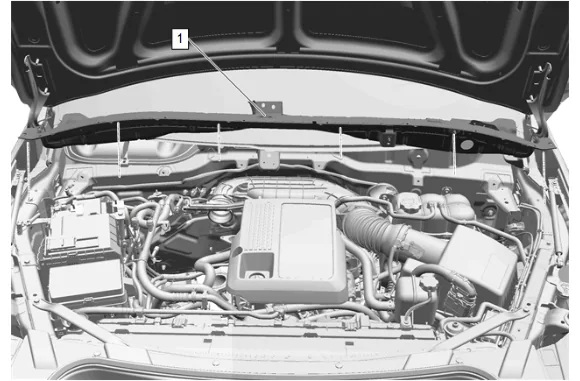
- Plenum Front Panel Outer Reinforcement (1) » Remove Cleaning and Inspection Procedure
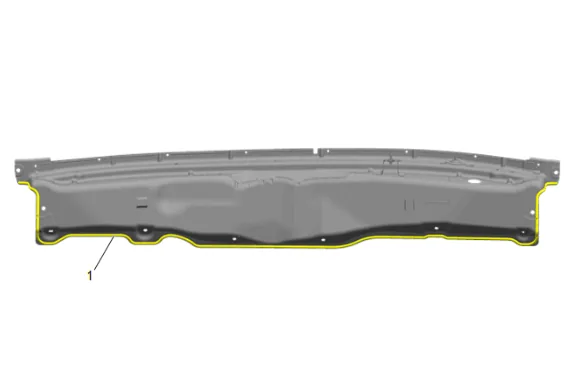
-
Inspect the plenum and the frame surfaces of where the plenum is removed.
-
Clean areas that the bead is broken or damaged with a plastic scrapper on the body and plenum.
-
Apply General Motors recommended Strip-Calk or equivalent to the plenum areas that are needed. Adhesives, Fluids, Lubricants, and Sealers Installation Procedure
-
Plenum Front Panel Outer Reinforcement (1) » Install
-
Radiator Surge Tank (3) » Install
-
Radiator Surge Tank Bolt (2) » Install and tighten — Fastener Specifications
-
Plenum Front Panel Bolt (1) » Install and tighten [2x] — Fastener Specifications
-
Plenum Front Panel Nut (2) » Install and tighten [3x] — Fastener Specifications
-
Plenum Front Panel Bolt (1) » Install and tighten [3x] — Fastener Specifications
-
Plenum Front Panel Nut (2) » Install and tighten [3x] — Fastener Specifications
-
Air Inlet Deflector Water Deflector (2) » Install
-
Attach the wiring harness and connect the electrical connectors as necessary.
-
Air Conditioning Evaporator and Blower Module Nut (1) » » Install and tighten [2x] Fastener Specifications
-
Connect the electrical connector to the windshield wiper system module until the lock engages fully.
-
Pull back lightly on the electrical connector to ensure the lock is engaged.
-
Install the windshield wiper system module (2) in the vehicle.
-
Windshield Wiper System Module Bolt (1) » Install and tighten [2x] — Fastener Specifications
-
Install the retainers.
-
Connect the battery negative cable. Battery Negative Cable Disconnection and Connection
-
Windshield Wiper System Module Shield (1) » Install
-
Air Inlet Grille Panel (2) » Install
-
Connect the windshield washer nozzle hose to the windshield washer pump hose.
-
Air Inlet Grille Panel Retainer (1) » Install [8x]
-
Air Inlet Grille Panel Extension (1) » Install [2x]
-
Remove the masking tape from the top edge of the service part.
-
Using a 50/50 mixture of isopropyl alcohol and clean drinkable water with a clean towel, remove any left over adhesive residue from the masking tape.
-
Hood Rear Outer Air Inlet Seal (2) » Install [2x]
-
Hood Rear Outer Air Inlet Seal Retainer (1) » Install [2x]
-
Clean the left and right side windshield wiper transmission pivot shaft splines with a soft wire brush before installing the windshield wiper arm (3).
-
Windshield Wiper Arm (3) » Install [2x]
-
Windshield Wiper Arm Nut (2) » Install and tighten [2x] — Fastener Specifications
-
Windshield Wiper Arm Finish Cap (1) » Install [2x]
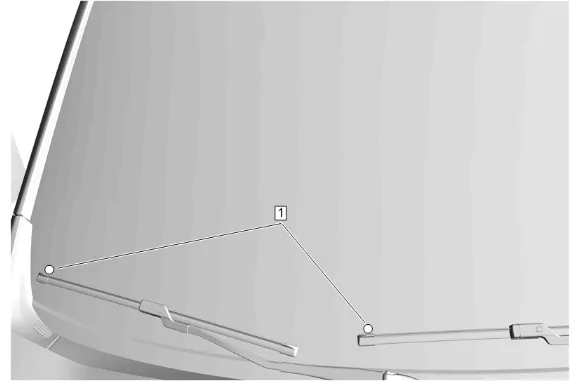
- If required, realign the windshield wipers to their respective alignment circles (1) on the windshield.
- Lubricate the windshield with clean washer fluid.
- Run the windshield wipers for two complete cycles then turn off the windshield wipers.
- Ensure the windshield wipers are in the full park position.