High Frequency Antenna Replacement
Removal Procedure
- Disable the SIR system. SIR Disabling and Enabling
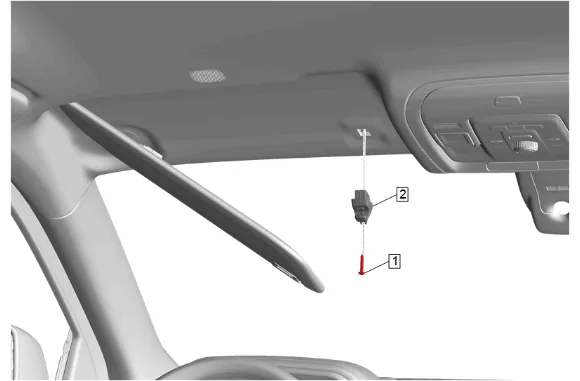
- Unclip the sunshade and rotate the sunshade to the side.
- Open the sunshade support bolt access cover with an appropriate tool.
- Sunshade Support Bolt (1) » Remove
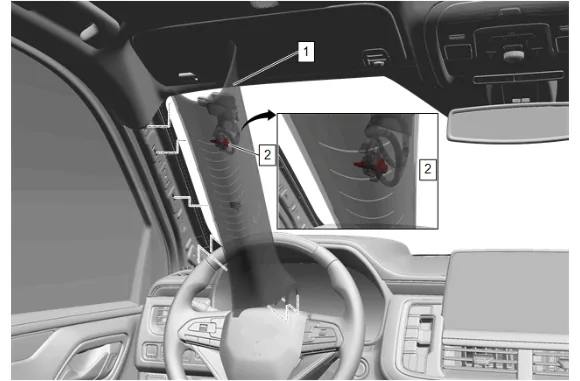
- Reposition the weatherstrip as necessary.
- Pull the windshield garnish molding (1) rearwards to release the tether from the A pillar.
- Access the windshield garnish bolt (2) which is located on the backside of the windshield garnish molding (1) and secures the tether to the A pillar.
- Windshield Garnish Molding Bolt (2) » Remove
- Windshield Garnish Molding - Left Side (1) » Remove
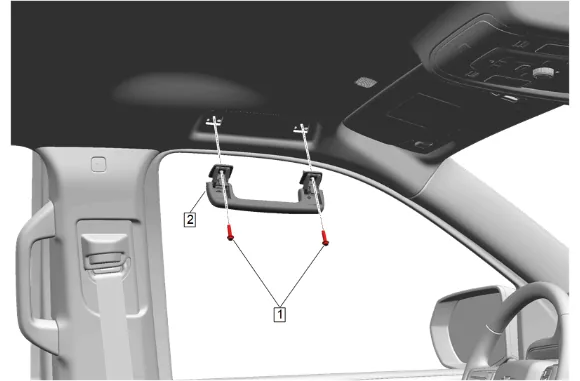
- Fold the assist handle downward and hold. (2)
- Use a small flat-bladed tool to open the assist handle covers to access the bolts.
- Roof Rail Assist Handle Bolt (1) » Remove [2x]
- Roof Rail Assist Handle (2) » Remove
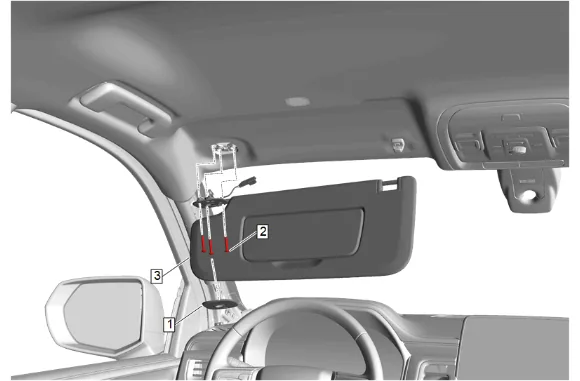
- Sunshade Retainer Bolt Cover (1) » Remove
- Sunshade Bolt (2) » Remove [3x]
- Squeeze the tabs at the base of the sunshade (3) to detach it from the roof panel and allow the headliner with the sunshade attached to be lowered.
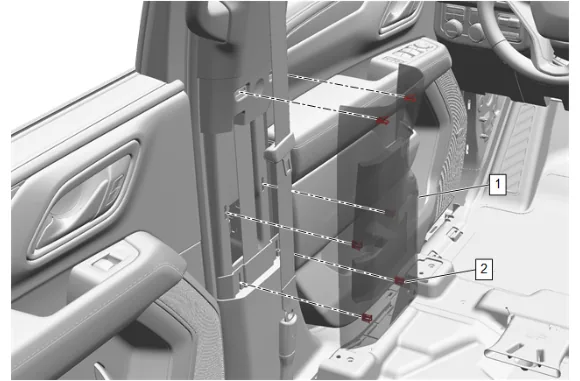
- Move the front seat fully forward.
- Use a flat bladed plastic tool between the center pillar center trim panel (1) and the center pillar upper trim panel to disengage the upper retaining clips (2).
- Pull from both sides of the center pillar center trim panel (1) to release the middle and lower retaining clips (2).
- Center Pillar Center Trim Panel (1) » Remove
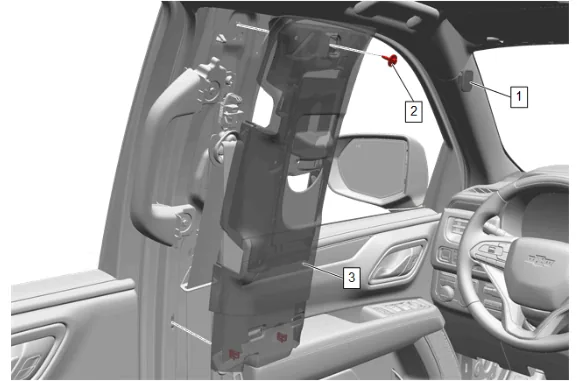
- Center Pillar Upper Trim Panel Bolt Cap (1) » Remove
- Center Pillar Upper Garnish Molding Bolt (2) » Remove
- Pull the trim panel (3) toward the inside of the vehicle to disengage the retaining clips.
- Center Pillar Upper Trim Panel (3) » Reposition
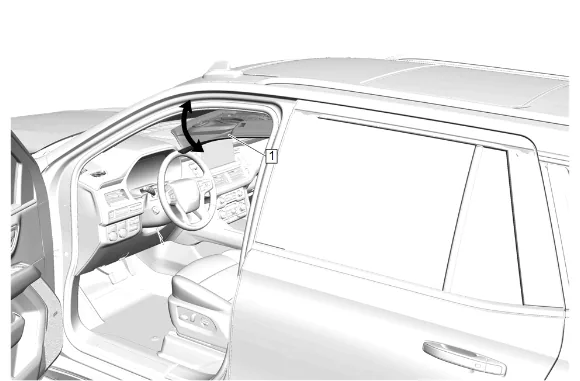
- Lower the left front section of the headlining trim panel (1).
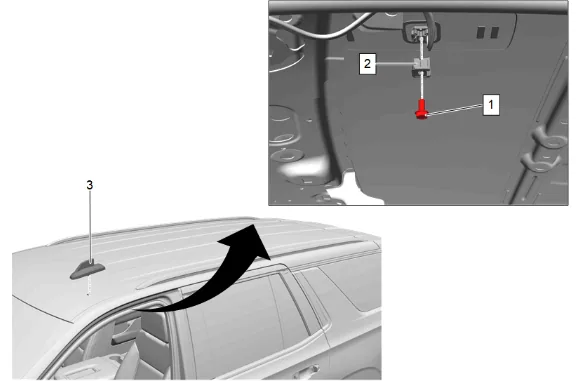
-
Disconnect the electrical connector.
-
High Frequency Antenna Bolt (1) » Remove
-
High Frequency Antenna Retainer (2) » Remove
-
High Frequency Antenna (3) » Remove Installation Procedure
-
Install the new high frequency antenna (3), high frequency antenna retainer (2), and high frequency antenna bolt (1) through the roof opening as an assembly.
-
High Frequency Antenna Bolt (1) » Install and tighten — Fastener Specifications
-
Ensure the high frequency antenna retainer (2) is properly compressed, securely retaining the high frequency antenna (3) to the vehicles roof.
-
Connect the electrical connector.
-
Headlining Trim Panel (1) » Install
-
Center Pillar Upper Trim Panel (3) » Install
-
Center Pillar Upper Garnish Molding Bolt (2) » Install and tighten — Fastener Specifications
-
Center Pillar Upper Trim Panel Bolt Cap (1) » Install
-
Align 6 retaining clips (2) with the upper and lower trim panels.
-
Center Pillar Center Trim Panel (1) » Install
-
Sunshade Bolt (2) » Install and tighten [3x] — Fastener Specifications
-
Sunshade Retainer Bolt Cover (1) » Install
-
Roof Rail Assist Handle (2) » Install
-
Roof Rail Assist Handle Bolt (1) » Install and tighten [2x] — Fastener Specifications
-
Windshield Garnish Molding Bolt (2) » Install and tighten — Fastener Specifications
-
Align the retainer clips with the slots in the A pillar and press the windshield garnish molding (1) into place.
-
Windshield Garnish Molding - Left Side (1) » Install
-
Reposition the weatherstrip as necessary.
-
Sunshade Support Bolt (1) » Install and tighten — Fastener Specifications
-
Close the sunshade support bolt access cover.
-
Enable the SIR System. SIR Disabling and Enabling