Front Output Shaft Seal Replacement (LM2) (1)
Front Output Shaft Seal Replacement (LM2) Single Use Fasteners and Components Transfer Case Front Output Shaft Boot Clamp [2x] Transfer Case Front Output Shaft Seal Special Tools Propeller Shaft DT-35910 Drive Axle Seal Clamp Pliers Equivalent regional tools: Special Tools Transfer Case - MP 3015 NPO DT-51329 Driveshaft Removal Adapter J–36614 Inner Pinion Bearing Installer Equivalent regional tools: Special Tools
- Raise and support the vehicle. Lifting and Jacking the Vehicle
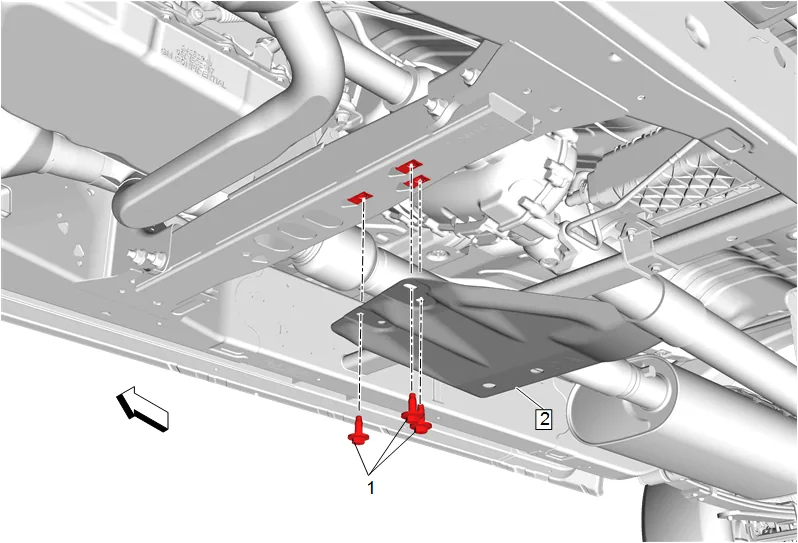
- { If equipped } Transfer Case Skid Shield Bolt (1) » Remove [3x]
- { If equipped } Transfer Case Skid Shield (2) » Remove
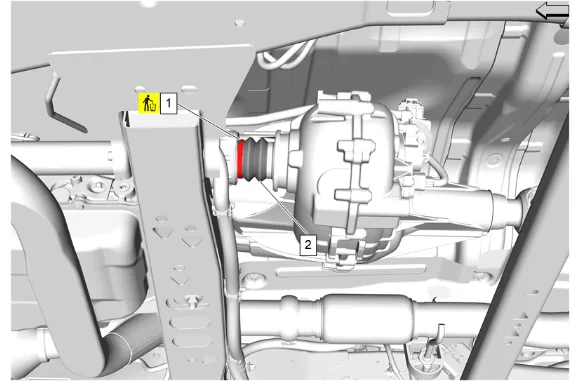
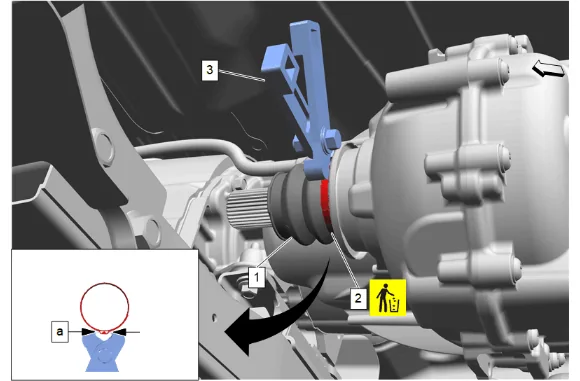
- Transfer Case Front Output Shaft Boot Clamp (1) @ Front Axle Propeller Shaft » Remove and DISCARD
- Reposition the transfer case front output shaft boot (2) and mark a reference point between the front axle propeller shaft and the transfer case front output shaft.
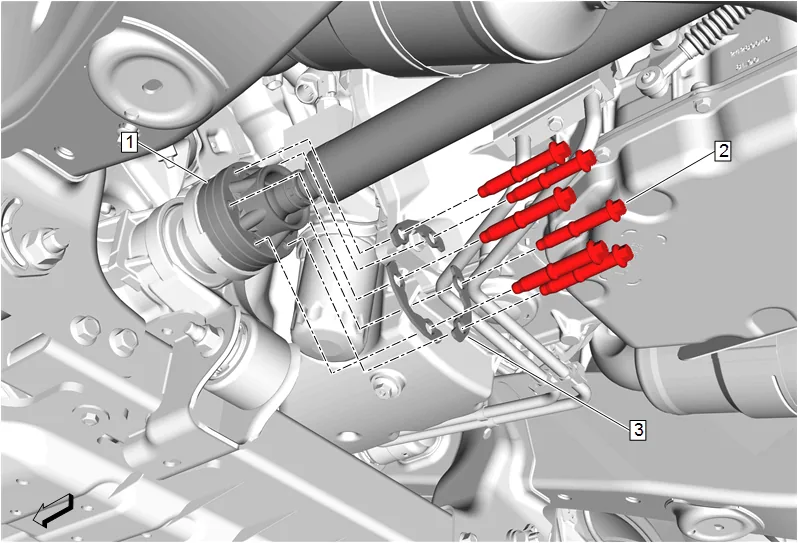
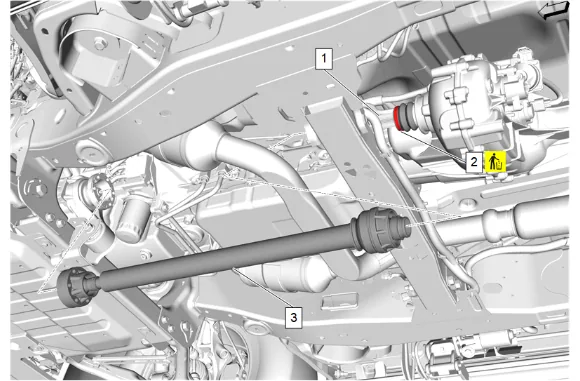
- Mark a reference point between the front axle propeller shaft (1) and the front differential drive pinion gear yoke.
- Front Axle Propeller Shaft Bolt (2) » Remove [6x]
- Front Axle Propeller Shaft Washer (3) » Remove [3x]
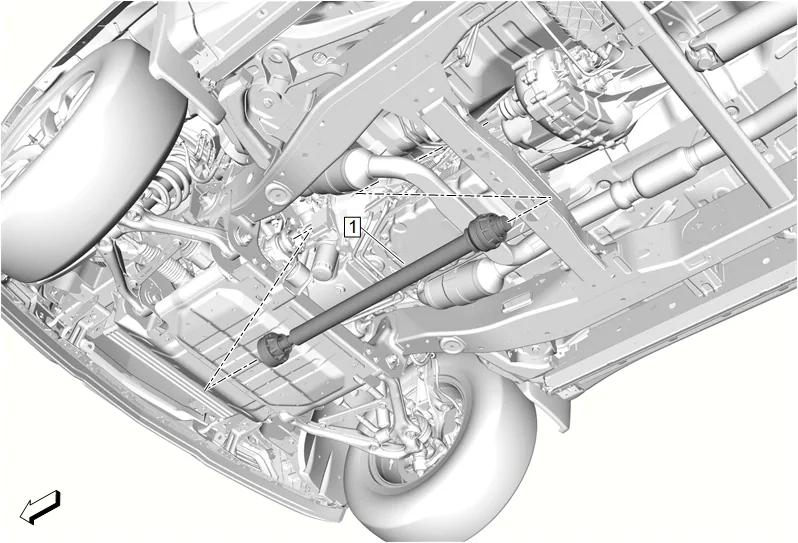
- Front Axle Propeller Shaft (1) » Remove
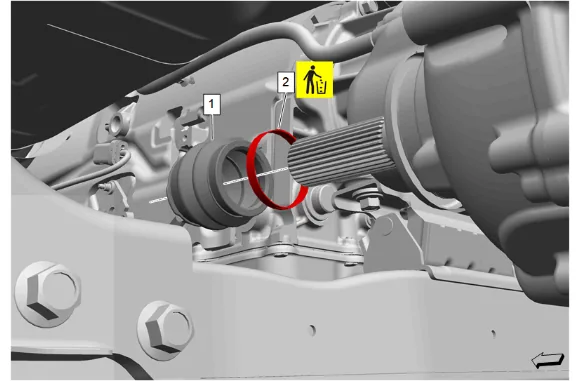
- Transfer Case Front Output Shaft Boot Clamp (2) @ Transfer Case » Remove and DISCARD
- Transfer Case Front Output Shaft Boot (1) » Remove
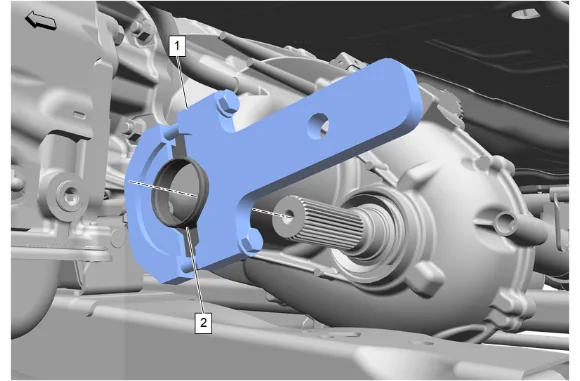
- Using the DT-51329 Driveshaft Removal Adapter (1) and standard 3-jaw puller, remove the transfer case front output shaft oil slinger (2) from the transfer case.
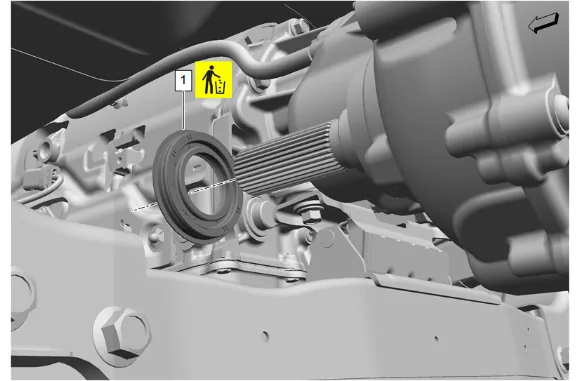
-
Using a suitable flat bladed tool, pry the transfer case front output shaft seal (1) out of the transfer case.
-
Transfer Case Front Output Shaft Seal (1) » Remove and DISCARD Installation Procedure
-
Transfer Case Front Output Shaft Seal (1) » Install NEW
-
Using a suitable tool, tap the NEW transfer case front output shaft seal (1) in to the transfer case until it is fully seated.
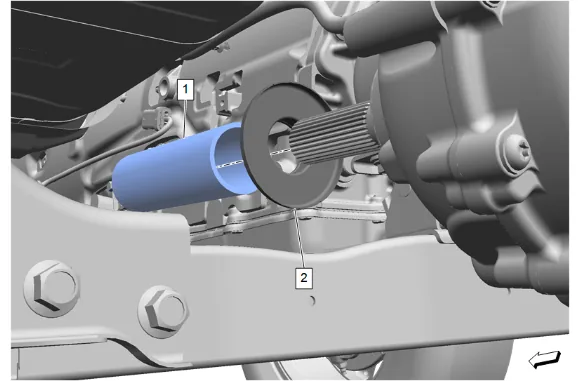
- Using the J–36614 Inner Pinion Bearing Installer (1), drive the transfer case front output shaft oil slinger (2) in to the transfer case until it is fully seated.
- Transfer Case Front Output Shaft Boot (1) » Install
- Using the DT-35910 Drive Axle Seal Clamp Pliers (3), install and crimp the NEW transfer case front output shaft boot clamp (2) until the gap at the base of the ear (a) is 1.5 mm (0.059 in).
-
Apply a thin layer of grease to the splines of the transfer case front output shaft (1). Adhesives, Fluids, Lubricants, and Sealers
-
Loosely install a NEW transfer case front output shaft boot clamp (2) to the transfer case front output shaft boot groove.
-
Align the reference marks made between the transfer case front output shaft and the front axle propeller shaft.
-
Front Axle Propeller Shaft (3) » Install
-
If NEW threaded components are being installed, loosen the adhesive using a metal pick or similar tool before proceeding. If threaded components are reused, prepare the threaded components using the following steps: 10.1. Remove any loose cured adhesive from the external threads of the components using a lint free cloth. 10.2. Thread the cleaned components into the internal mating threads and remove to loosen trapped cured adhesive. 10.3. Apply thread locking adhesive to the external threads of the components. Adhesives, Fluids, Lubricants, and Sealers 10.4. Ensure there are no gaps in the thread locking adhesive once applied to the component.
-
Align the reference marks made between the front axle propeller shaft (1) and the front differential drive pinion gear yoke.
-
Front Axle Propeller Shaft Washer (3) » Install [3x]
- Install the 6 front axle propeller shaft bolts (2) and tighten in a crisscross pattern. Fastener Specifications
-
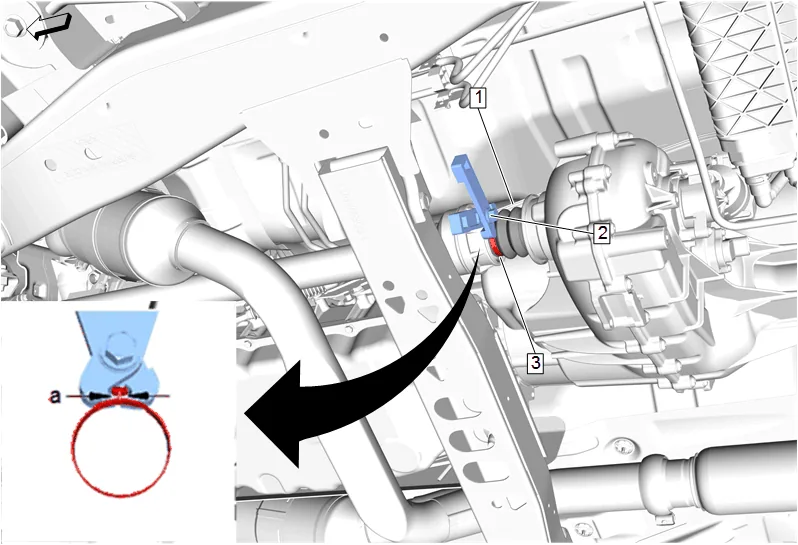
Ensure the transfer case front output shaft boot (1) is fully engaged into the groove of the transfer case front output shaft.
-
Using the DT-35910 Drive Axle Seal Clamp Pliers (2), crimp the transfer case front output shaft boot clamp (3) until the gap (a) at the base of the ear is 1.5 mm (0.059 in).
-
{ If equipped } Transfer Case Skid Shield (2) » Install
-
{ If equipped } Transfer Case Skid Shield Bolt (1) » Install and tighten [3x] — Fastener Specifications
-
Remove the support and lower the vehicle.