Plastic Collar Quick Connect Fitting Service
Engine Controls and Fuel - 5.3L L84 or 6.2L L87 | Repair Instructions | Document ID: 2656427 Removal Procedure
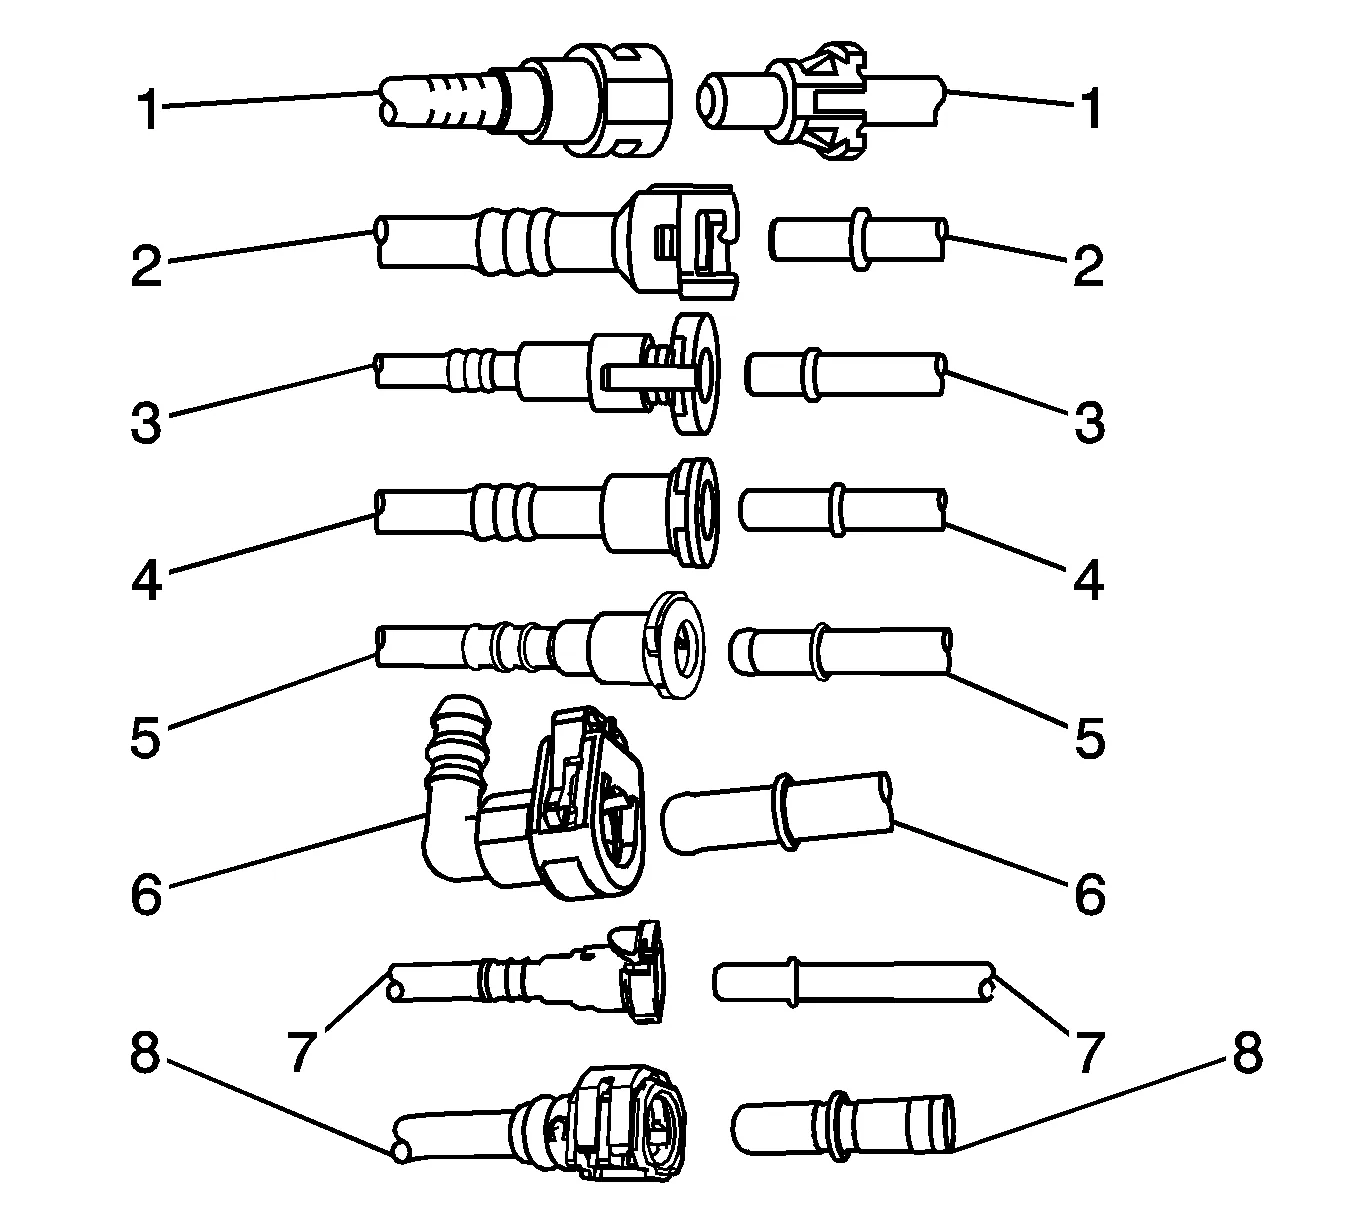
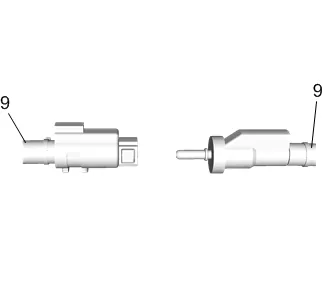
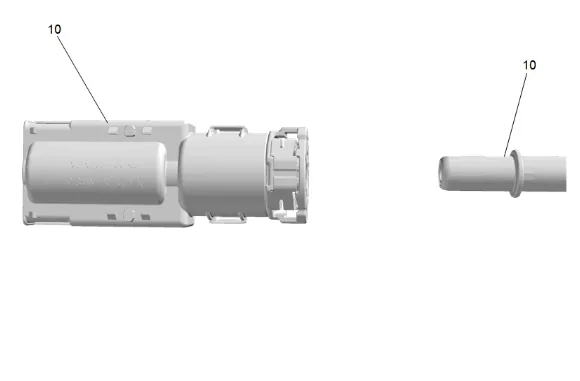
- Relieve the fuel system pressure before servicing any fuel system connection.
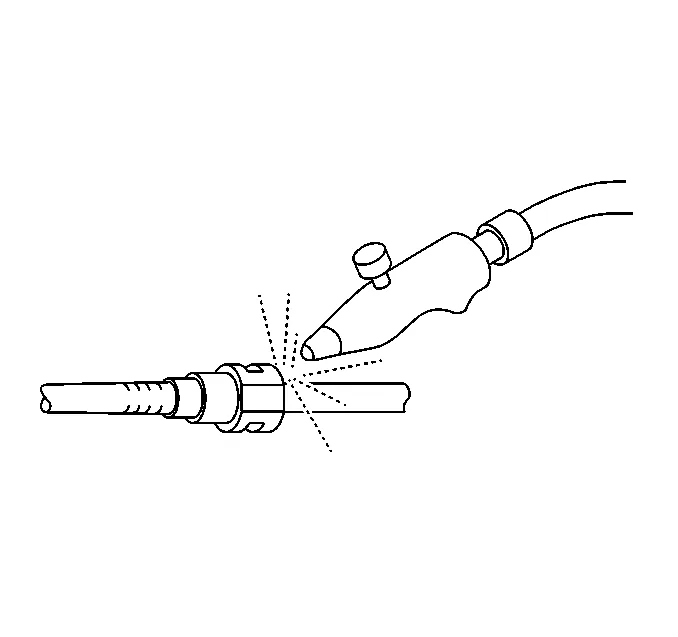
- Using compressed air, blow any dirt out of the quick-connect fitting.
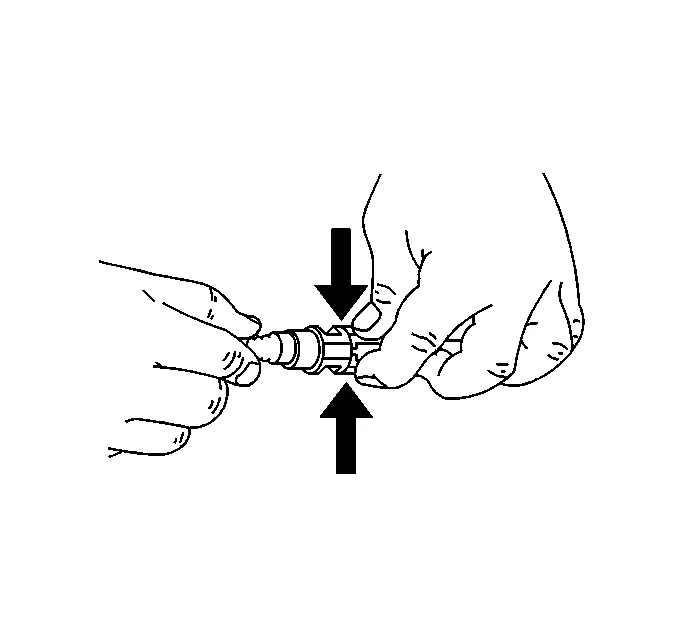
- This step applies to Bartholomew style connectors ONLY. Squeeze the plastic quick-connect fitting release tabs.
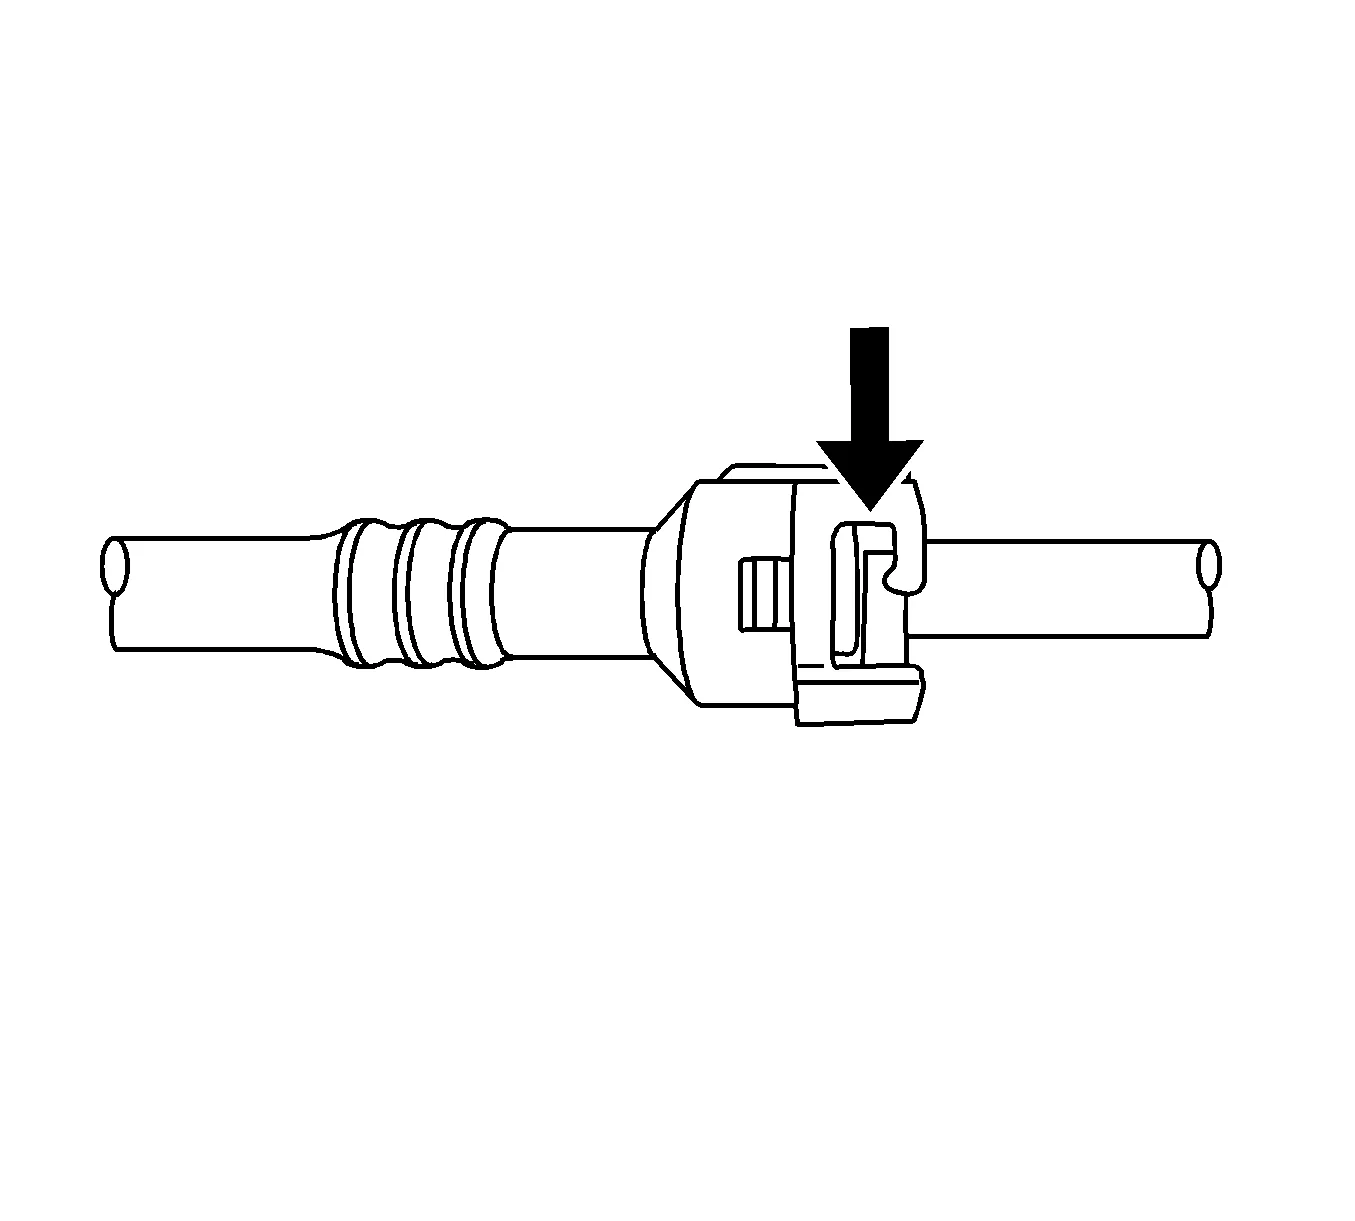
- This step applies to Q Release style connectors ONLY. Release the fitting by Pushing the tab toward the other side of the slot in the fitting.
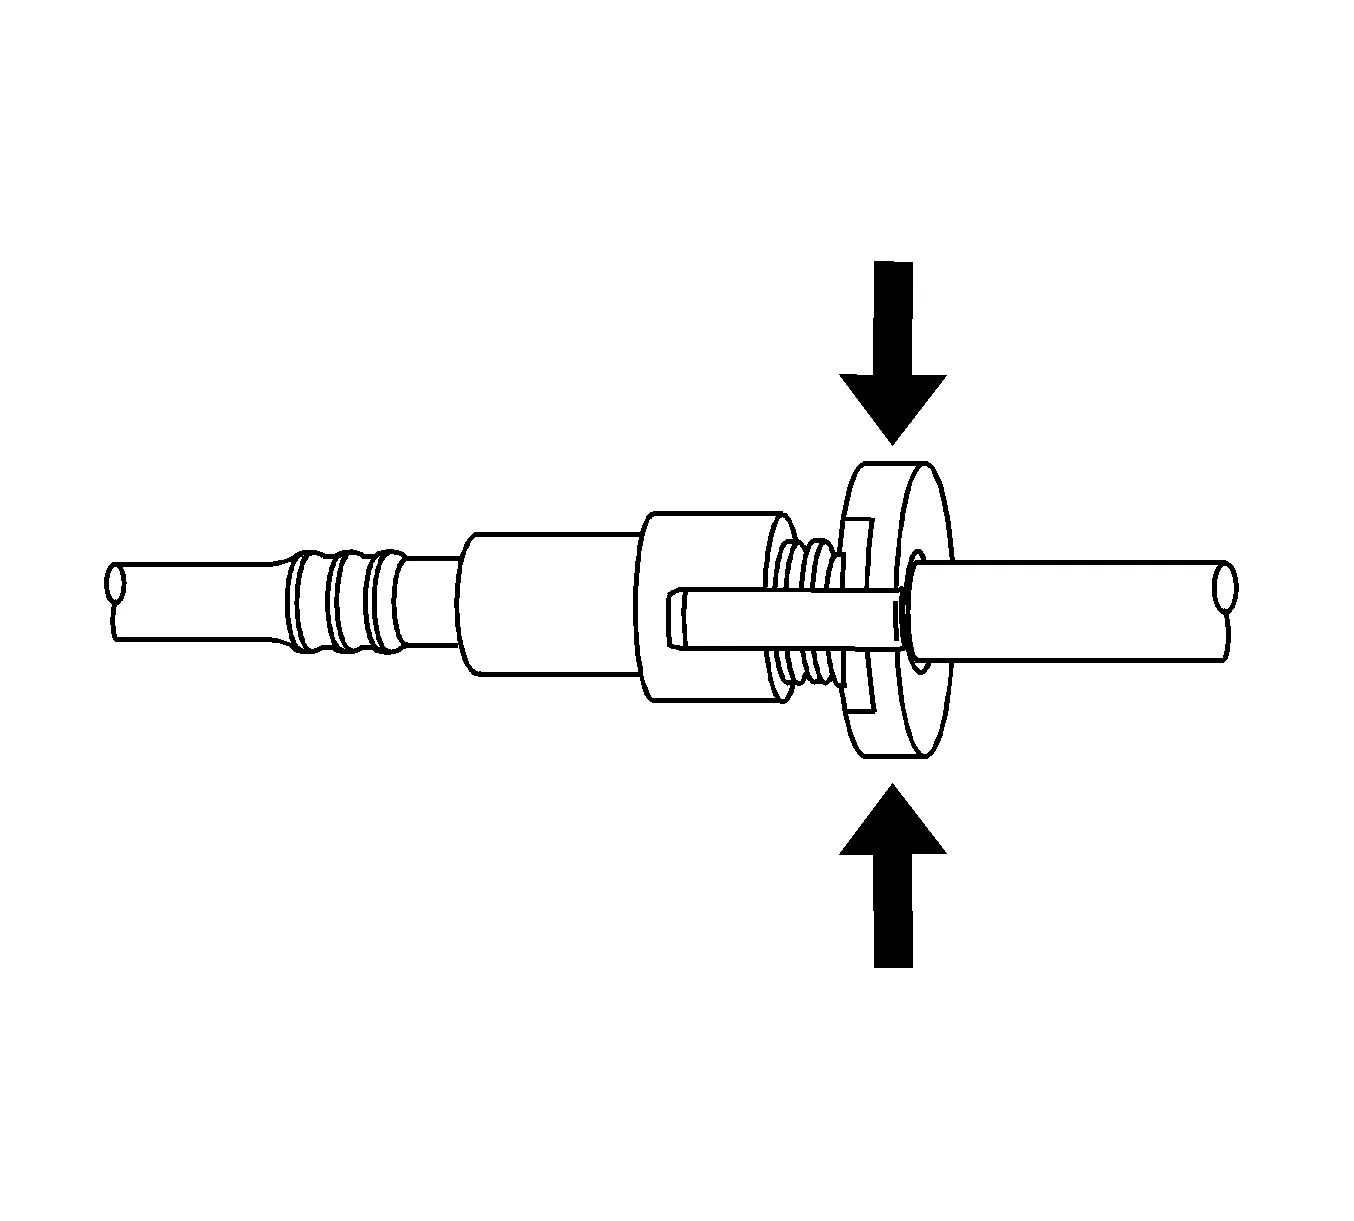
- This step applies to Squeeze to Release style connectors ONLY. Squeeze where indicated by arrows on both sides of the plastic ring surrounding the quick-connect fitting.
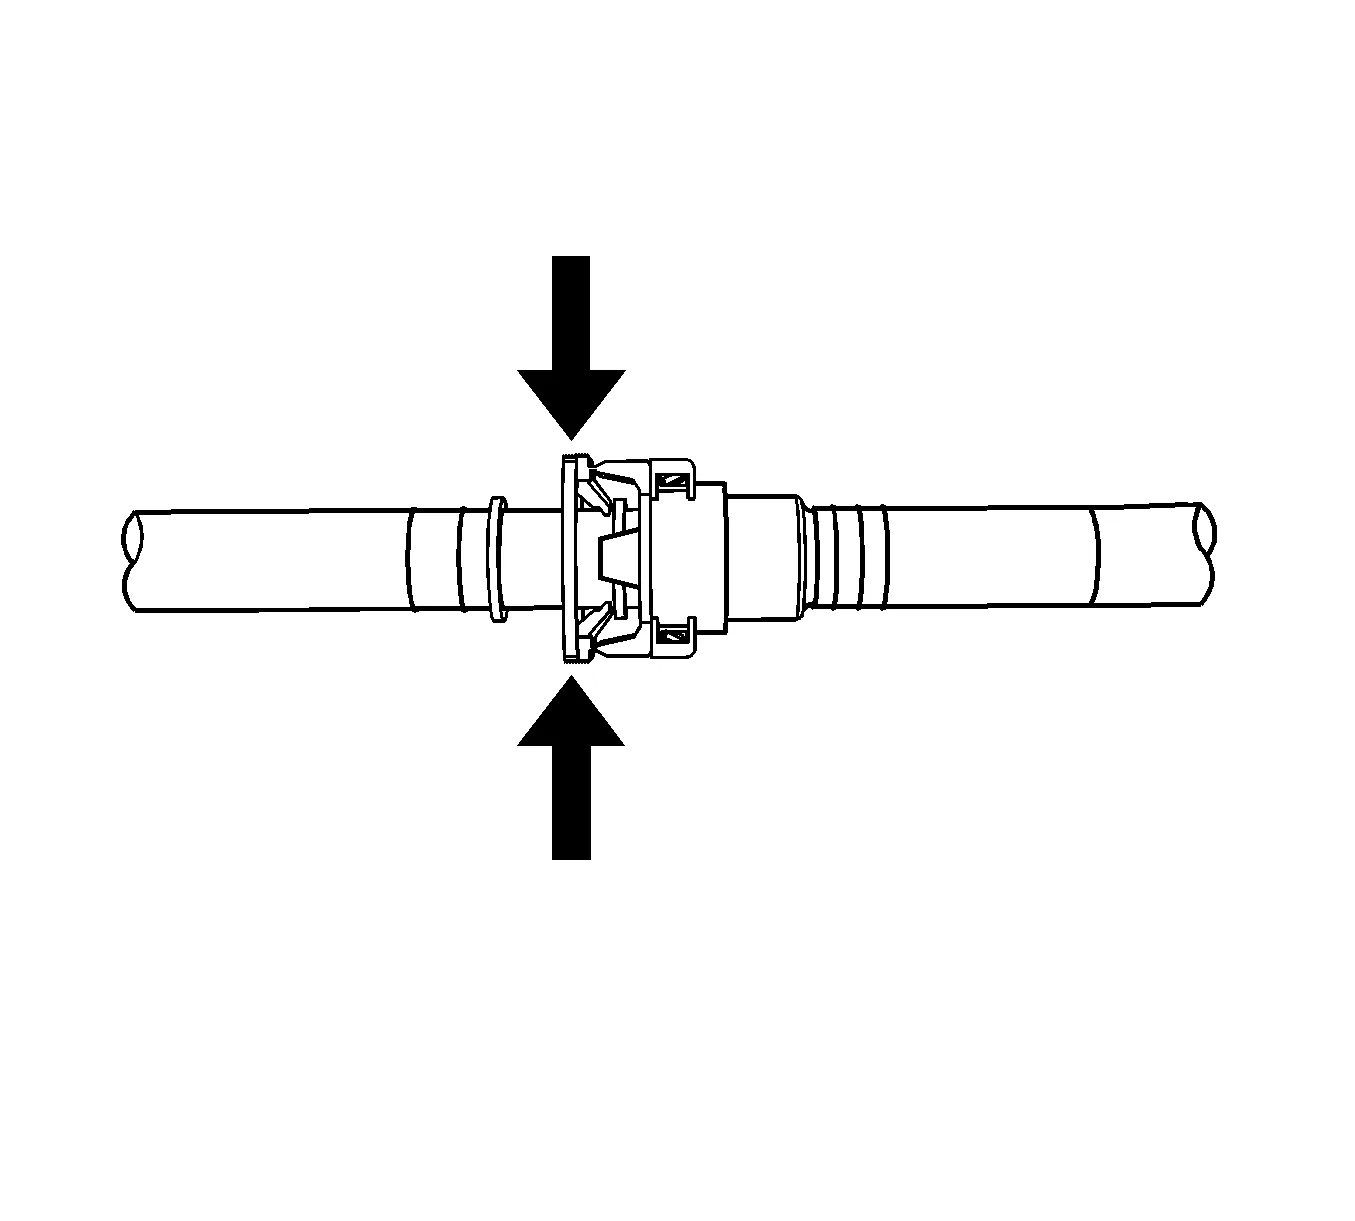
- This step applies to Squeeze to Release style connectors ONLY. Push in the male side slightly in order to slide the retainer away from the retainers, squeeze where indicated by arrows on both sides of the plastic ring surrounding the quick-connect fitting.
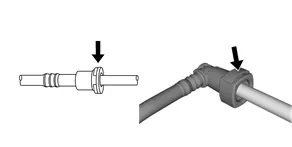
- This step applies to Sliding Retainer style connectors ONLY. Release the fitting by pressing on one side of the release tab causing it to push in slightly. If the tab doesn’t move try pressing the tab in from the opposite side. The tab will only move in one direction.
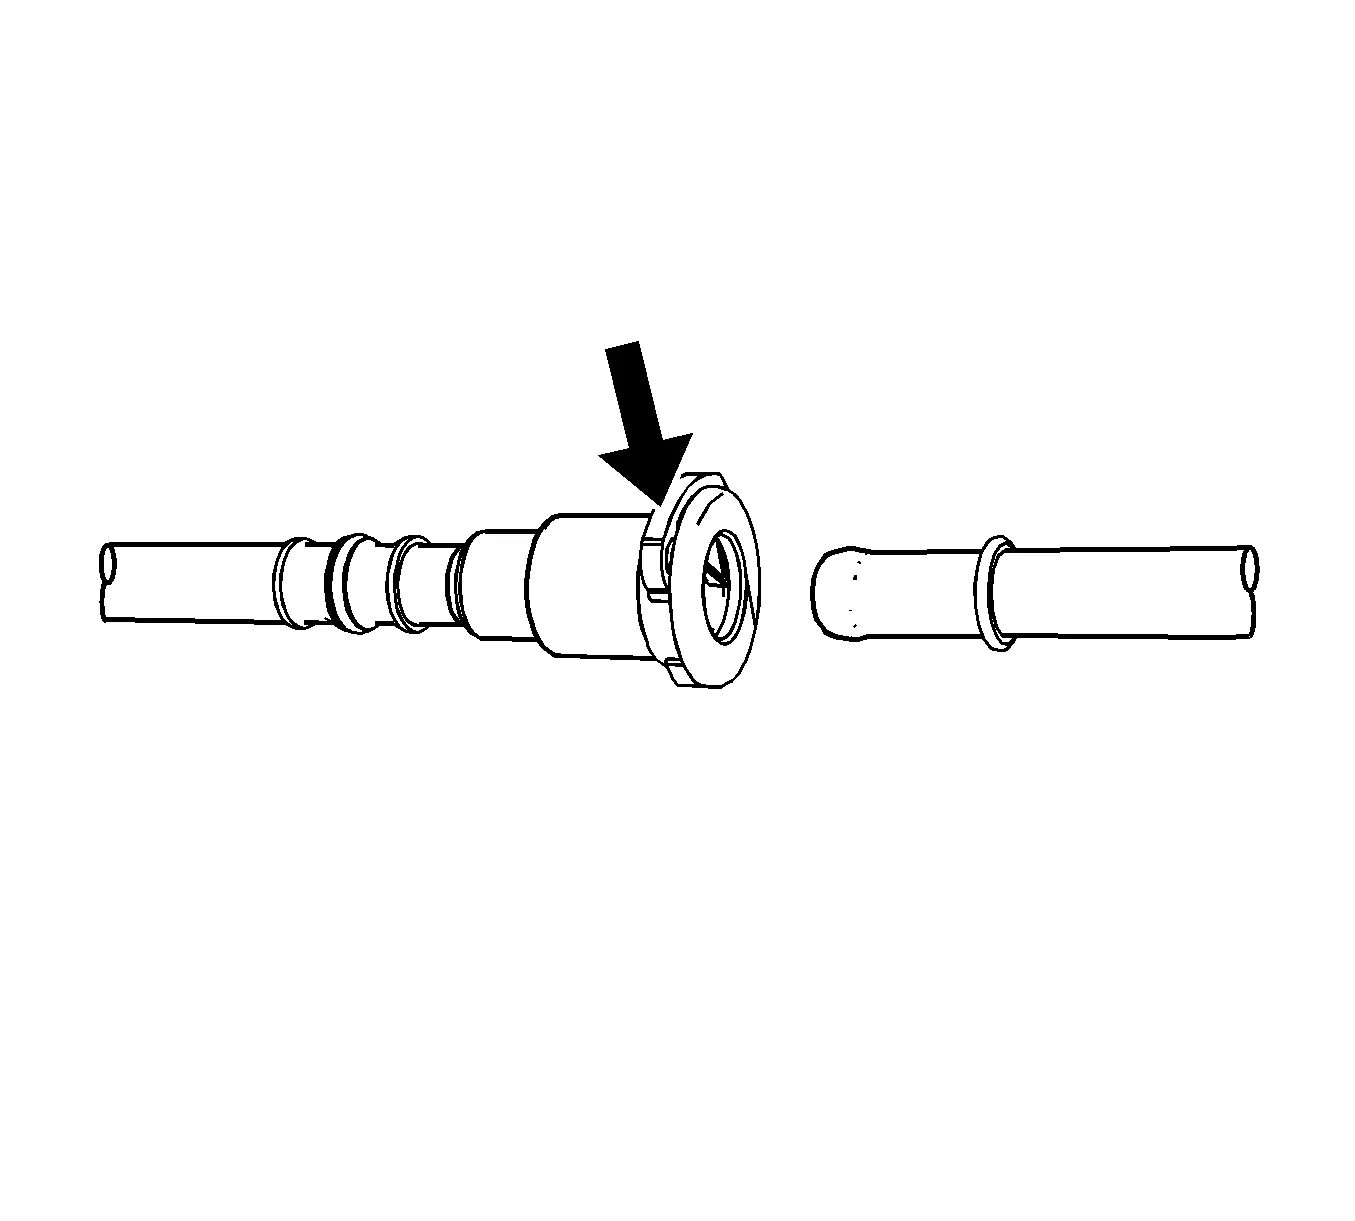
- This step applies to the Global Connector style only. Push the connector toward the tube in order to release the pressure. Press and hold down the release mechanism, and pull the connector straight out.
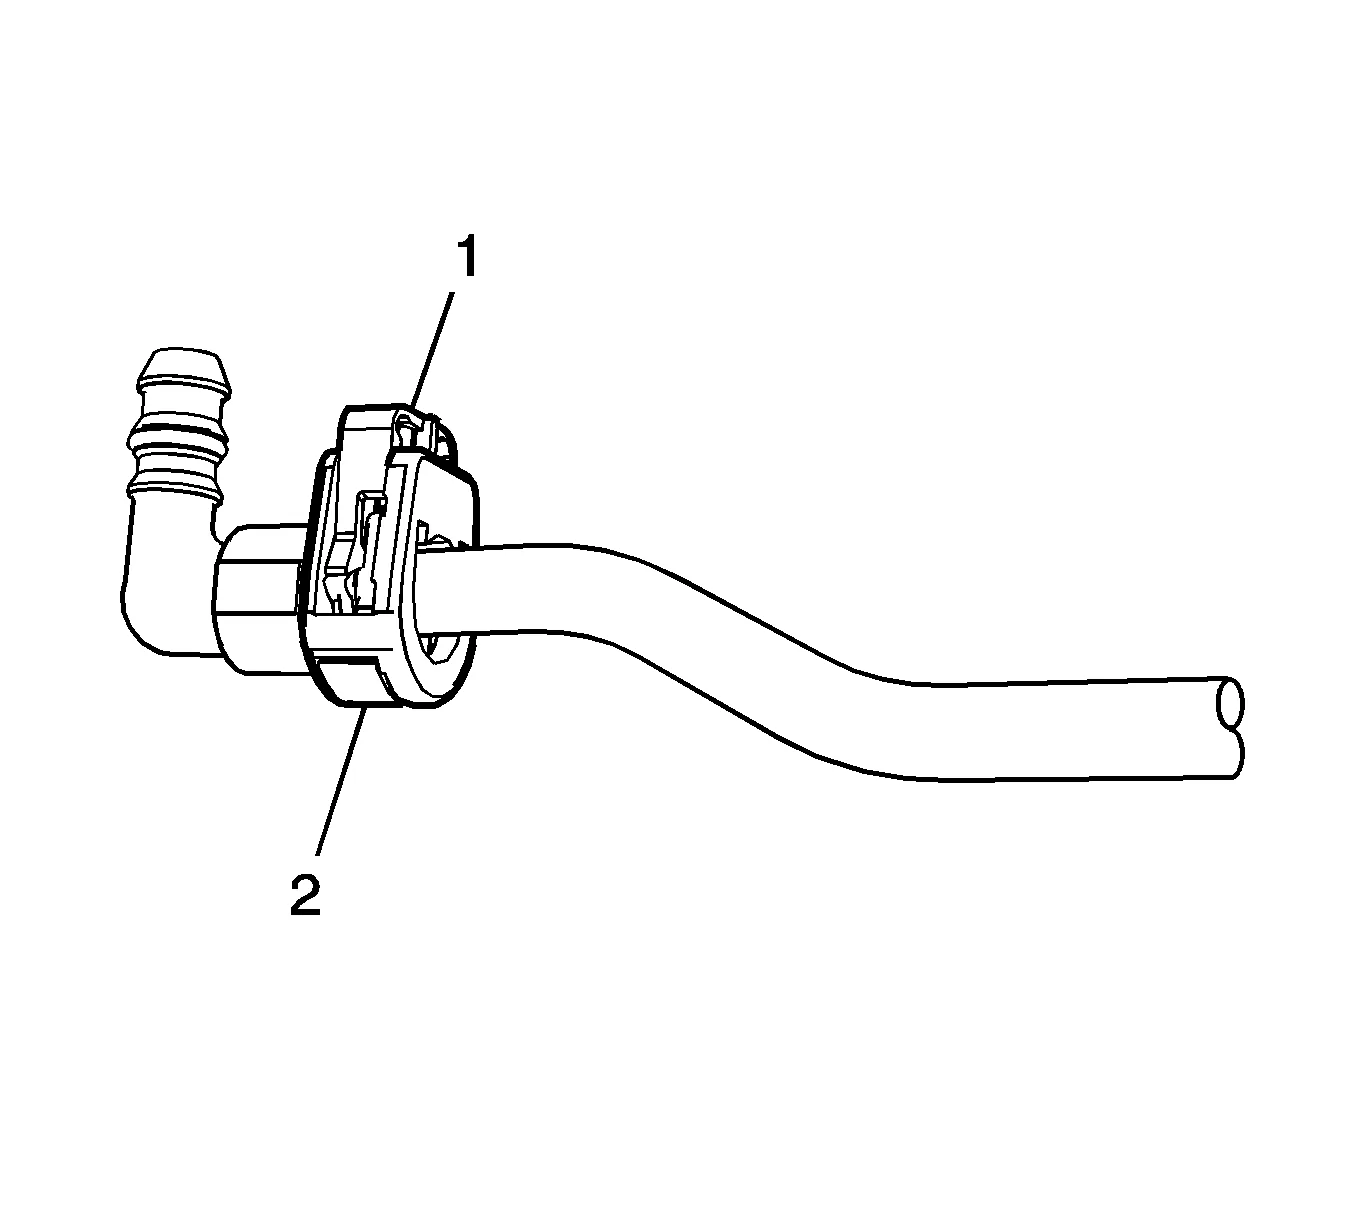
- This step applies to the TI Loc style only. Push the connector toward the tube in order to release the pressure. Release the redundant latch (1) with two fingers or a flat bladed tool. Then press and hold down the bottom release mechanism (2) and pull the connector straight out.
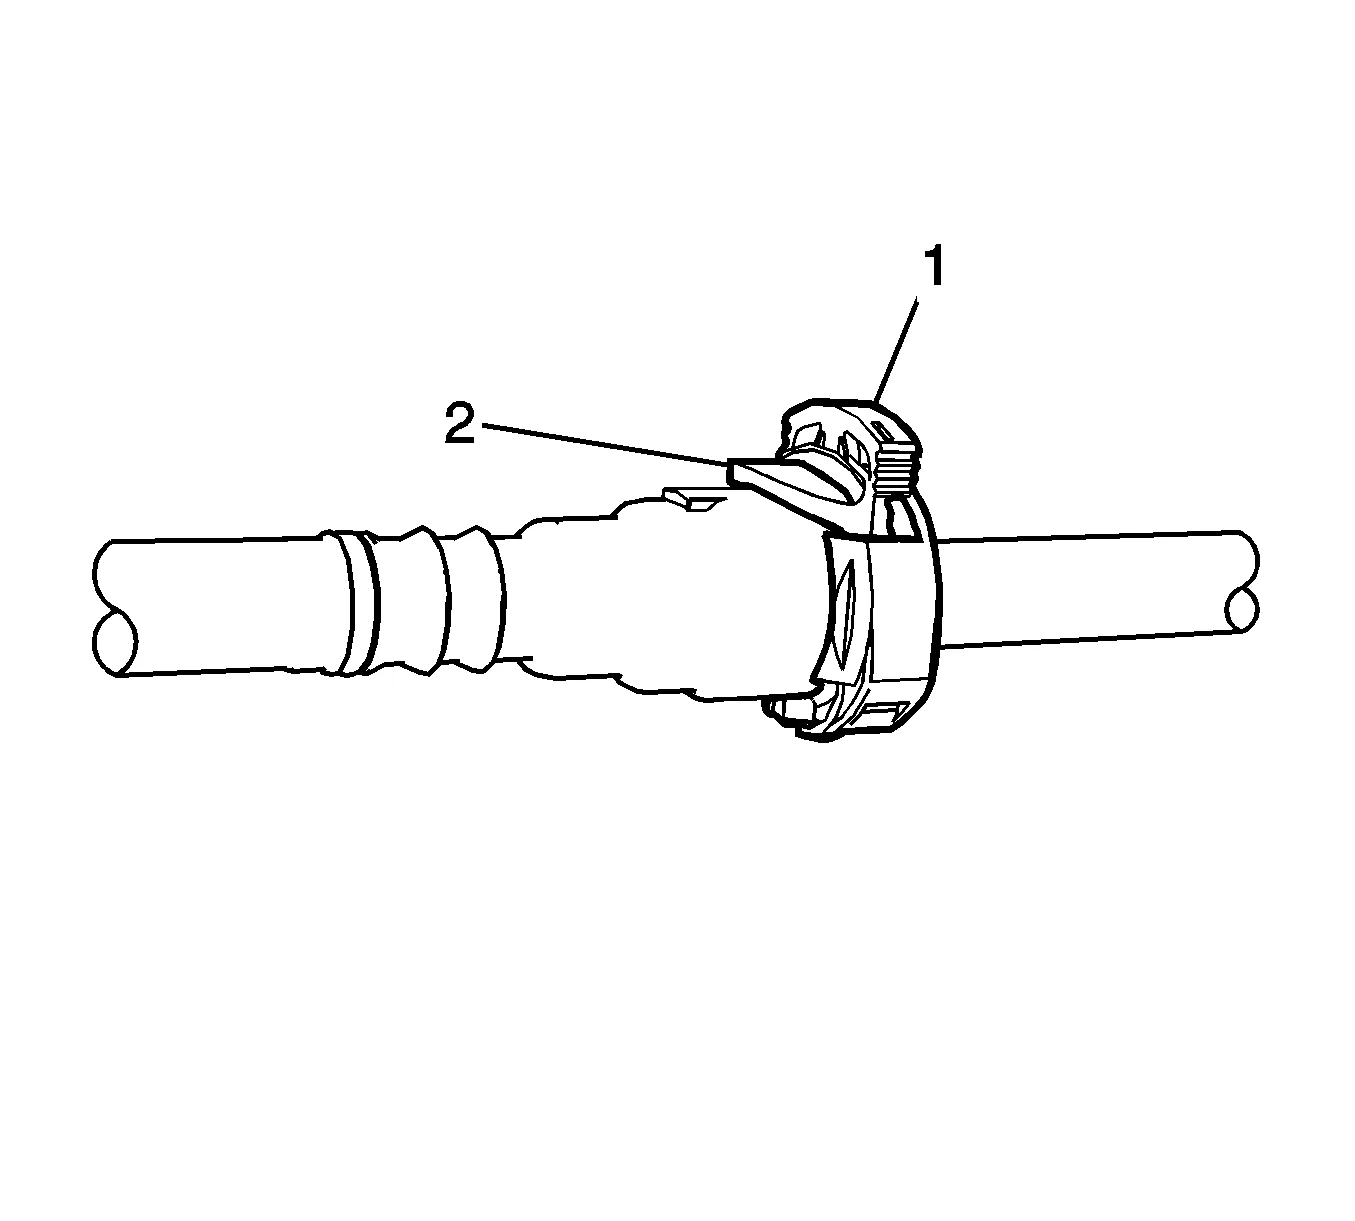
- This step applies to the Safe Lock style only. Push the connector toward the tube in order to release the pressure. Release the second latch (1) with two fingers. Then press and hold down the bottom release mechanism (2) and pull the connector straight out.
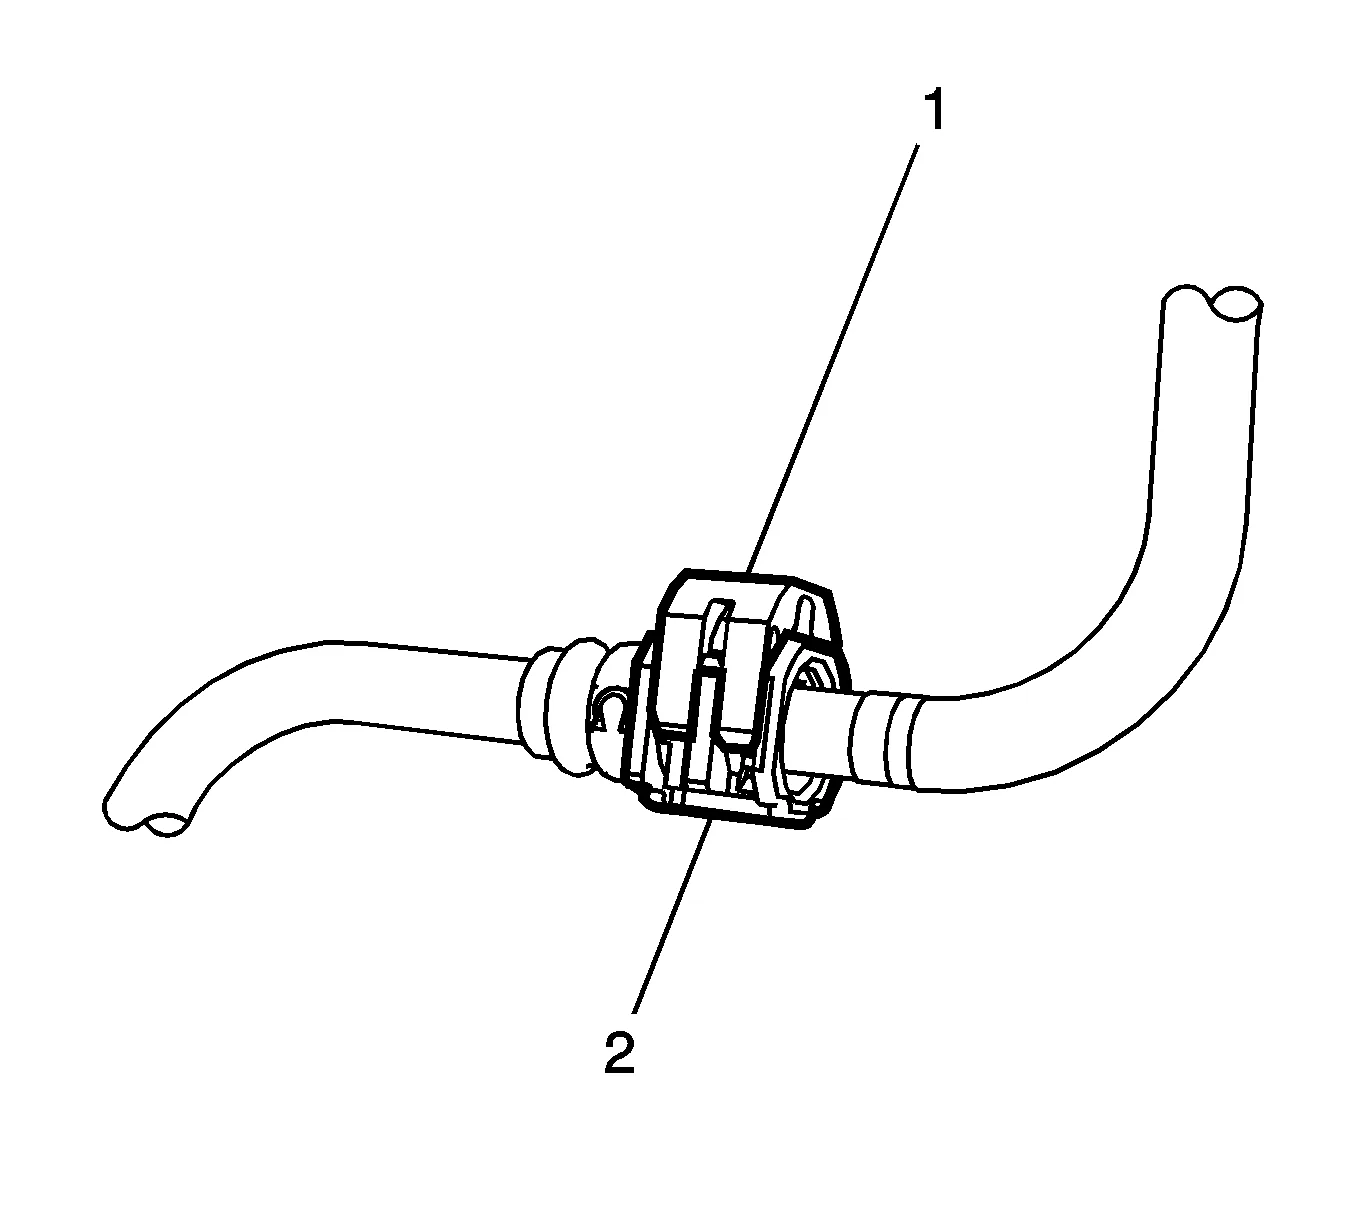
- This step applies to the Plastic Connector style 8, push the connector toward the tube in order to release the pressure. Press the latch (1) inward in order to release the pipe, while pulling the connector (2) straight out.
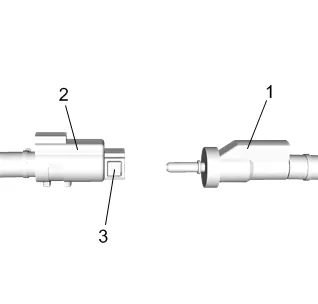
- This step applies to the DEF Connector style only. Push the male side (1) towards connector (2) in order to release the pressure on the connector. Squeeze the tabs on both sides of the connector (3) to release the connector then pull male side (1) straight out.
- Using a clean shop towel, wipe off the male pipe end.
- Inspect both ends of the fitting for dirt and burrs.
- Clean or replace components as necessary.
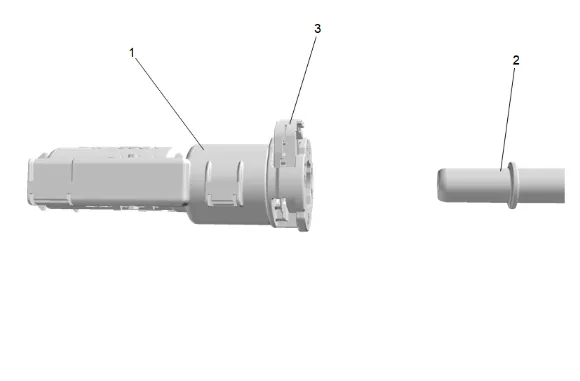
- For the DEF Connector style only. Push the female side (1) towards connector (2) in order to release the pressure on the connector. Squeeze the tabs on female side of the connector (3) to release the connector then pull male side (2) straight out.
- Using a clean shop towel, wipe off the male pipe end.
- Inspect both ends of the fitting for dirt and burrs.
- Clean or replace components as necessary. Installation Procedure
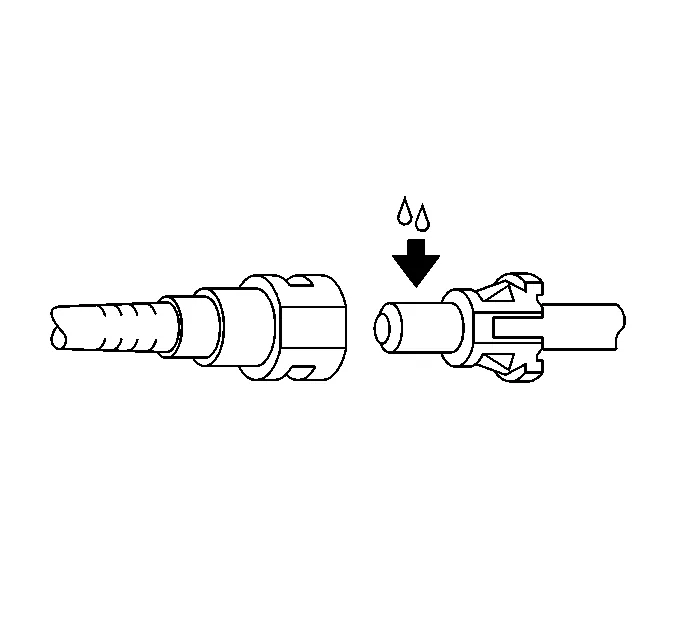
- Apply a few drops of clean engine oil to the male pipe end.
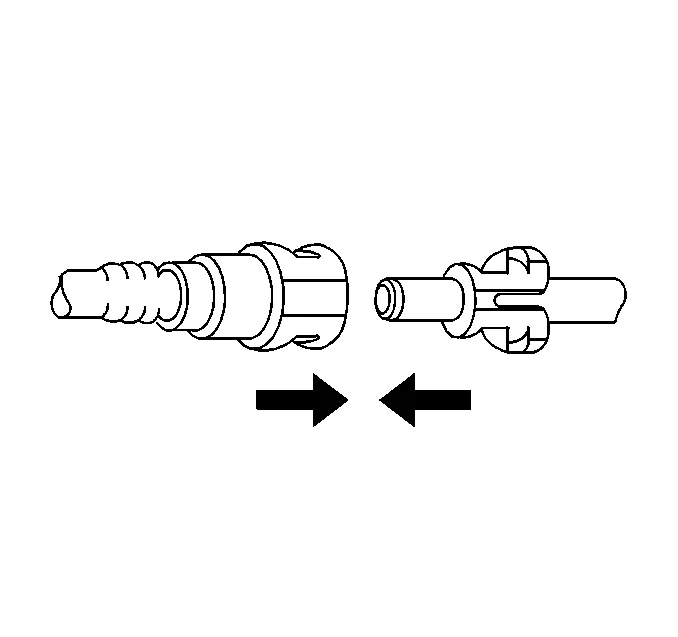
- Push both sides of the quick-connect fitting together in order to cause the retaining feature to snap into place.
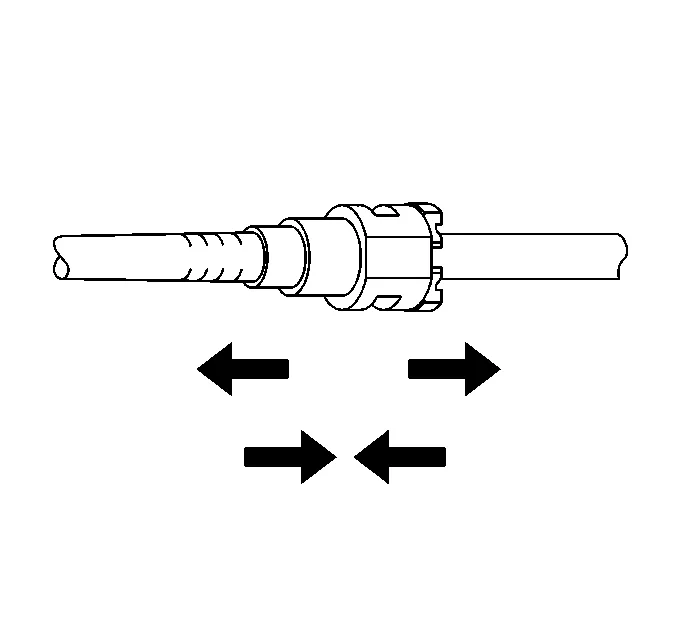
-
Pull on both sides of the quick-connect fitting to make sure the connection is secure.
-
Insert the tube in the connector until the retainer snaps in place.
-
Push down on the redundant latch (1) until it is fully engaged and snapped into position.
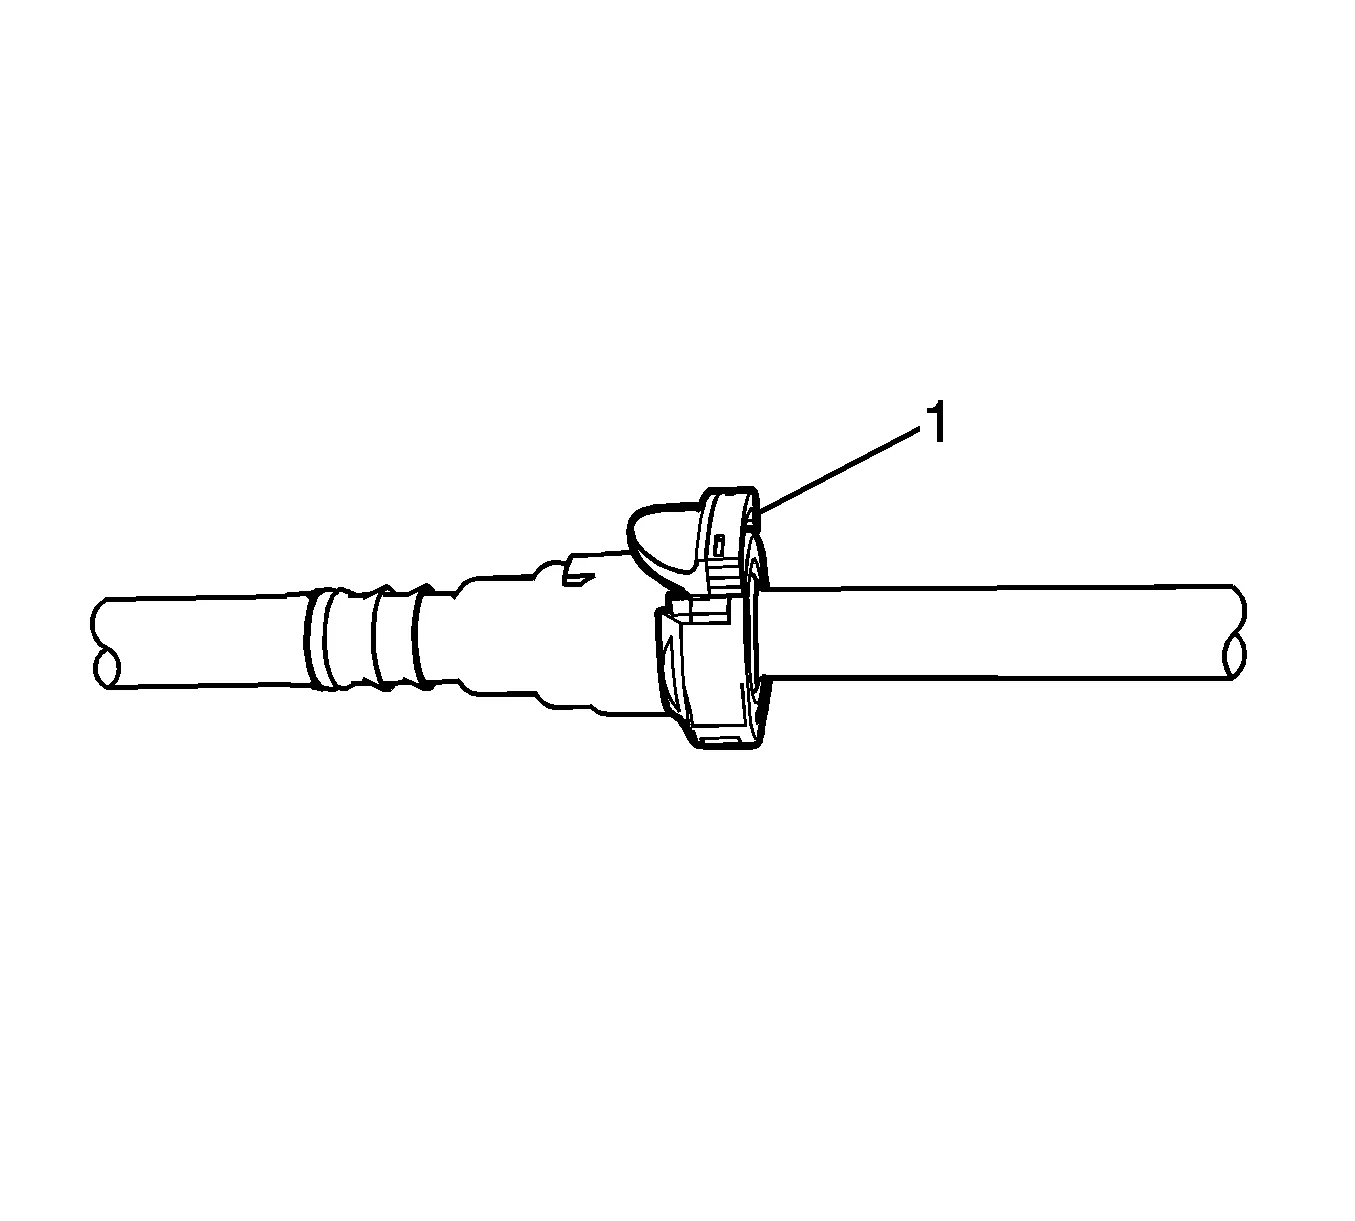
- Insert the tube in the connector until the retainer snaps in place.
- Push down on the second latch (1) in order to secure the connection.
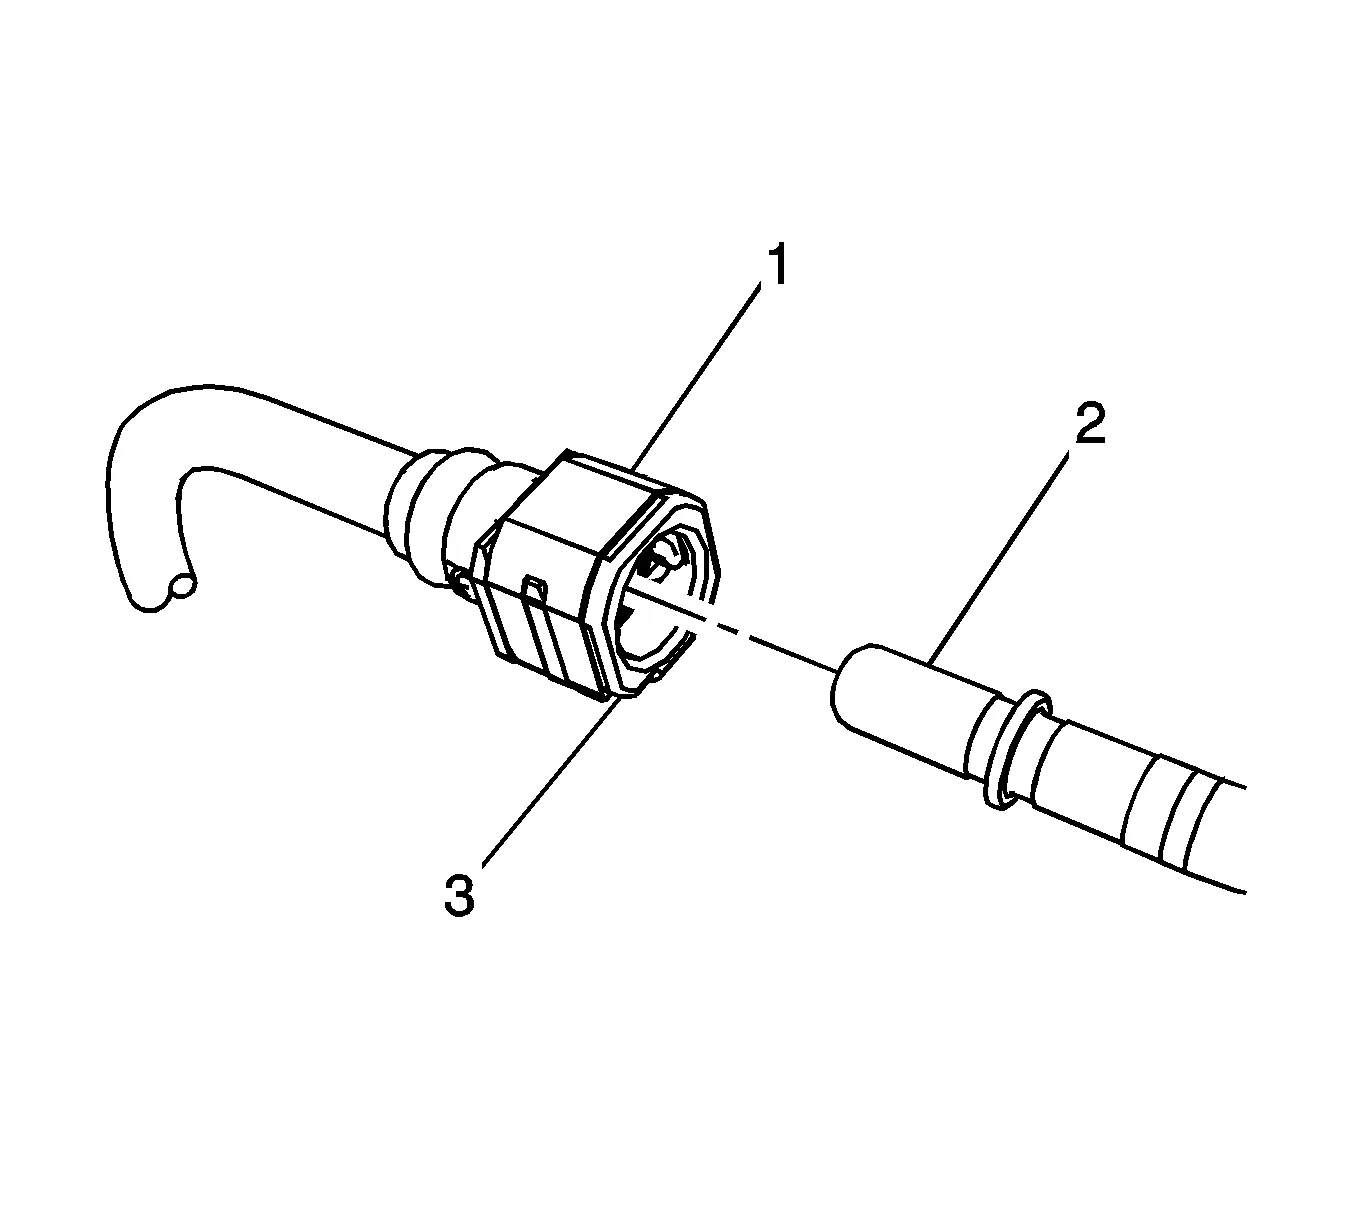
- For the plastic connector type 8, depress the latch (1) while inserting the connector (3) on to the pipe (2) .
- Move the latch (1) upward in order to secure the connection.
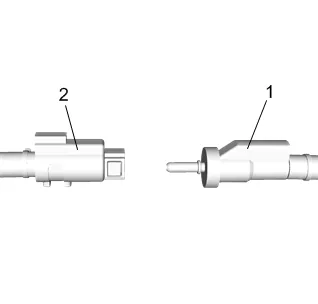
- For the DEF Connector type 9, wipe off male side of line (1) to insure there is no contamination on the line prior to installation. Inspect inside connector side line (2) to insure there is no contamination in the connector prior to installation. Push the male side (1) inwards to connector (2) until connector latches. Once latched, pull on male line (1) outward to insure connection is made.
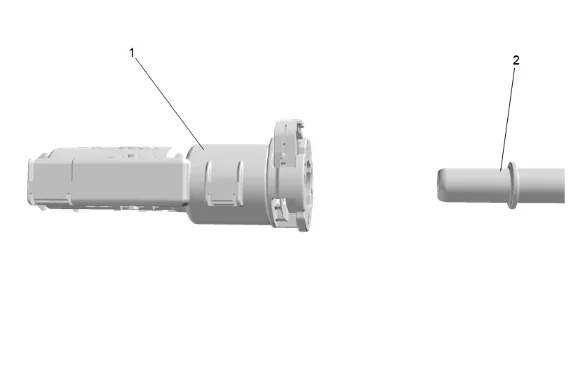
- For the DEF Connector style only. Push the female side (1) towards connector (2). Push female line on the male connector until the tab latches. Once latched, pull on the female line outward to ensure connection is made.
- Inspect for leaks using the following procedure: 12.1. Turn the ignition ON, with the engine OFF for 2 seconds. 12.2. Turn the ignition OFF, for 10 seconds. 12.3. Turn the ignition ON, with the engine OFF for 2 seconds. 12.4. Turn the ignition OFF. 12.5. Inspect for leaks.