Crankshaft Rear Oil Seal Replacement (2WD)
Single Use Fasteners and Components Automatic Transmission Flex Plate Bolt [8x] Crankshaft Rear Oil Seal Exhaust System Front Gasket Oil Filter Transmission Fluid Cooler Pipe Seal [2x] Transmission Fluid Cooler Seal Special Tools EN-956-1 Extension EN-49979 Holder EN-52446 Rear Crankshaft Seal Installer Equivalent regional tools: Special Tools Removal Procedure
- Transmission » Remove — Automatic Transmission Removal and Installation
- Engine Oil and Oil Filter » Remove and DISCARD — Engine Oil and Oil Filter Replacement
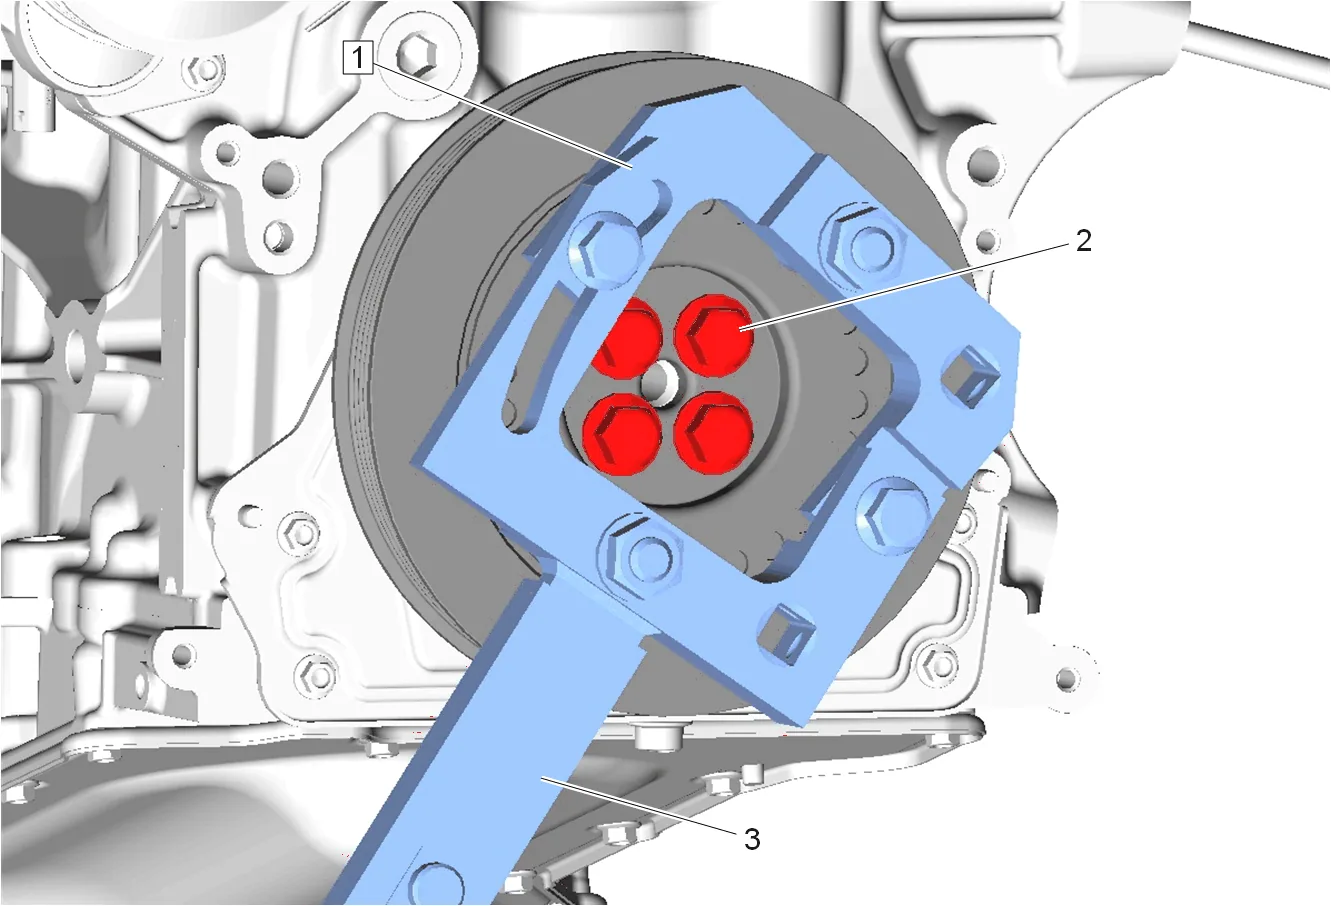
- Install the EN-49979 Crankshaft Holder (1) with EN-956-1 Extension (3).
-
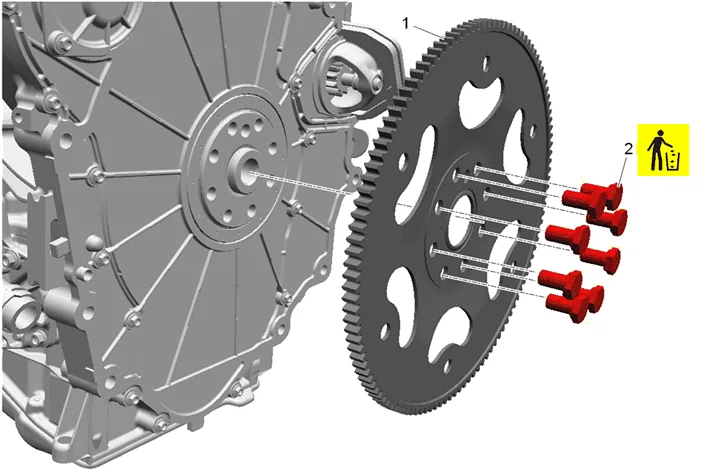
Automatic Transmission Flex Plate Bolt (2) » Remove and DISCARD [8x]
-
Automatic Transmission Flex Plate (1) » Remove
-
Remove the EN-49979 Crankshaft Holder (1) with EN-956-1 Extension (3).
-
Reposition hoses as needed.
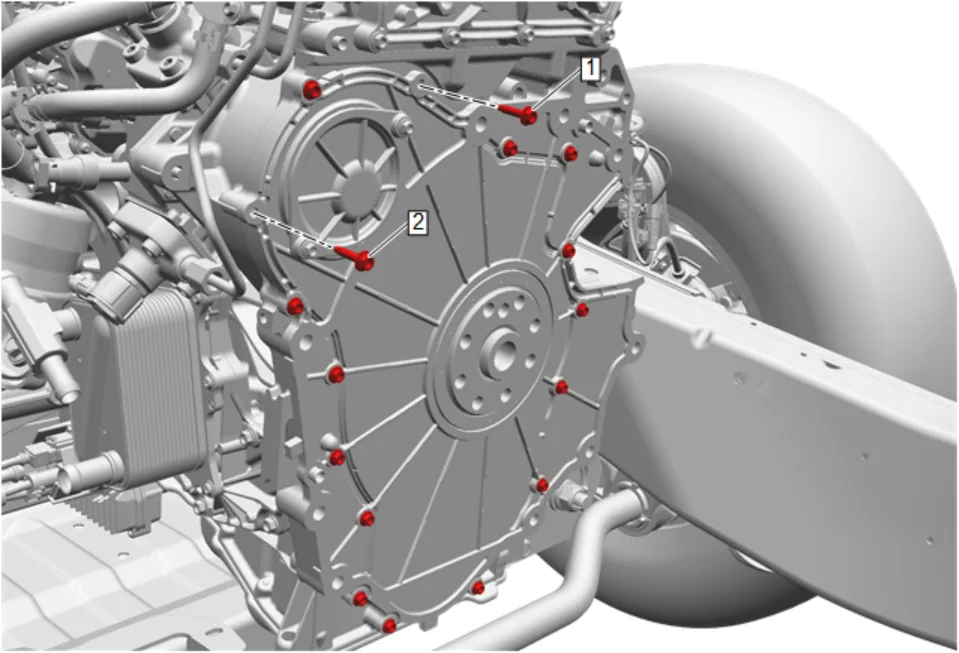
- Remove the 16 timing chain cover bolts (1, 2).
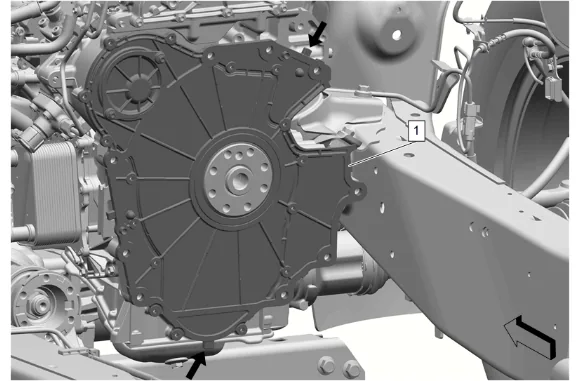
- Using a suitable tool at the locations indicated by the arrows to pry, loosen the timing chain lower cover (1) carefully from the engine block.
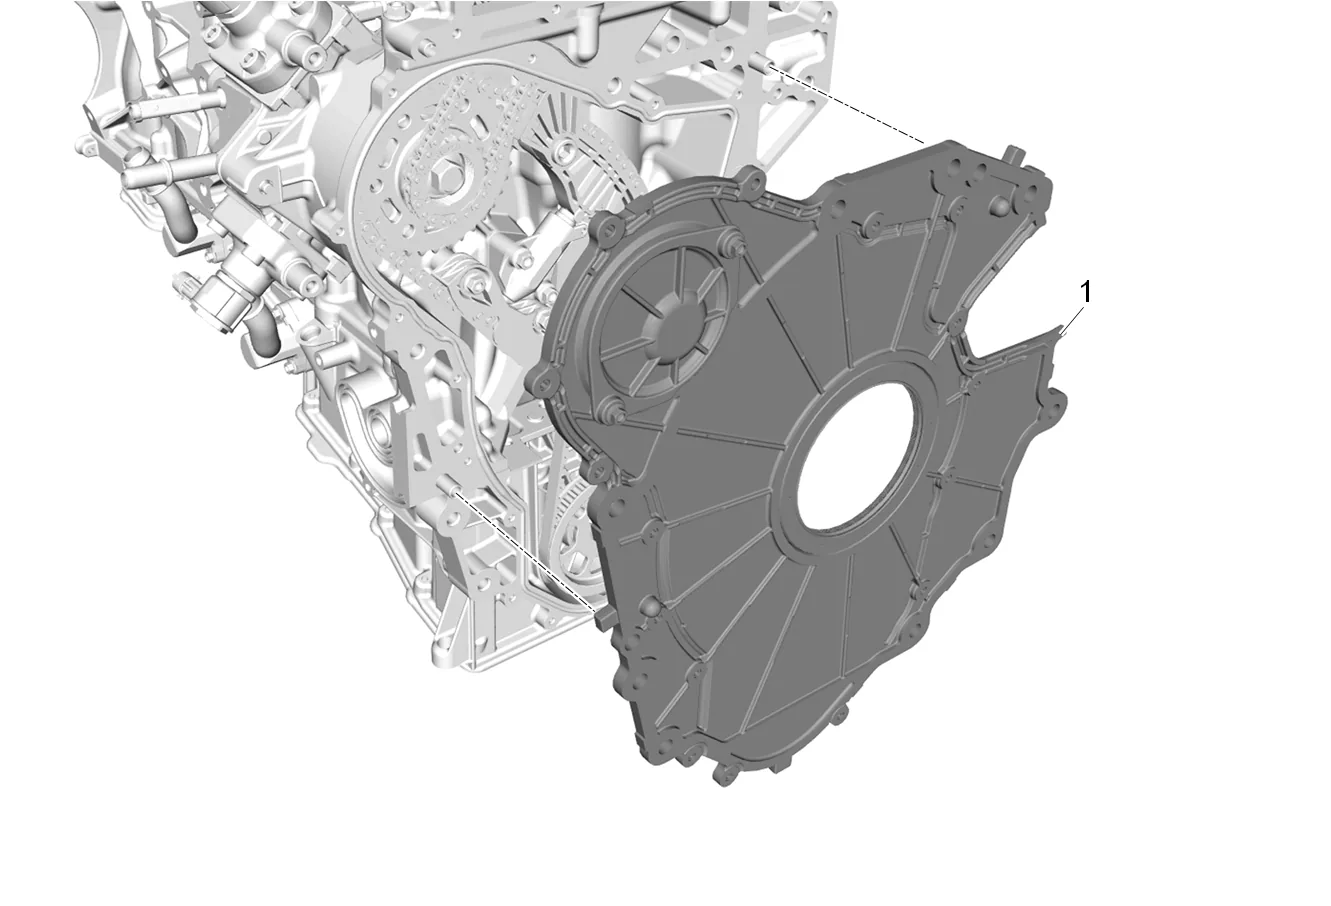
- Timing Chain Lower Cover (1) » Remove
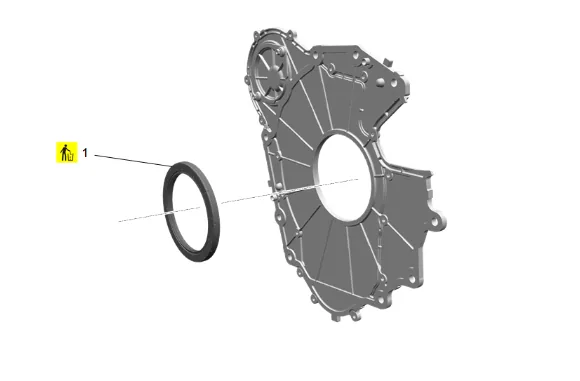
- Crankshaft Rear Oil Seal (1) » Remove and DISCARD Cleaning and Inspection Procedure - Required
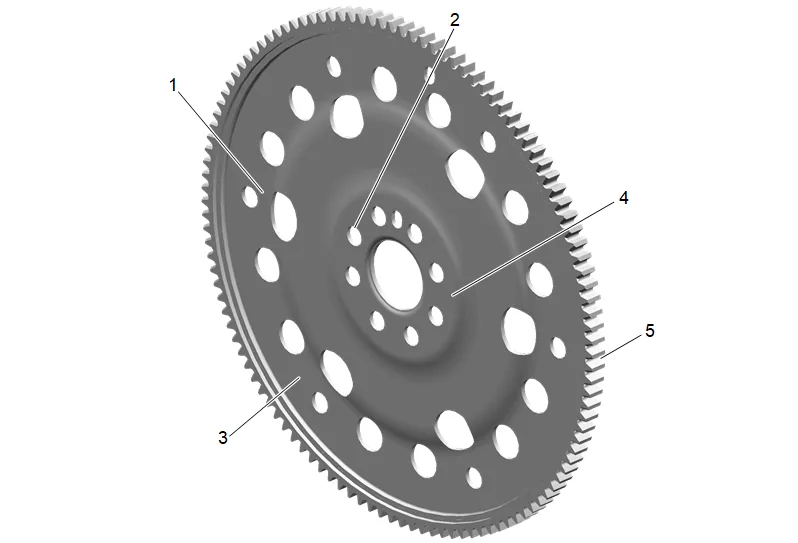
- Clean the automatic transmission flex plate (1) in solvent.
- Dry the automatic transmission flex plate (1) with compressed air.
- Inspect the automatic transmission flex plate for the following conditions: 3.1. Stress cracks around the automatic transmission flex plate-to-torque converter mounting bolt hole locations (1) and automatic transmission flex plate-to-crankshaft (2, 4)
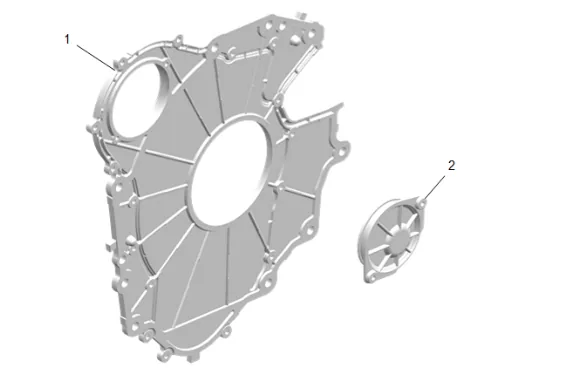
- Clean the timing chain lower cover (1).
- Clean the timing chain lower cover mating surfaces.
- Inspect the timing chain lower cover mating surfaces for damage.
- Inspect the crankshaft rear oil seal bore for damage.
- Inspect the fuel pump access hole cover (2) for damage.
- Replace the timing chain lower cover (1) if damaged. Installation Procedure
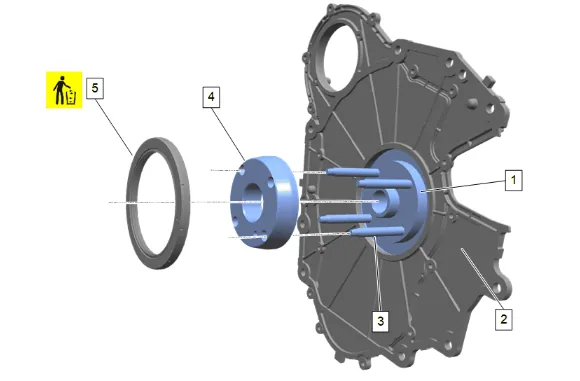
Click Image For Video

Secure the EN-52446-3 Base (1) in a vice. 2. Install the 4 EN-52446-4 Studs (3) in base. 3. Place the timing chain lower cover (2) outward facing side up on the base. 4. Install EN-52446-2 Seal Protector (4) onto the EN-52446-3 Base (1). 5. Install new crankshaft rear oil seal (5) to the EN-52446-3 Base (1), using the EN-52446-2 Seal Protector (4) to center the crankshaft rear oil seal (5). 6. Remove the EN-52446-2 Seal Protector (4).
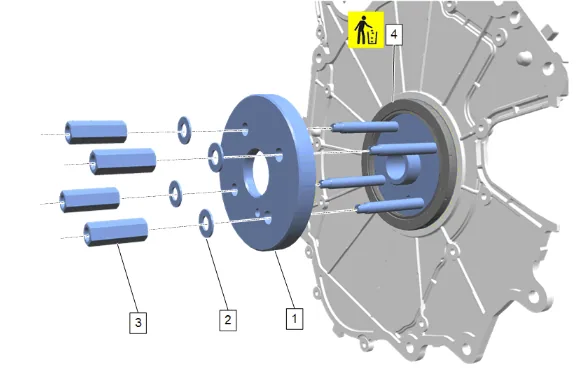
- Install the EN-52446-1 Installer (1) on the crankshaft rear oil seal (4).
- Install 4 washers (2) onto the EN-52446-4 Studs.
- Install the 4 EN-52446-5 Nuts (3) onto the studs.
- Tighten the 4 EN-52446-5 Nuts (3) evenly until the crankshaft rear oil seal (4) is fully seated in the cover.
- Remove the EN-52446 Assembly from the crankshaft rear oil seal (4).
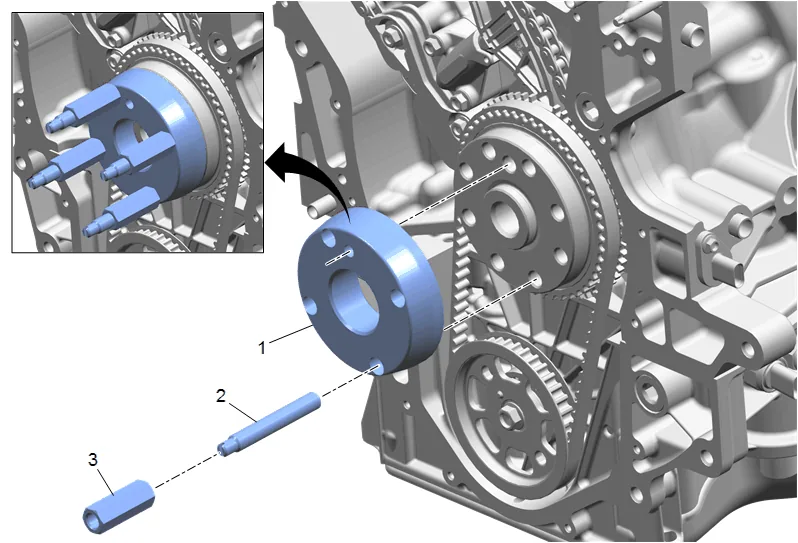
Click Image For Video
- Install the 4 EN-52446-4 Studs (2).
- Install the 4 EN-52446-5 Nuts (3) and hand tighten.
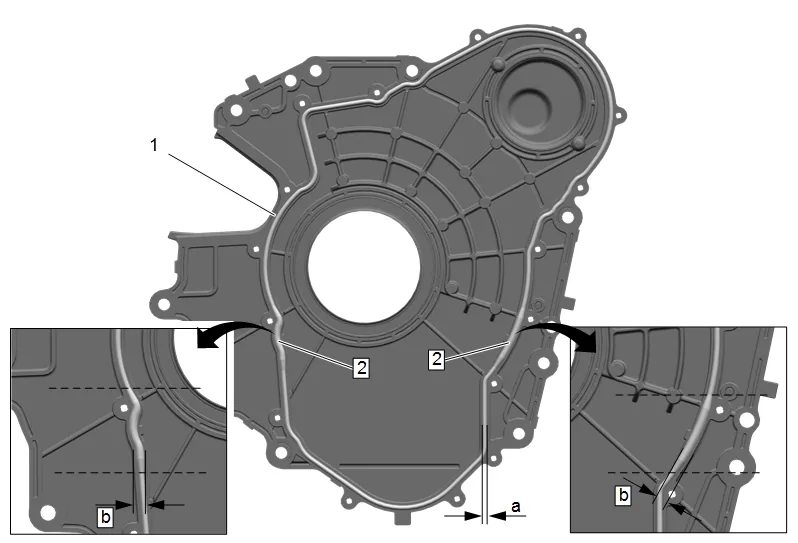
- Clean all sealing surfaces.
- Ensure proper use of room temperature vulcanizing (RTV) sealant. Use of Room Temperature Vulcanizing (RTV) and Anaerobic Sealant
- Apply a 4.0 mm (0.158 in) bead of sealer along the timing chain lower cover sealing path (1), dimension a. Increase the bead to 6.0 mm (0.236 in) at the two locations (2), dimension b. Adhesives, Fluids, Lubricants, and Sealers
-
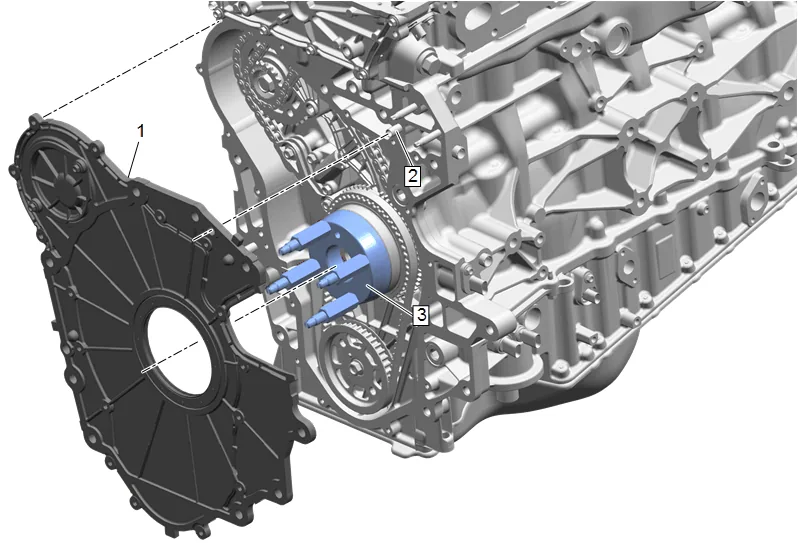
Align the timing chain lower cover (1) with the two transmission locating pins (2).
-
Timing Chain Lower Cover (1) » Install
-
Check that the crankshaft rear oil seal sits correct on the crankshaft.
-
Remove the EN-52446-2 Seal Protector (3).
-
Timing Chain Cover Bolt (1, 2) » Install and hand tighten [16x]
-
Timing Chain Cover Bolt » Install and tighten in sequence [16x] — Fastener Specifications
-
Reposition hoses as needed.
-
Install the EN-49979 Crankshaft Holder (1) with EN-956-1 Extension (3) to the crankshaft pulley.
-
Automatic Transmission Flex Plate (1) » Install
-
If NEW threaded components are being installed, loosen the adhesive using a metal pick or similar tool before proceeding. If threaded components are reused, prepare the threaded components using the following steps: 27.1. Remove any loose cured adhesive from the external threads of the components using a lint free cloth. 27.2. Thread the cleaned components into the internal mating threads and remove to loosen trapped cured adhesive. 27.3. Apply thread locking adhesive to the external threads of the components. Adhesives, Fluids, Lubricants, and Sealers 27.4. Ensure there are no gaps in the thread locking adhesive once applied to the component.
-
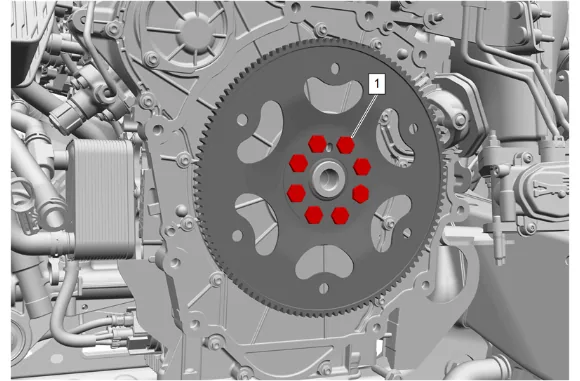
Automatic Transmission Flex Plate Bolt (2) » Install NEW and hand tighten [8x]
-
Automatic Transmission Flex Plate Bolt (1) » Tighten in sequence [8x] — Fastener Specifications
-
Remove the EN-49979 Crankshaft Holder (1) with EN-956-1 Extension (3) to the crankshaft pulley.
-
Transmission » Install — Automatic Transmission Removal and Installation
-
Fill the engine oil to the proper level with NEW engine oil. Engine Oil and Oil Filter Replacement