Instrument Cluster Replacement
Removal Procedure
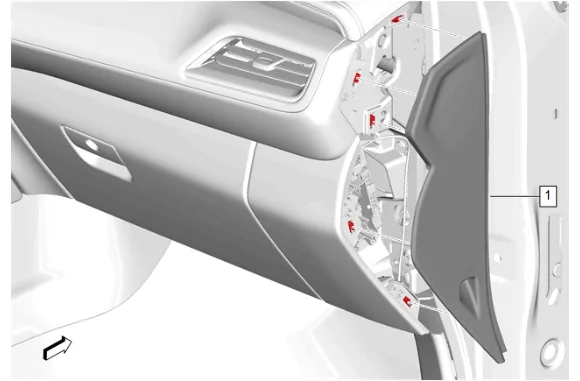
- Using a flat-bladed plastic trim tool, release the retaining clips.
- Instrument Panel Fuse Block Access Hole Cover (1) » Remove
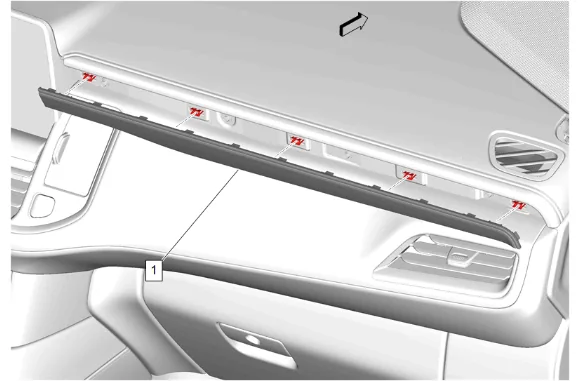
- Using a flat-bladed plastic trim tool, release the retaining clips.
- Instrument Panel Trim Plate Applique (1) » Remove
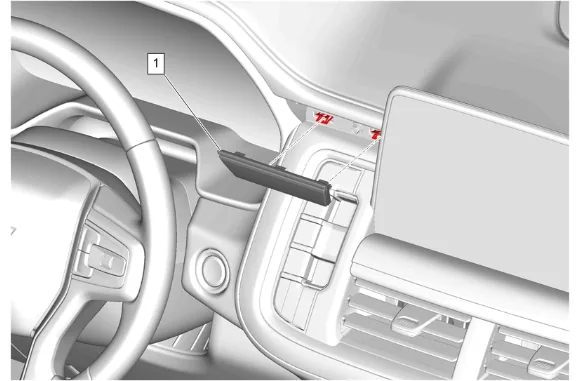
- Using a flat-bladed plastic trim tool, release the retaining clips.
- Instrument Panel Center Trim Plate Applique (1) » Remove
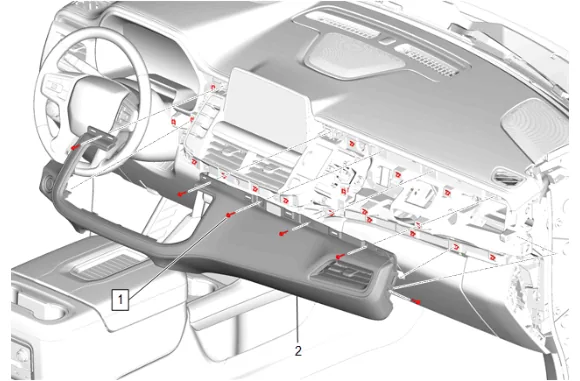
- Instrument Panel Upper Trim Panel Bolt (1) » Remove [6x]
- Using a flat-bladed plastic trim tool, release the retaining clips.
- Disconnect the electrical connector.
- Instrument Panel Trim Pad (2) » Remove
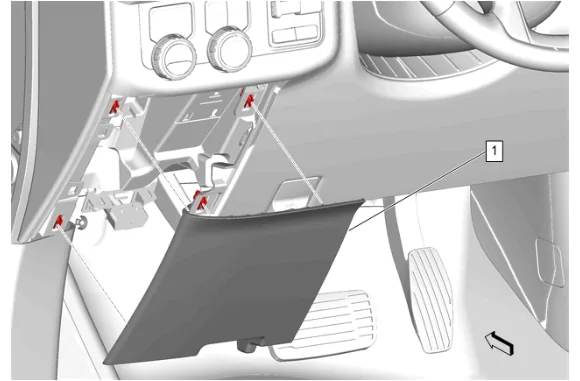
- Instrument Panel Lower Trim Panel Outer Filler (1) » Remove
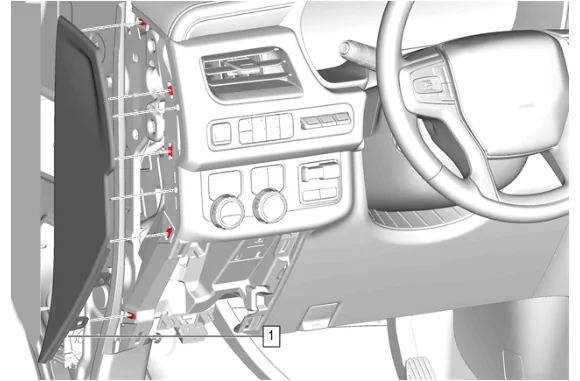
- Using a flat-bladed plastic trim tool, release the retaining clips.
- Instrument Panel Fuse Block Access Hole Cover (1) » Remove
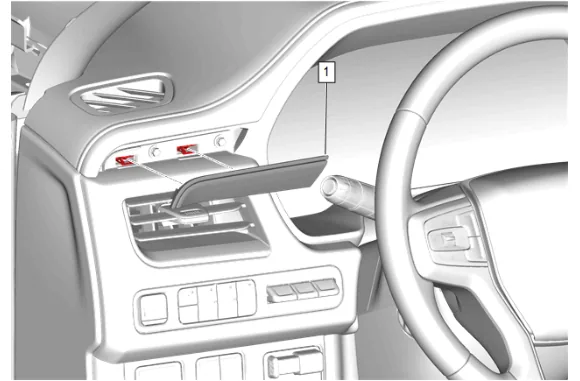
- Using a flat-bladed plastic trim tool, release the retaining clips.
- Instrument Panel Trim Plate Applique (1) » Remove
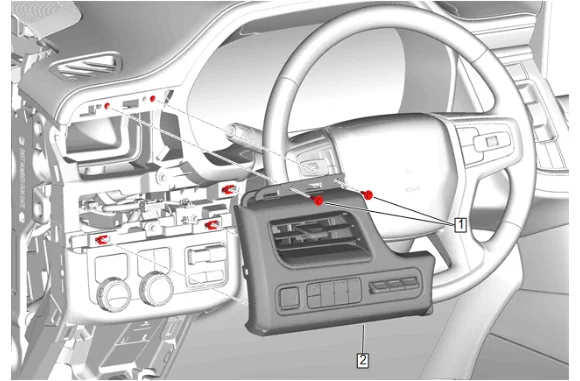
- Instrument Panel Trim Pad Bolt (1) » Remove [2x]
- Disconnect the electrical connectors.
- Instrument Panel Trim Pad (2) » Remove
- Extend the steering column to its furthest point to allow the instrument panel steering column upper trim cover to clear the instrument panel.
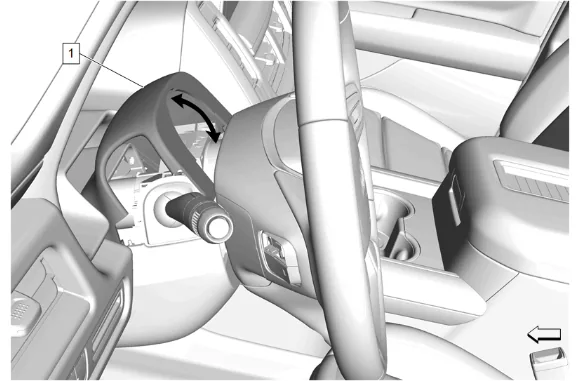
- Using a small plastic trim tool, separate the instrument panel steering column upper trim cover (1) from the instrument panel steering column lower trim cover.
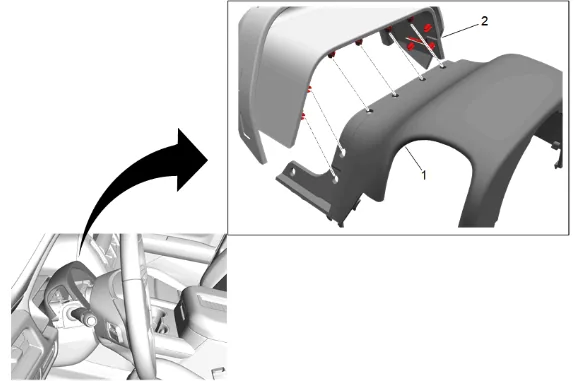
- Using a small plastic trim tool, separate the instrument panel steering column upper trim cover (1) from the instrument panel steering column opening closeout (2).
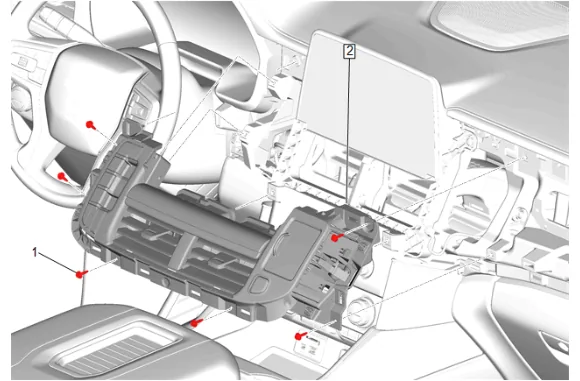
- Instrument Panel Center Trim Panel Bolt (1) » Remove [6x]
- Disconnect the electrical connectors.
- Instrument Panel Transmission Shift Opening Cover (2) » Remove
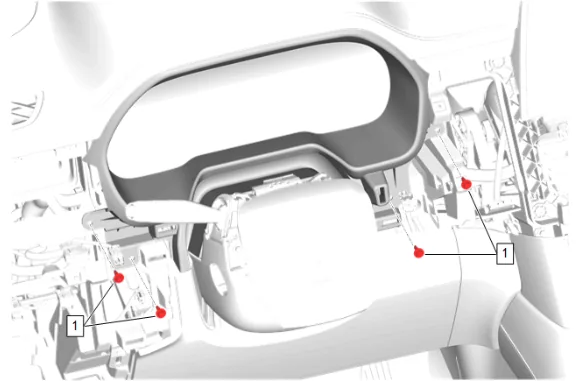
- Instrument Panel Cluster Trim Plate Bolt (1) » Remove [4x]
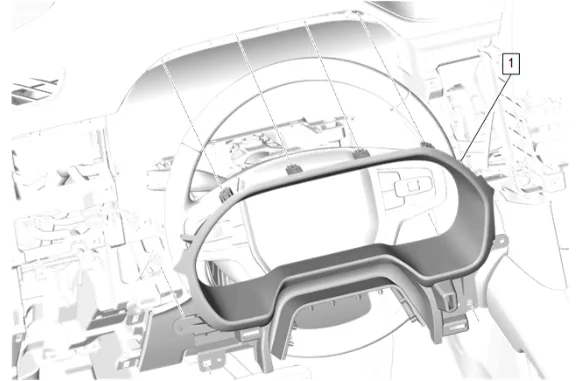
- Instrument Panel Cluster Trim Plate (1) » Remove
-
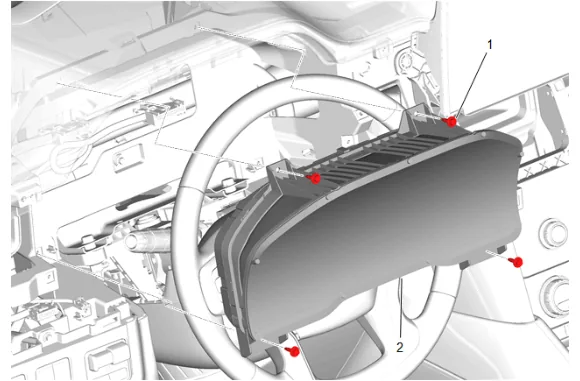
Instrument Cluster Bolt (1) » Remove [4x]
-
Disconnect the electrical connectors.
-
Instrument Cluster (2) » Remove Installation Procedure
-
Connect the electrical connectors.
-
Instrument Cluster (2) » Install
-
Instrument Cluster Bolt (1) » Install and tighten [4x] — Fastener Specifications
-
Instrument Panel Cluster Trim Plate (1) » Install
-
Instrument Panel Cluster Trim Plate Bolt (1) » Install and tighten [4x] — Fastener Specifications
-
Connect the electrical connectors.
-
Instrument Panel Transmission Shift Opening Cover (2) » Install
-
Instrument Panel Center Trim Panel Bolt (1) » Install and tighten [6x] — Fastener Specifications
-
Clip the instrument panel steering column opening closeout (2) to the instrument panel steering column upper trim cover (1).
-
Secure the instrument panel steering column upper trim cover (1) to the instrument panel steering column lower trim cover.
-
Connect the electrical connectors.
-
Instrument Panel Trim Pad (2) » Install
-
Instrument Panel Trim Pad Bolt (1) » Install and tighten [2x] — Fastener Specifications
-
Instrument Panel Trim Plate Applique (1) » Install
-
Instrument Panel Fuse Block Access Hole Cover (1) » Install
-
Instrument Panel Lower Trim Panel Outer Filler (1) » Install
-
Connect the electrical connector.
-
Instrument Panel Trim Pad (2) » Install
-
Instrument Panel Upper Trim Panel Bolt (1) » Install and tighten [6x] — Fastener Specifications
-
Instrument Panel Center Trim Plate Applique (1) » Install
-
Instrument Panel Trim Plate Applique (1) » Install
-
Instrument Panel Fuse Block Access Hole Cover (1) » Install
-
Perform the necessary programming and setup procedure: Control Module References