Steering Column Removal and Installation
- Disable the SIR system. SIR Disabling and Enabling
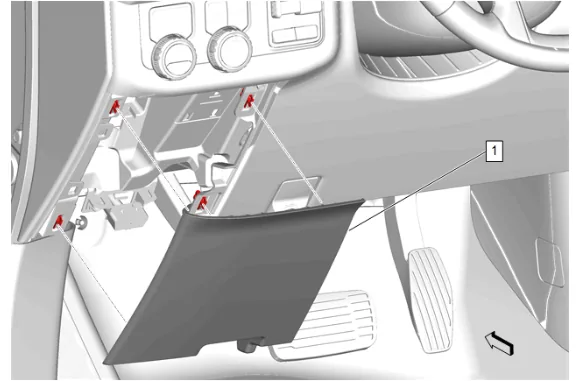
- Instrument Panel Lower Trim Panel Outer Filler (1) » Remove
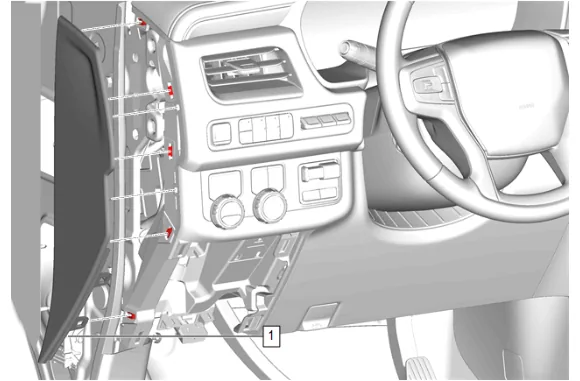
- Using a flat-bladed plastic trim tool, release the retaining clips.
- Instrument Panel Fuse Block Access Hole Cover (1) » Remove
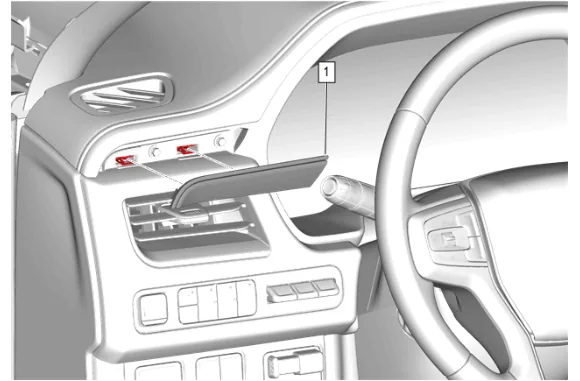
- Using a flat-bladed plastic trim tool, release the retaining clips.
- Instrument Panel Trim Plate Applique (1) » Remove
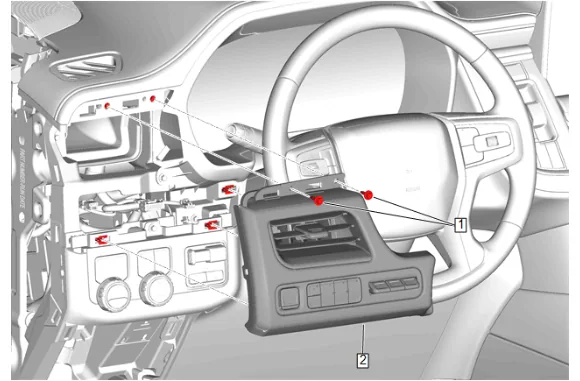
- Instrument Panel Trim Pad Bolt (1) » Remove [2x]
- Disconnect the electrical connectors.
- Instrument Panel Trim Pad (2) » Remove
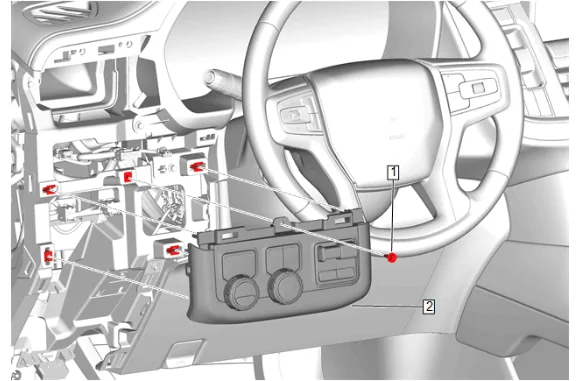
- Instrument Panel Switch Trim Plate Bolt (1) » Remove
- Disconnect the electrical connectors.
- Instrument Panel Switch Trim Plate (2) » Remove
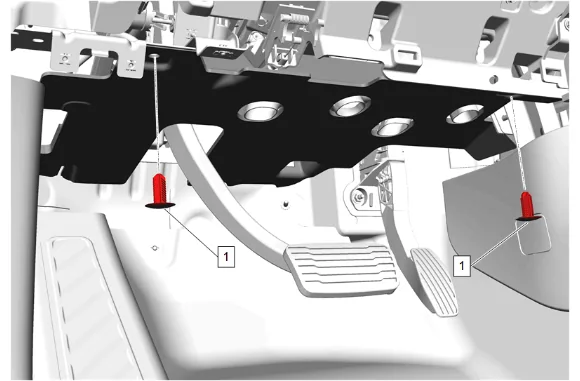
- Instrument Panel Lower Insulator Retainer (1) » Remove [2x]
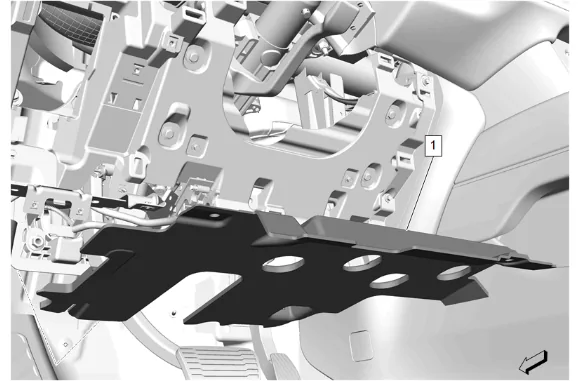
- Instrument Panel Lower Trim Panel Insulator (1) » Remove
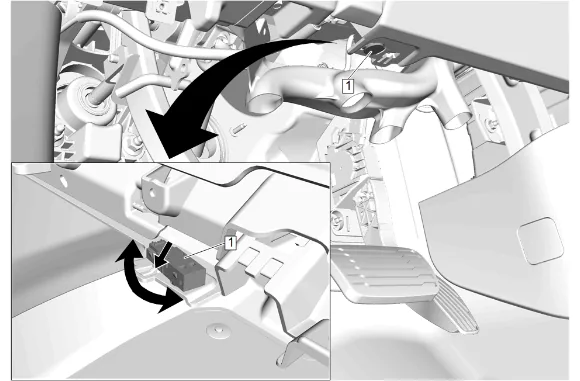
- Release the retaining tab.
- Rotate the front floor courtesy lamp (1) a quarter turn counterclockwise to release.
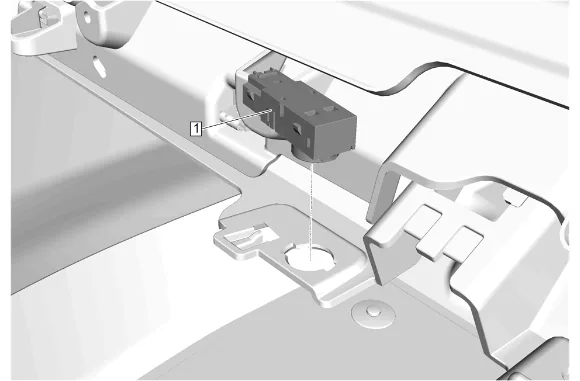
- Front Floor Courtesy Lamp (1) » Remove
- Disconnect the electrical connector.
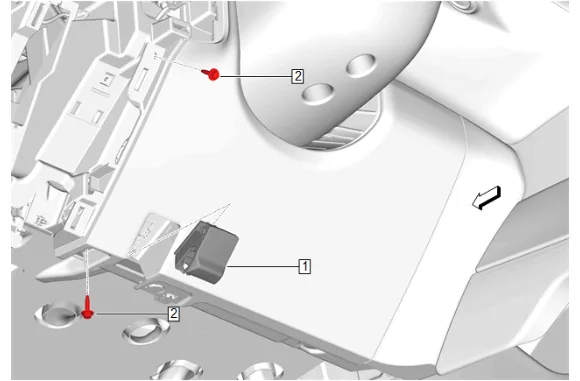
- Hood Primary Latch Release Cable Handle (1) » Release
- Instrument Panel Knee Bolster Bolt (2) » Remove [2x]
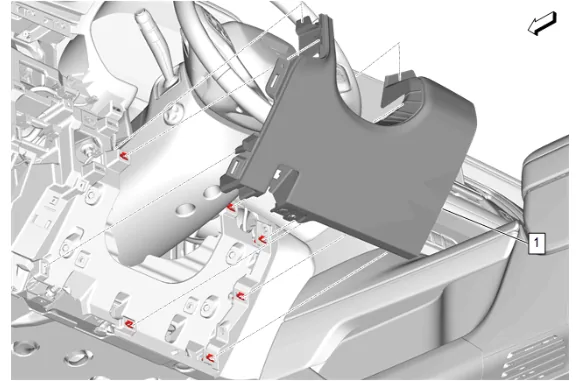
- Instrument Panel Knee Bolster (1) » Remove
- Extend the steering column to its furthest point to allow the instrument panel steering column upper trim cover to clear the instrument panel.
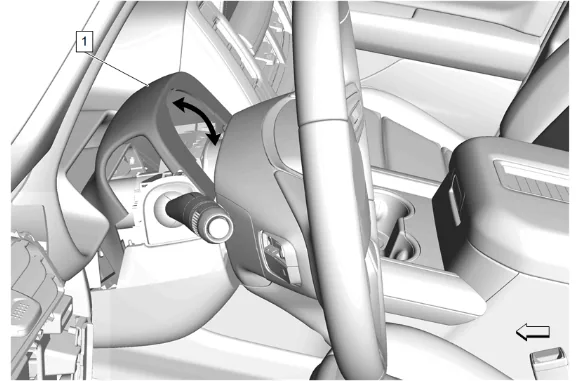
- Using a small plastic trim tool, separate the instrument panel steering column upper trim cover (1) from the instrument panel steering column lower trim cover.
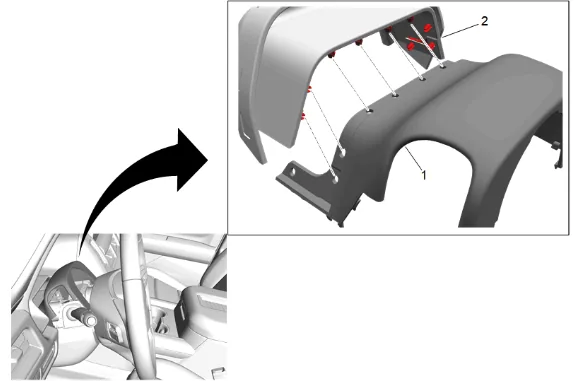
- Using a small plastic trim tool, separate the instrument panel steering column upper trim cover (1) from the instrument panel steering column opening closeout (2).
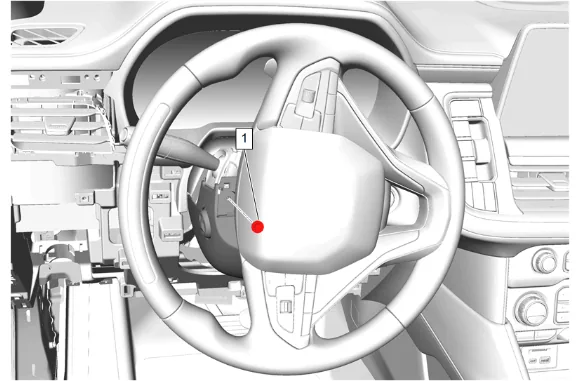
- Turn the steering wheel approximately 90 degrees to the left of the centered position.
- Instrument Panel Steering Column Lower Trim Cover Bolt (1) » Remove
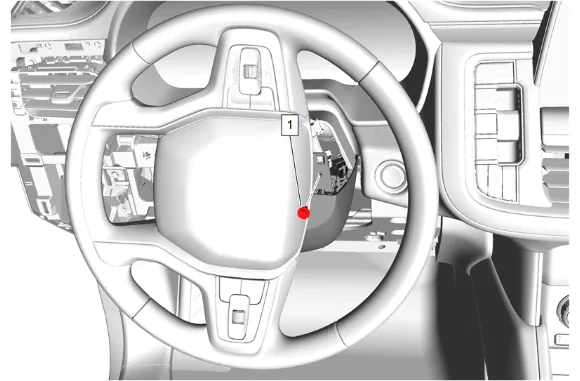
- Turn the steering wheel approximately 90 degrees to the right of the centered position.
- Instrument Panel Steering Column Lower Trim Cover Bolt (1) » Remove
- Turn the steering wheel to the centered position.
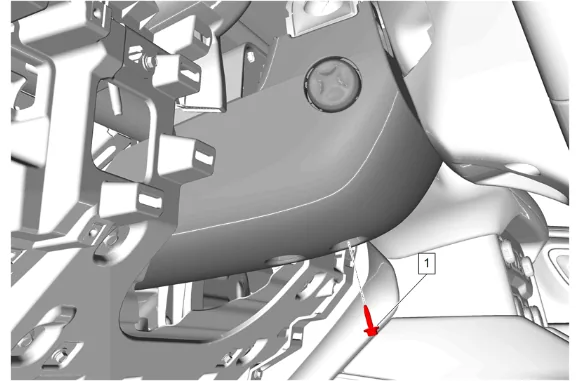
- Instrument Panel Steering Column Lower Trim Cover Bolt (1) » Remove
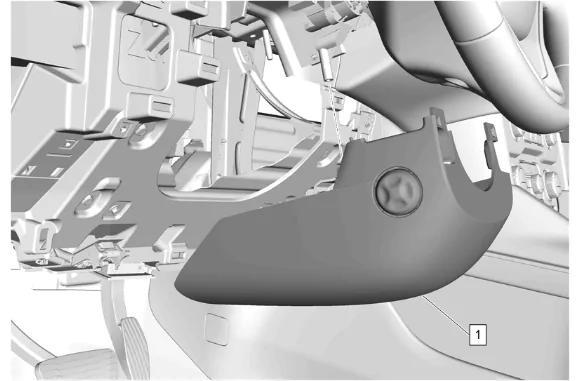
- Instrument Panel Steering Column Lower Trim Cover (1) » Remove
- { If equipped } Disconnect the electrical connectors.
- Install an appropriate device to prevent the steering column from rotating.
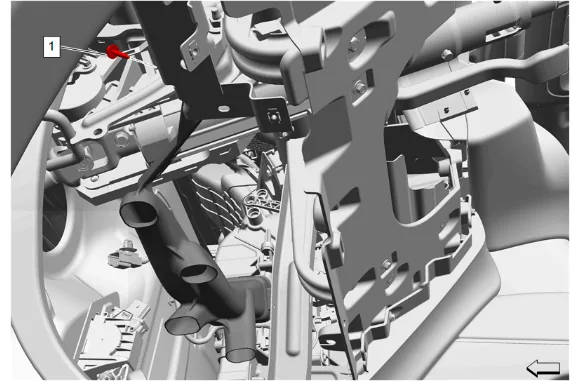
- Floor Front Air Outlet Duct Bolt (1) » Remove
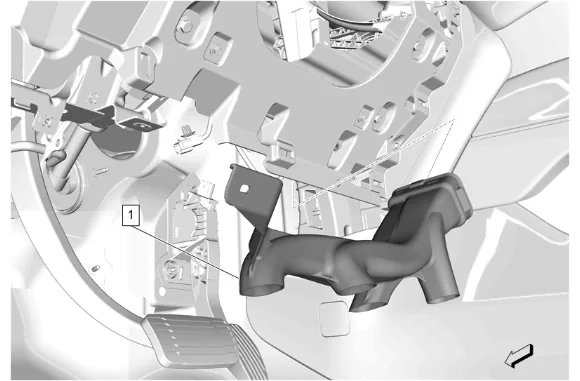
- Floor Front Air Outlet Duct - Left Side (1) » Remove
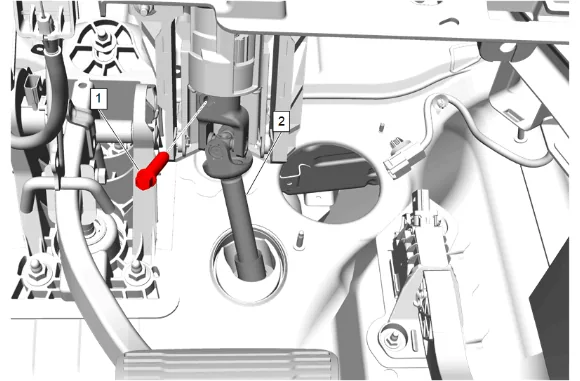
- Upper Intermediate Steering Shaft Bolt (1) » Remove
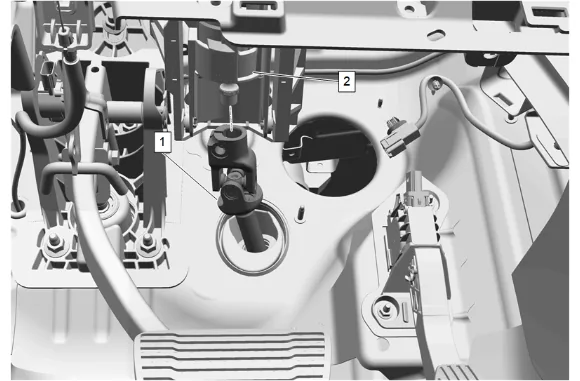
- Upper Intermediate Steering Shaft (1) @ Steering Column (2) » Separate
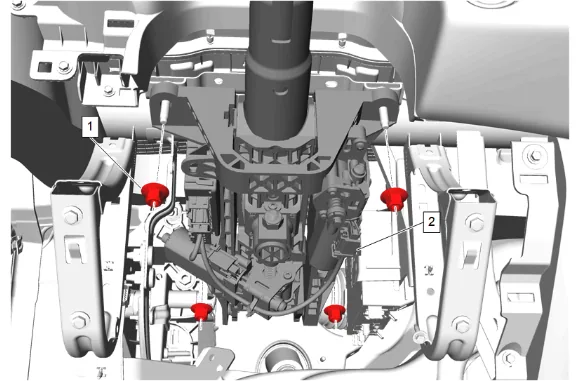
- Steering Column Nut (1) » Remove [4x]
- Disconnect the steering column electrical connectors as necessary.
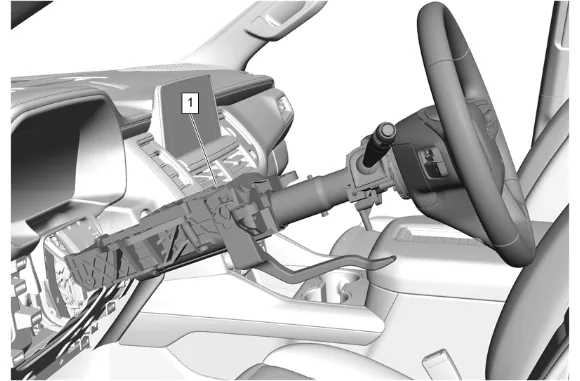
-
Steering Column (1) » Remove Installation Procedure
-
Steering Column (1) » Install
-
Connect the steering column electrical connectors.
-
Steering Column Nut (1) » Install and tighten [4x] — Fastener Specifications
-
Upper Intermediate Steering Shaft (1) » Install
-
Upper Intermediate Steering Shaft Bolt (1) » Install and tighten — Fastener Specifications
-
Floor Front Air Outlet Duct - Left Side (1) » Install
-
Floor Front Air Outlet Duct Bolt (1) » Install and tighten — Fastener Specifications
-
Remove the device used to prevent the steering column from rotating.
-
Instrument Panel Steering Column Lower Trim Cover (1) » Install
-
{ If equipped } Connect the electrical connector.
-
Instrument Panel Steering Column Lower Trim Cover Bolt (1) » Install and tighten — Fastener Specifications
-
Turn the steering wheel approximately 90 degrees to the right of the centered position.
-
Instrument Panel Steering Column Lower Trim Cover Bolt (1) » Install and tighten — Fastener Specifications
-
Turn the steering wheel approximately 90 degrees to the left of the centered position.
-
Instrument Panel Steering Column Lower Trim Cover Bolt (1) » Install and tighten — Fastener Specifications
-
Turn the steering wheel to the centered position.
-
Clip the instrument panel steering column opening closeout (2) to the instrument panel steering column upper trim cover (1).
-
Secure the instrument panel steering column upper trim cover (1) to the instrument panel steering column lower trim cover.
-
Instrument Panel Knee Bolster (1) » Install
-
Instrument Panel Knee Bolster Bolt (2) » Install and tighten [2x] — Fastener Specifications
-
Hood Primary Latch Release Cable Handle (1) » Install
-
Connect the electrical connector.
-
Front Floor Courtesy Lamp (1) » Install
-
Rotate the front floor courtesy lamp (1) a quarter turn clockwise to secure.
-
Secure the retaining tab.
-
Instrument Panel Lower Trim Panel Insulator (1) » Install
-
Instrument Panel Lower Insulator Retainer (1) » Install [2x]
-
Connect the electrical connectors.
-
Instrument Panel Switch Trim Plate (2) » Install
-
Instrument Panel Switch Trim Plate Bolt (1) » Install and tighten — Fastener Specifications
-
Connect the electrical connectors.
-
Instrument Panel Trim Pad (2) » Install
-
Instrument Panel Trim Pad Bolt (1) » Install and tighten [2x] — Fastener Specifications
-
Instrument Panel Trim Plate Applique (1) » Install
-
Instrument Panel Fuse Block Access Hole Cover (1) » Install
-
Instrument Panel Lower Trim Panel Outer Filler (1) » Install
-
Enable the SIR System. SIR Disabling and Enabling