Engine Front Cover Replacement
Removal Procedure
- Oil Filler Cap » Remove
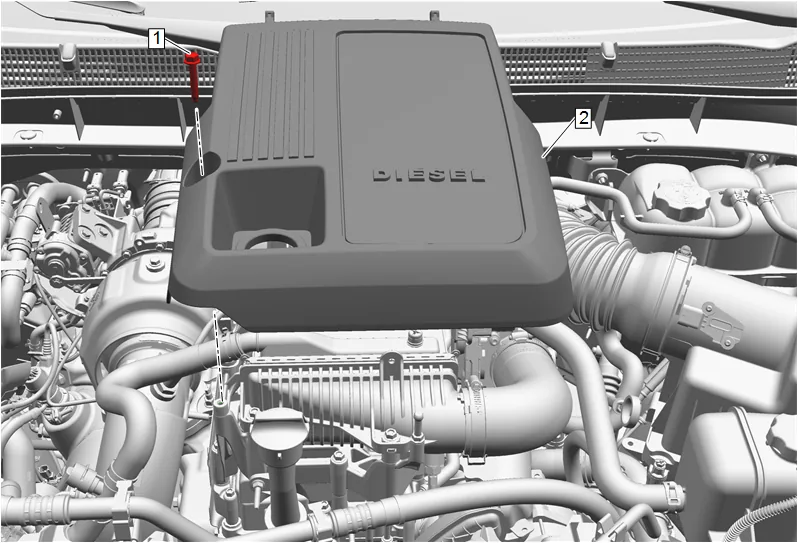
- Intake Manifold Cover Bolt (1) » Remove
- Intake Manifold Cover (2) » Remove
- Install the oil filler cap after removal of the intake manifold cover to prevent debris from falling into the engine.
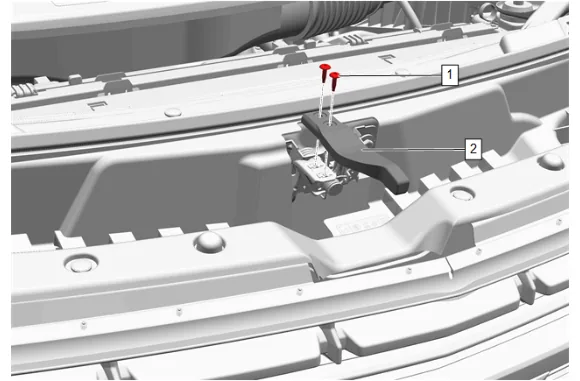
- { If equipped } Hood Latch Actuator Bolt (1) » Remove [2x]
- { If equipped } Hood Secondary Latch Release Handle (2) » Remove
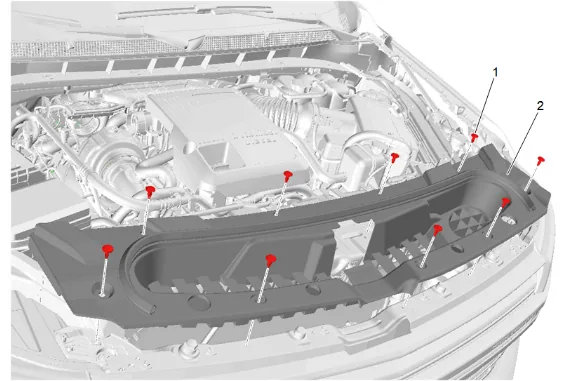
- Intake Air Baffle Retainer (1) » Remove [9x]
- Intake Air Splash Shield (2) » Remove
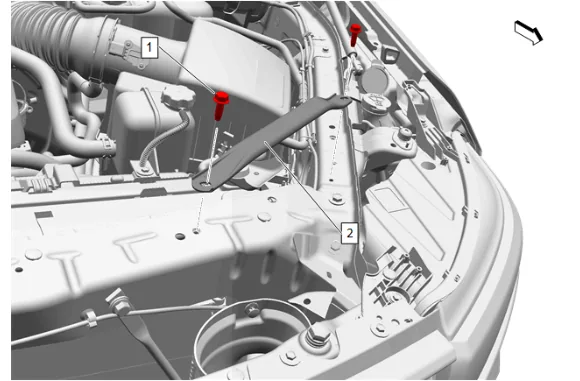
- Front End Sheet Metal Diagonal Brace Bolt - Left Side and Right Side (1) » Remove [4x]
- Front End Sheet Metal Diagonal Brace - Left Side and Right Side (2) » Remove [2x]
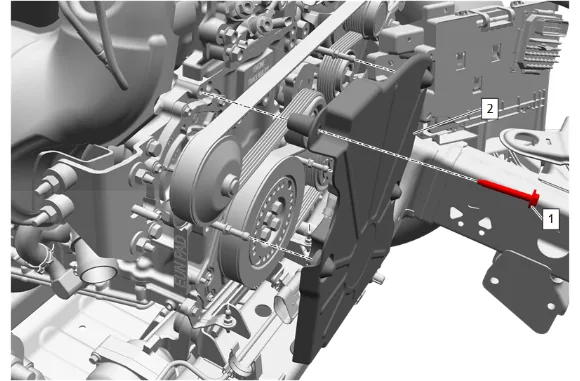
- Engine Front Cover Bolt (1) » Remove
- Pull forward and upward on the engine front cover (2) to release the 5 retaining grommets from the ball studs.
- Raise and support the vehicle. Lifting and Jacking the Vehicle
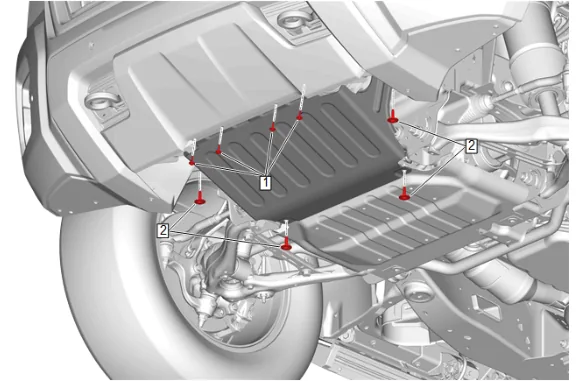
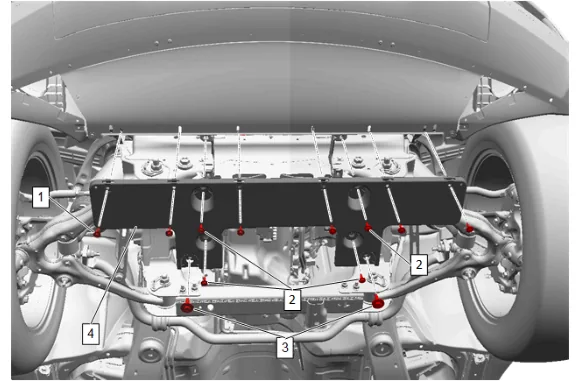
- {with RC1} Remove the underbody splash shield. 14.1. Front Bumper Fascia Skid Plate Bolt (1) » Remove [4x] 14.2. Underbody Splash Shield Bolt (2) » Remove [4x]
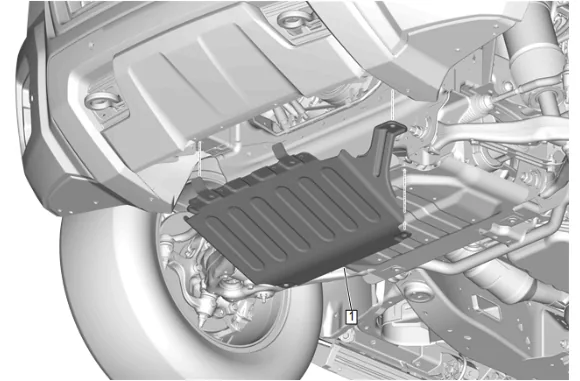
14.3. Underbody Splash Shield (1) » Remove
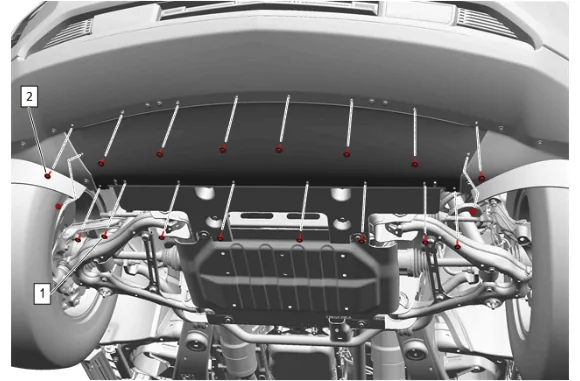
- {without RC1} Remove the front bumper fascia extension. 15.1. Front Bumper Fascia Air Deflector Bolt (1) » Remove [10x] 15.2. Front Bumper Fascia Extension Bolt (2) » Remove [8x]
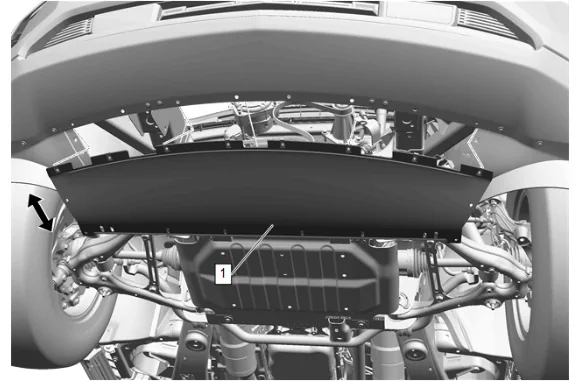
15.3. Pull the front bumper fascia extension (1) rearward and down from the front bumper fascia.
-
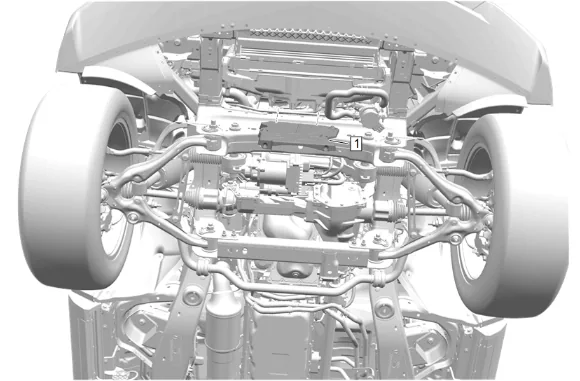
Remove the engine front cover (1) from the bottom of the vehicle. Installation Procedure
-
Install the engine front cover (1) from the bottom of the vehicle.
-
{without RC1} Install the front bumper fascia extension.
2.4. Front Bumper Fascia Extension (1) » Install
2.5. Front Bumper Fascia Extension Bolt (2) » Install and tighten [8x] — Fastener Specifications 2.6. Front Bumper Fascia Air Deflector Bolt (1) » Install and tighten [10x] — Fastener Specifications
- {with RC1} Install the underbody splash shield. 3.1. Underbody Splash Shield (1) » Install
3.2. Underbody Splash Shield Bolt (2) » Install and tighten[4x] — Fastener Specifications 3.3. Front Bumper Fascia Skid Plate Bolt (1) » Install and tighten[4x] — Fastener Specifications 4. Lower the vehicle.
- Push down and rearward on the engine front cover (2) to engage the 5 retaining grommets to the ball studs.
- Engine Front Cover Bolt (1) » Install and tighten — Fastener Specifications
-
Front End Sheet Metal Diagonal Brace - Left Side and Right Side (2) » Install [2x]
-
If NEW threaded components are being installed, loosen the adhesive using a metal pick or similar tool before proceeding. If threaded components are reused, prepare the threaded components using the following steps: 8.1. Remove any loose cured adhesive from the external threads of the components using a lint free cloth. 8.2. Thread the cleaned components into the internal mating threads and remove to loosen trapped cured adhesive. 8.3. Apply thread locking adhesive to the external threads of the components. Adhesives, Fluids, Lubricants, and Sealers 8.4. Ensure there are no gaps in the thread locking adhesive once applied to the component.
-
Front End Sheet Metal Diagonal Brace Bolt - Left Side and Right Side (1) » Install and tighten [4x] — Fastener Specifications
-
Intake Air Splash Shield (2) » Install
-
Intake Air Baffle Retainer (1) » Install [9x]
-
{ If equipped } Hood Secondary Latch Release Handle (2) » Install
-
{ If equipped } Hood Latch Actuator Bolt (1) » Install and tighten [2x] — Fastener Specifications
-
Oil Filler Cap » Remove
-
Intake Manifold Cover (2) » Install
-
Intake Manifold Cover Bolt (1) » Install and tighten — Fastener Specifications
-
Oil Filler Cap » Install