Radio Speaker Amplifier Replacement
Removal Procedure
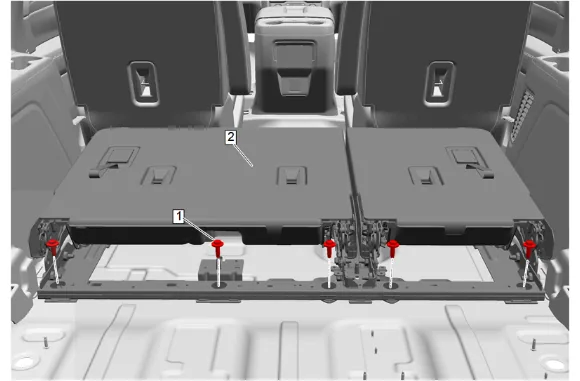
- 3rd Row Seat (2) » Remove — 3rd Row Seat Removal and Installation
- Disable the SIR system. SIR Disabling and Enabling
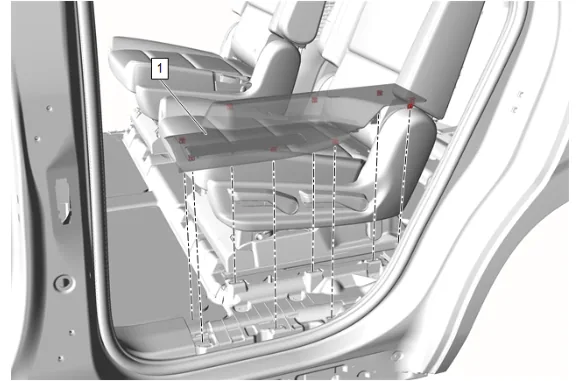
- Using a flat-bladed plastic trim tool, release the retaining clips.
- Rear Side Door Sill Garnish Molding (1) » Remove
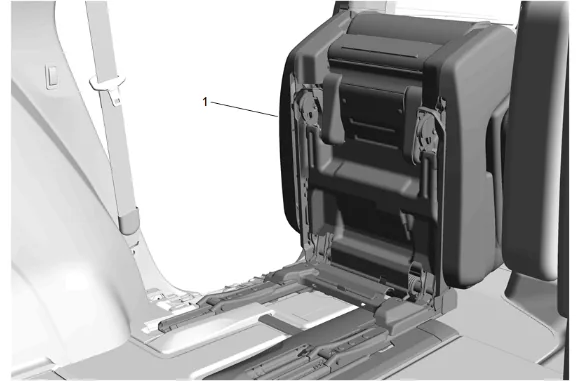
- Place the rear seat (1) in the fold and tumble position.
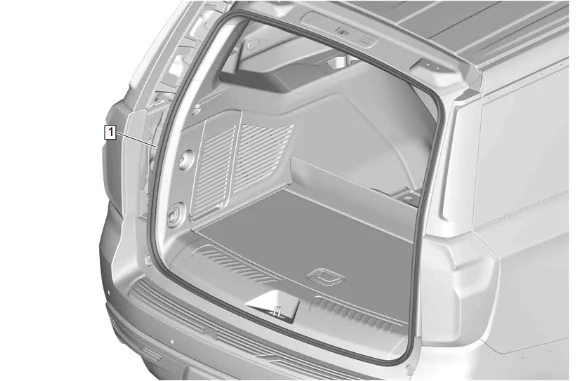
- Liftgate Weatherstrip (1) » Reposition
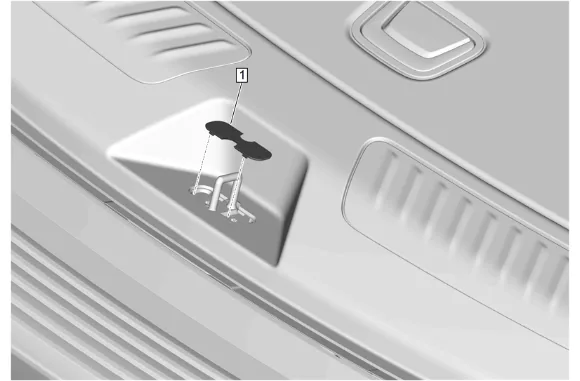
- Liftgate Lock Striker Cover (1) » Remove
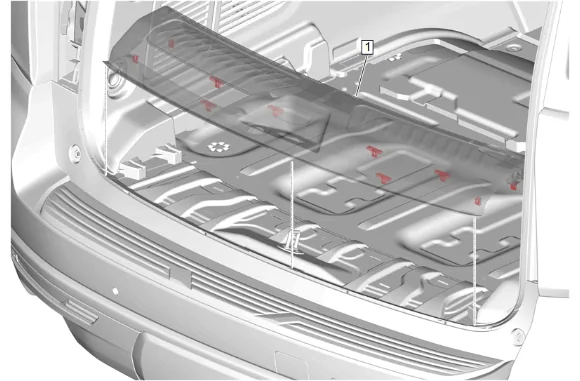
- Using a flat-bladed plastic trim tool, release the retaining clips.
- Rear End Trim Finish Panel (1) » Remove
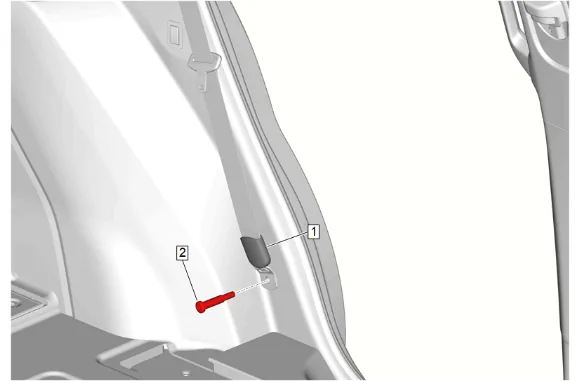
- Rear Seat Belt Retractor Sleeve (1) » Reposition
- Rear Seat Belt Anchor Plate Bolt (2) » Remove
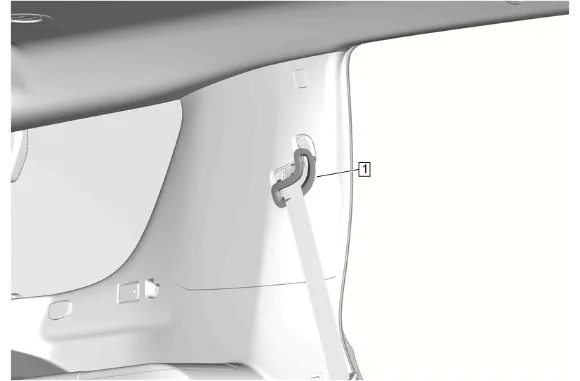
- Rear Seat Belt Opening Bezel (1) » Disengage
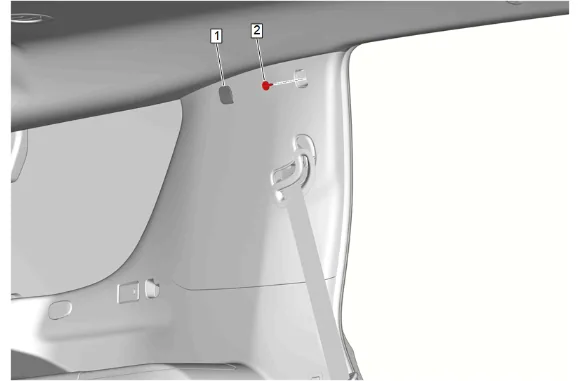
- Quarter Window Trim Finish Panel Bolt Cap (1) » Remove
- Quarter Window Trim Finish Panel Bolt (2) » Remove
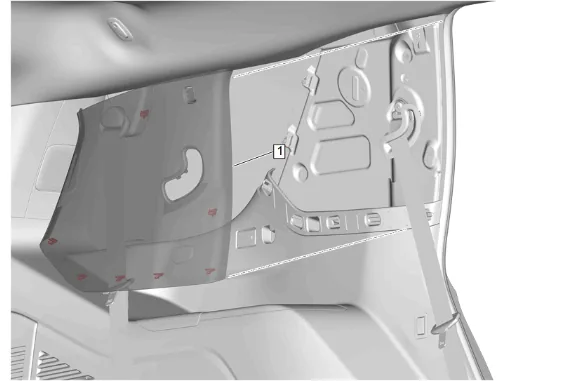
- Using a flat-bladed plastic trim tool, release the retaining clips.
- Body Lock Pillar Upper Trim Panel (1) » Remove
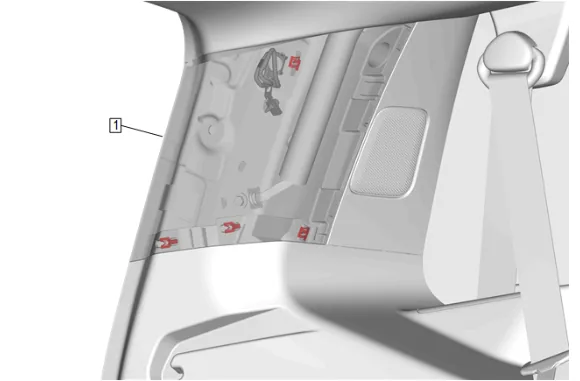
- Using a flat-bladed plastic trim tool, release the retaining clips.
- Pull the body side rear window garnish molding (1) outwards enough to access the tether fastener.
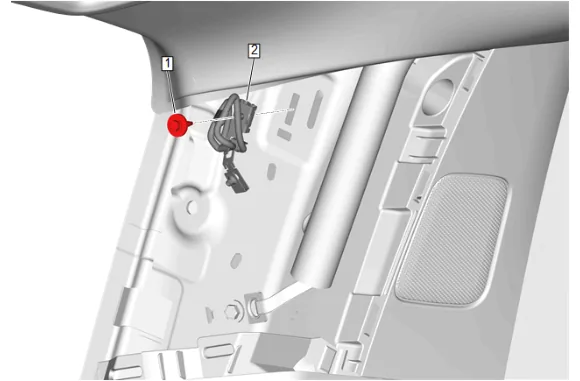
- Body Side Rear Window Garnish Molding Bolt (1) » Remove
- Body Side Rear Window Garnish Molding Tether Retaining Clip (2) » Remove
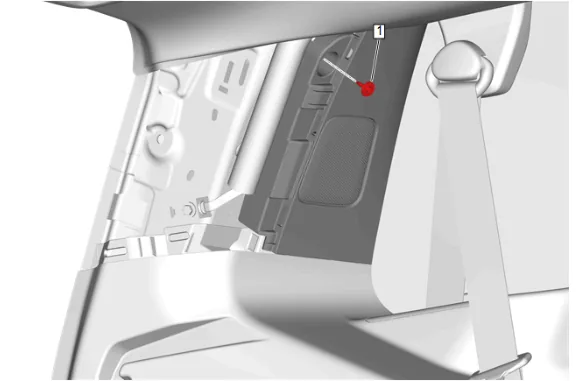
- Body Rear Corner Upper Garnish Molding Bolt (1) » Remove
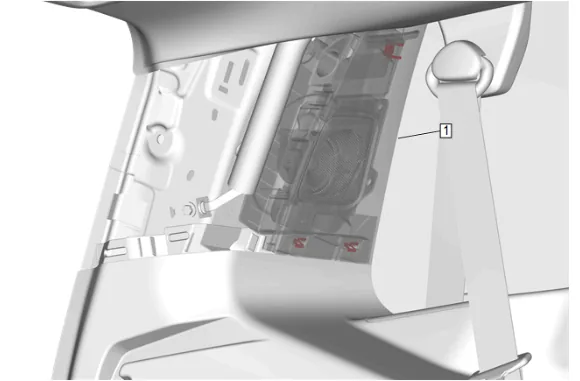
- Using a flat-bladed plastic trim tool, release the retaining clips.
- Body Rear Corner Upper Garnish Molding (1) » Remove
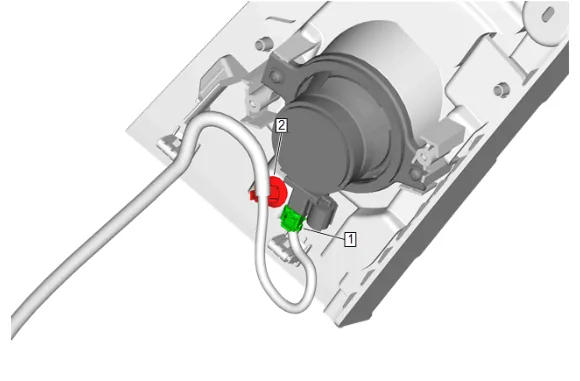
- Electrical Connector (1) » Disconnect
- Wiring Harness Retainer (2) » Remove
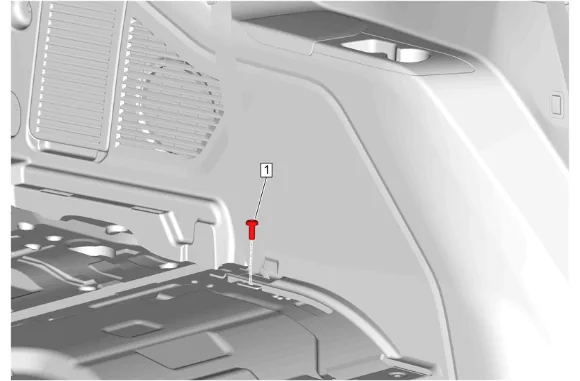
- 3rd Row Seat Belt Retractor Bolt - Lower (1) » Remove
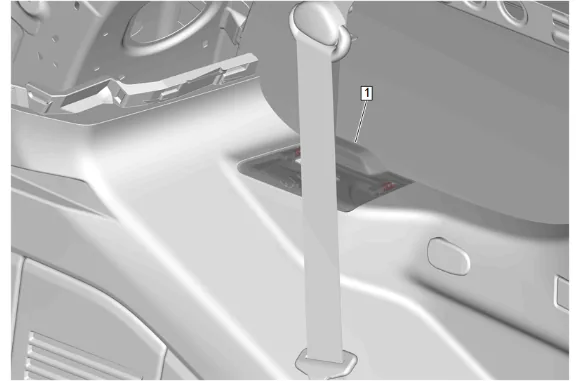
- Using a flat-bladed plastic trim tool, release the retaining clips.
- Rear Seat Belt Opening Bezel (1) » Remove
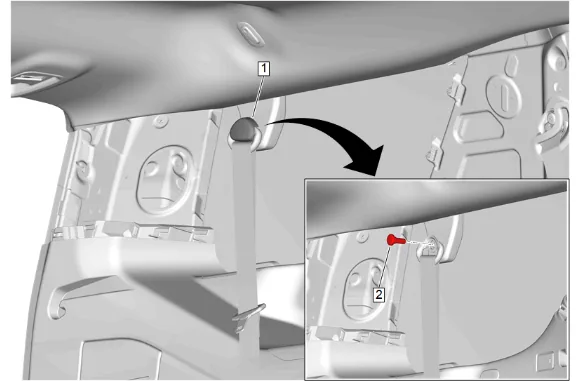
- 3rd Row Seat Belt Retractor Anchor Cover (1) » Open
- 3rd Row Seat Belt Retractor Bolt - Upper (2) » Remove
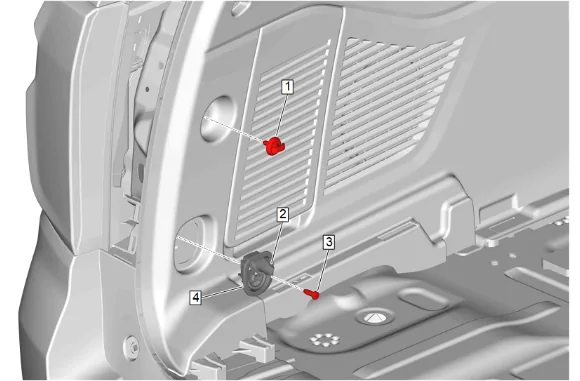
- Convenience Net Retainer (1) » Remove
- Cargo Tie Down Loop Bolt Cap (2) » Open
- Cargo Tie Down Loop Bolt (3) » Remove
- Cargo Tie Down Loop (4) » Remove
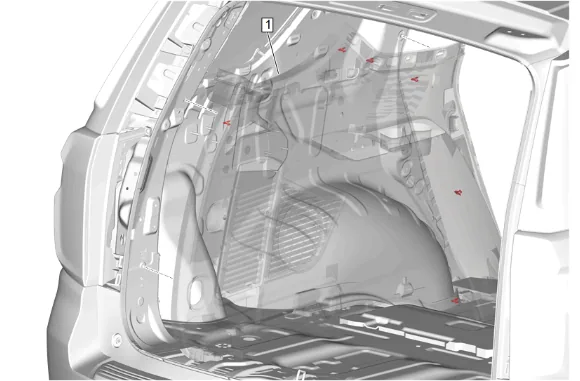
- Using a flat-bladed plastic trim tool, release the retaining clips.
- Quarter Lower Rear Trim Panel (1) » Remove
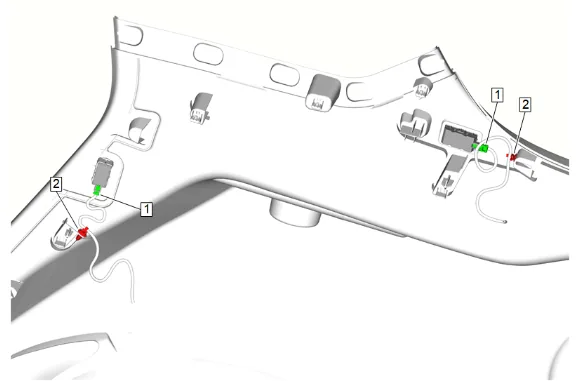
- Disconnect the electrical connectors (1).
- Remove the wiring harness retainers (2).
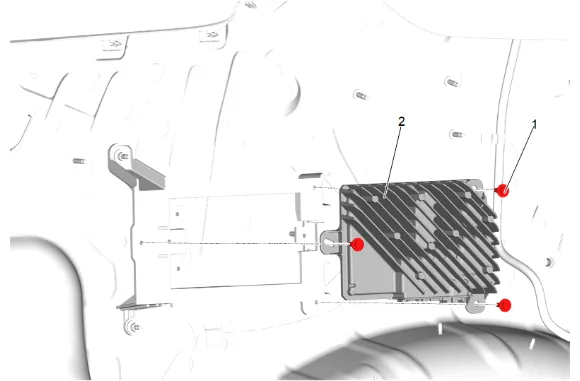
-
Disconnect all electrical connectors.
-
Radio Speaker Amplifier Bolt (1) » Remove [3x]
-
Radio Speaker Amplifier (2) » Remove Installation Procedure
-
Radio Speaker Amplifier (2) » Install
-
Radio Speaker Amplifier Bolt (1) » Install and tighten [3x] Fastener Specifications
-
Connect the electrical connectors.
-
Install the wiring harness retainers (2).
-
Connect the electrical connectors (1).
-
Quarter Lower Rear Trim Panel (1) » Install
-
Cargo Tie Down Loop (4) » Install
-
Cargo Tie Down Loop Bolt (3) » Install and tighten — Fastener Specifications
-
Cargo Tie Down Loop Bolt Cap (2) » Close
-
Convenience Net Retainer (1) » Install and tighten — Fastener Specifications
-
3rd Row Seat Belt Retractor Bolt - Upper (2) » Install and tighten — Fastener Specifications
-
3rd Row Seat Belt Retractor Anchor Cover (1) » Close
-
Rear Seat Belt Opening Bezel (1) » Install
-
3rd Row Seat Belt Retractor Bolt - Lower (1) » Install and tighten — Fastener Specifications
-
Wiring Harness Retainer (2) » Install
-
Electrical Connector (1) » Connect
-
Body Rear Corner Upper Garnish Molding (1) » Install
-
Body Rear Corner Upper Garnish Molding Bolt (1) » Install and tighten — Fastener Specifications
-
Body Side Rear Window Garnish Molding Tether Retaining Clip (2) » Install
-
Body Side Rear Window Garnish Molding Bolt (1) » Install and tighten — Fastener Specifications
- Body Side Rear Window Garnish Molding (1) » Install
-
Body Lock Pillar Upper Trim Panel (1) » Install
-
Quarter Window Trim Finish Panel Bolt (2) » Install and tighten — Fastener Specifications
-
Quarter Window Trim Finish Panel Bolt Cap (1) » Install
-
Rear Seat Belt Opening Bezel (1) » Install
-
Rear Seat Belt Retractor Anchor Plate Bolt (2) » Install and tighten — Fastener Specifications
-
Rear Seat Belt Retractor Sleeve (1) » Reposition
-
Rear End Trim Finish Panel (1) » Install
-
Liftgate Lock Striker Cover (1) » Install
-
Liftgate Weatherstrip (1) » Reposition
-
Return the rear seat (1) to the original position.
-
Rear Side Door Sill Garnish Molding (1) » Install
-
Enable the SIR System. SIR Disabling and Enabling
-
3rd Row Seat (2) » Install — 3rd Row Seat Removal and Installation
-
Perform the necessary programming and setup procedure: Control Module References