Limited Slip Differential Clutch Motor Replacement
Removal Procedure
- Raise and support the vehicle. Lifting and Jacking the Vehicle
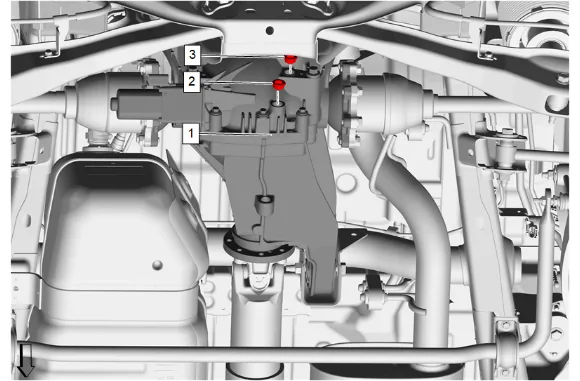
- Position a drain pan under the rear differential carrier (1).
- Rear Axle Housing Drain Plug (2) » Remove
- Rear Axle Housing Fill Plug (3) » Remove
- Clean the rear axle housing drain and fill plugs. Allow the fluid to completely drain.
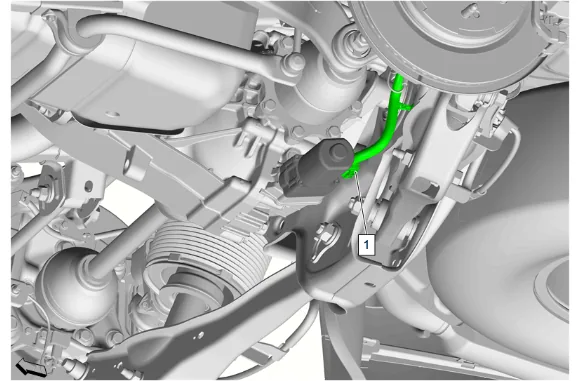
- Disconnect the limited slip differential clutch motor electrical connector (1)
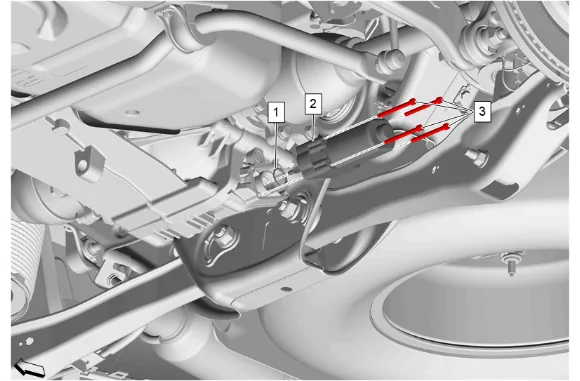
-
Limited Slip Differential Clutch Motor Bolt (3) » Remove [4x]
-
Limited Slip Differential Clutch Motor (2) » Remove
-
Limited Slip Differential Clutch Motor Seal (1) » Remove Installation Procedure
-
Limited Slip Differential Clutch Motor Seal (1) » Install
-
Limited Slip Differential Clutch Motor (2) » Install
-
Limited Slip Differential Clutch Motor Bolt (3) » Install and tighten [4x] — Fastener Specifications
-
Connect the limited slip differential clutch motor electrical connector (1).
- Rear Axle Housing Drain Plug (2) Install and tighten — Fastener Specifications
- Fill the rear differential carrier with the appropriate amount and type of axle lubricant: Approximate Fluid Capacities Adhesives, Fluids, Lubricants, and Sealers
- The gear lubricant level should be 1–2 mm (0.039-0.079 in) below the fill plug opening.
- Rear Axle Housing Fill Plug (3) » Install and tighten — Fastener Specifications
- Remove the support and lower the vehicle.