Hood Primary and Secondary Latch Replacement
Removal Procedure
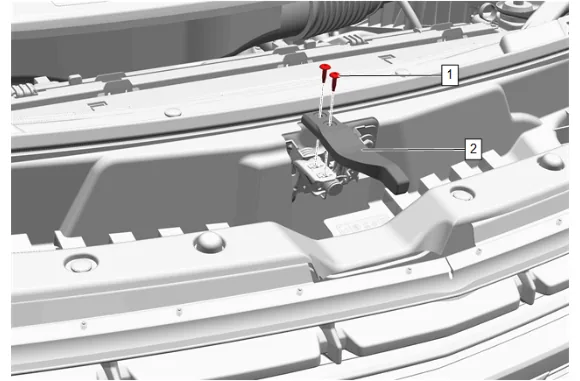
- Hood Latch Actuator Bolt (1) » Remove [2x]
- Hood Secondary Latch Release Handle (2) » Remove
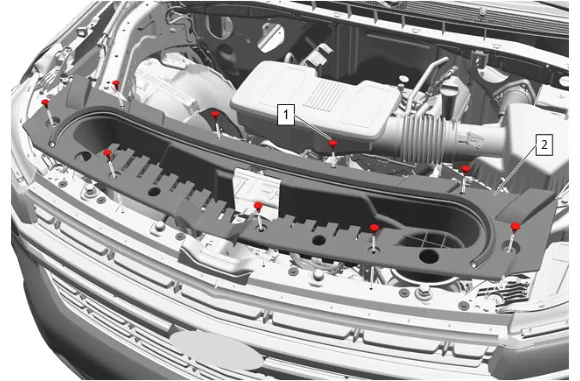
- Intake Air Baffle Retainer (1) » Remove [9x]
- Intake Air Splash Shield (2) » Remove
-
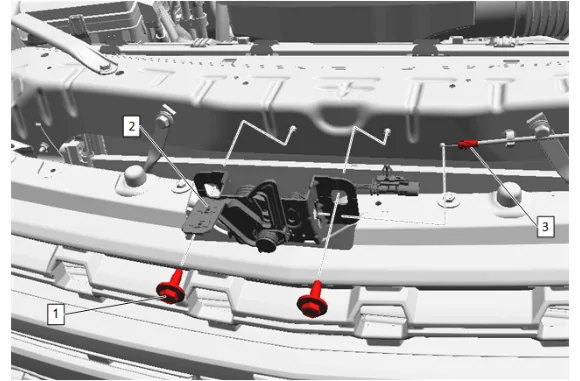
Hood Primary and Secondary Latch Bolt (1) » Remove [2x]
-
Hood Primary and Secondary Latch (2) » Remove
-
Disconnect the hood primary latch release cable (3) from the hood primary latch.
-
Disconnect the electrical connector.
-
Release wire harness retainer from under the upper tie bar. Installation Procedure
-
Hood Primary Latch Release Cable (3) » Install
-
Connect the electrical connector.
-
Install the wire harness retainer to the upper tie bar.
-
Hood Primary and Secondary Latch (2) » Install
-
Hood Primary and Secondary Latch Bolt (1) » Install and tighten [2x] — Fastener Specifications
-
Intake Air Splash Shield (2) » Install
-
Intake Air Baffle Retainer (1) » Install [9x]
-
Hood Secondary Latch Release Handle (2) » Install
-
Hood Latch Actuator Bolt (1) » Install and tighten [2x] — Fastener Specifications