Crankshaft Front Oil Seal Replacement
Single Use Fasteners and Components Air Conditioning Compressor and Condenser Hose Seal - Large Air Conditioning Compressor and Condenser Hose Seal - Small Crankshaft Front Oil Seal Transmission Fluid Cooler Seal [2x] Special Tools EN-956-1 Extension EN-49979 Crankshaft Holder EN-52452 Front Crankshaft Seal Installer Equivalent regional tools: Special Tools Removal Procedure
- Remove the charge air cooler, condenser, fan and radiator assembly from the vehicle. Charge Air Cooler, Condenser, Fan Motor, and Radiator Assembly Removal and Installation
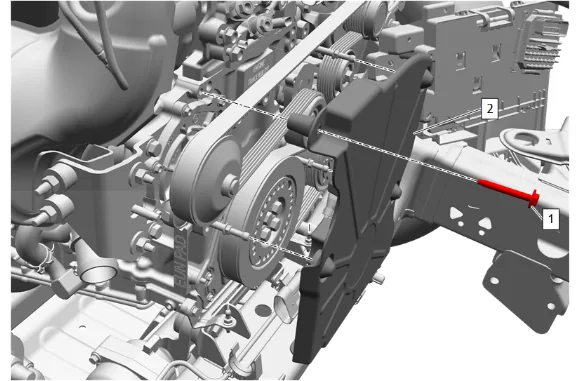
- Engine Front Cover Bolt (1) » Remove
- Engine Front Cover (2) » Remove
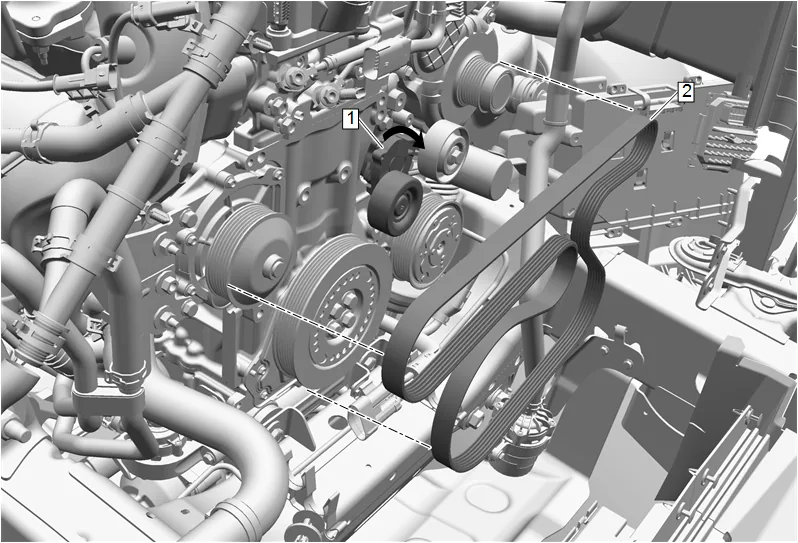
- Rotate the accessory drive primary belt tensioner (1) clockwise to release the drive belt tension.
- Slide the accessory drive primary belt (2) off of the belt idler pulley and slowly release the accessory drive primary belt tensioner (1).
- Remove the accessory drive primary belt (2) from the vehicle.
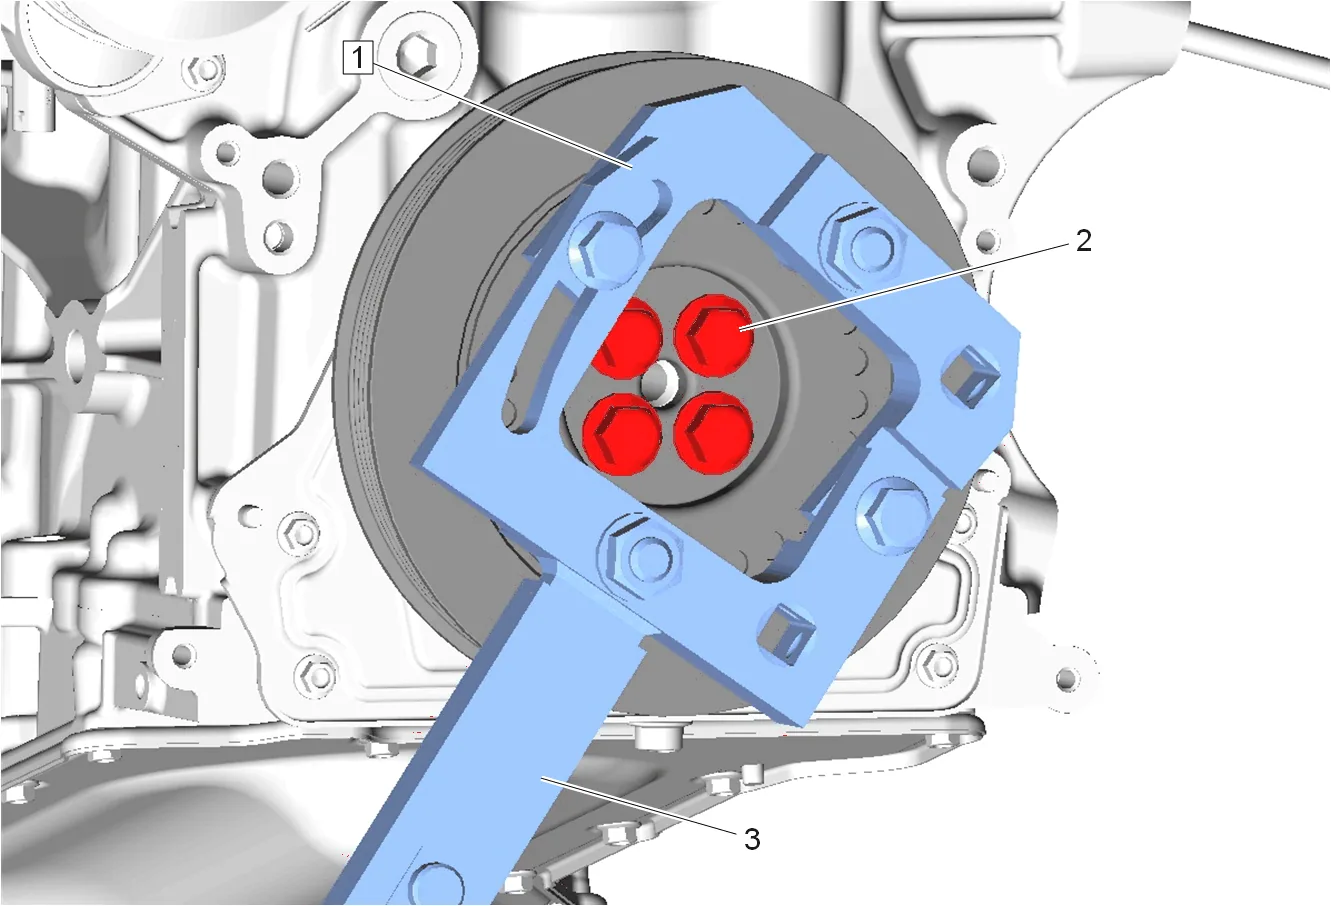
- Install the EN-49979 Crankshaft Holder (1) with EN-956-1 Extension (3) to the crankshaft pulley.
- Crankshaft Pulley Bolt (2) » Loosen [4x]
- Remove the EN-49979 Crankshaft Holder (1) with EN-956-1 Extension (3).
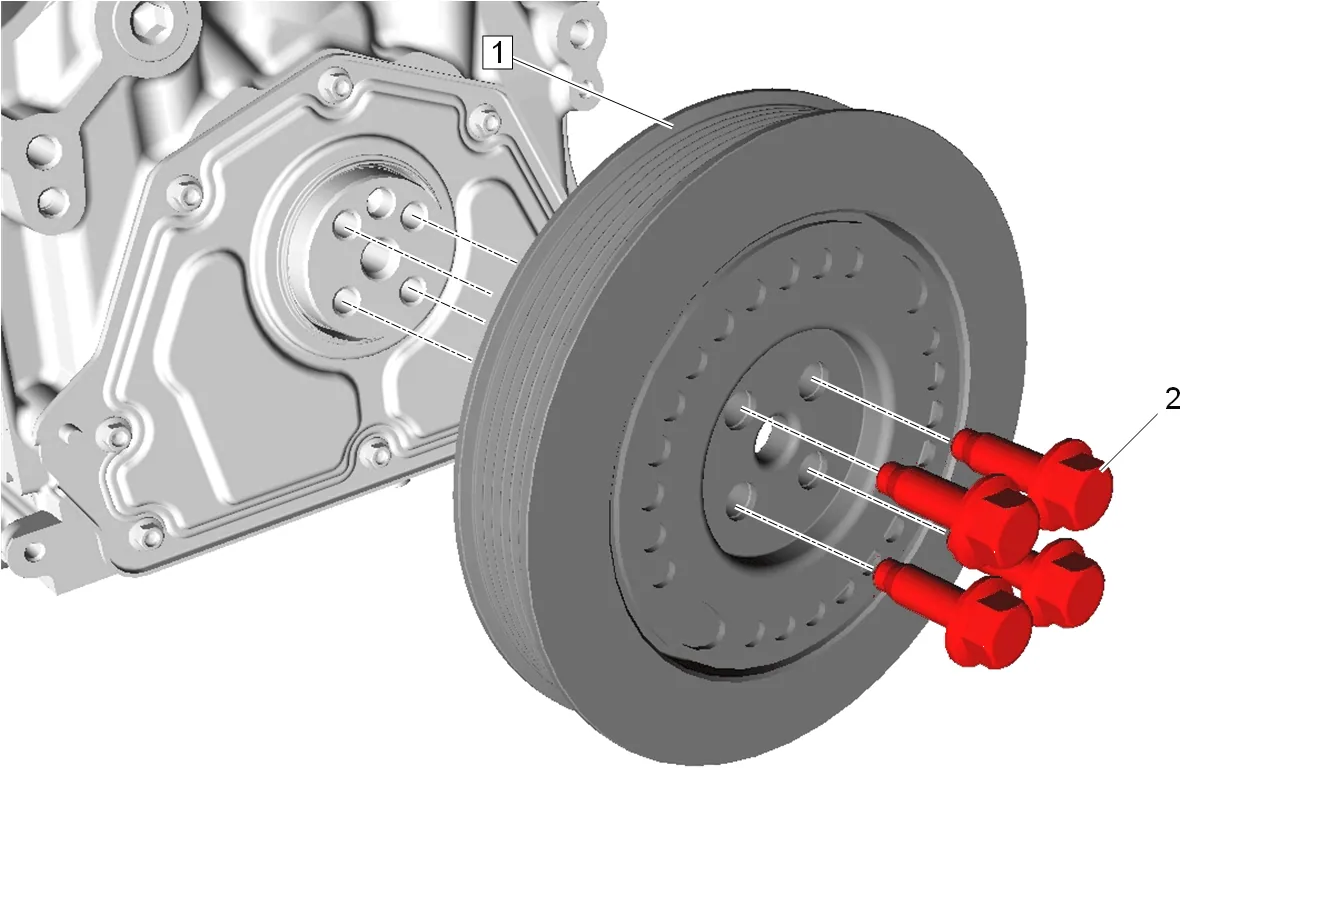
- Crankshaft Pulley Bolt (2) » Remove [4x]
- Crankshaft Pulley (1) » Remove
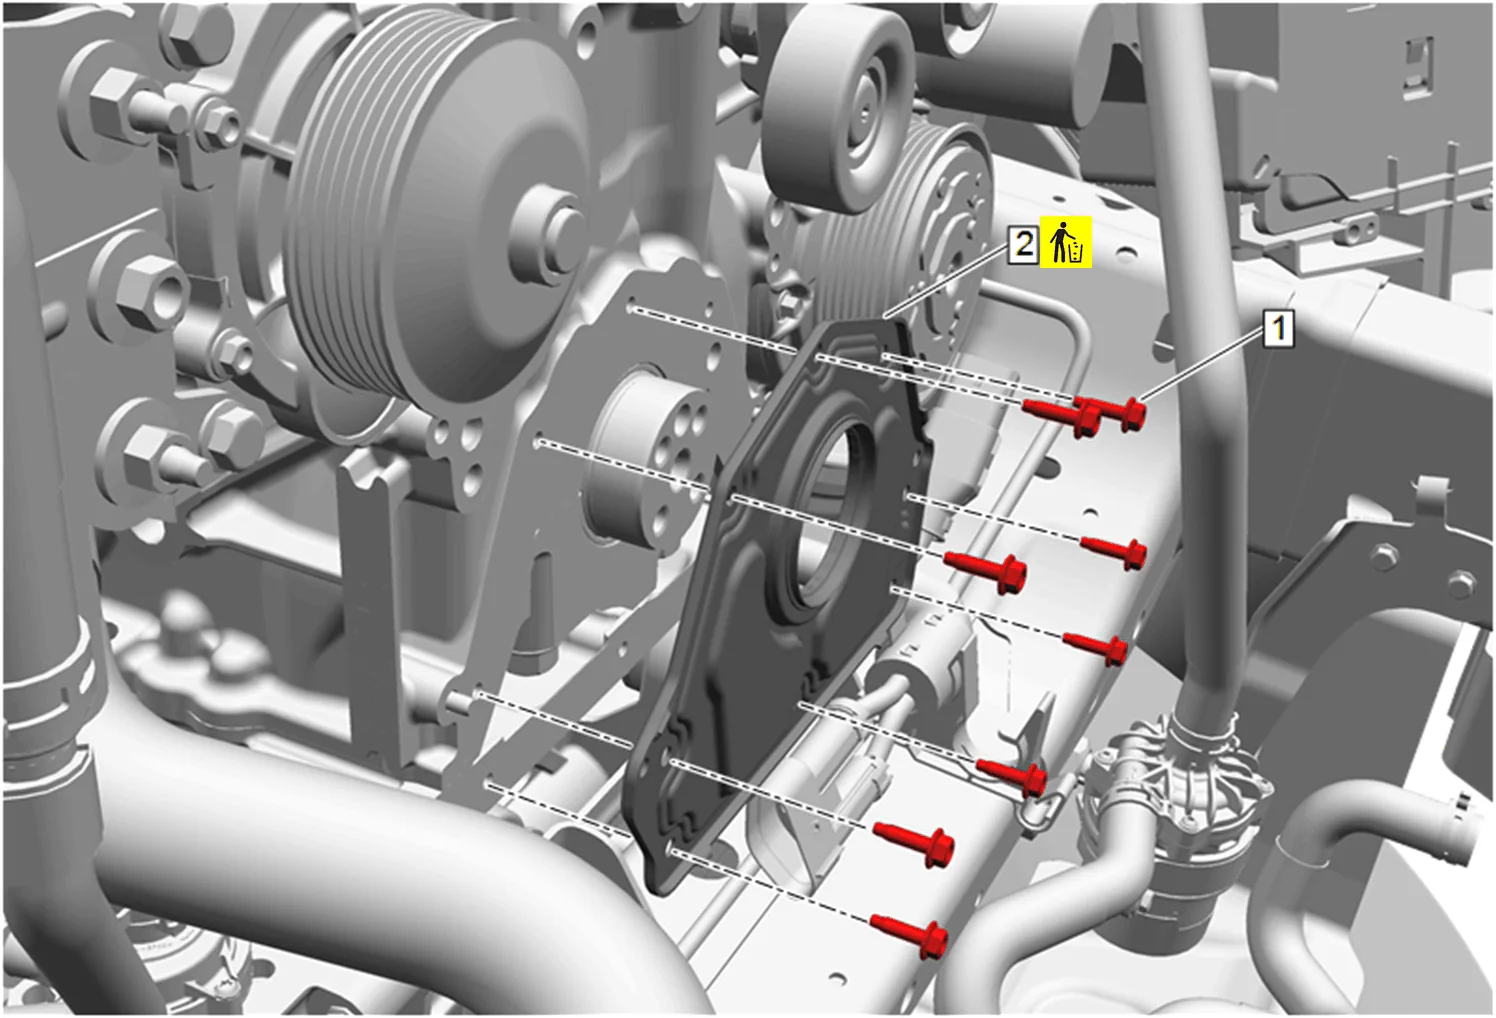
- Engine Front Cover Bolt (1) » Remove [8x]
- Crankshaft Front Oil Seal (2) » Remove and DISCARD Cleaning and Inspection Procedure - Required
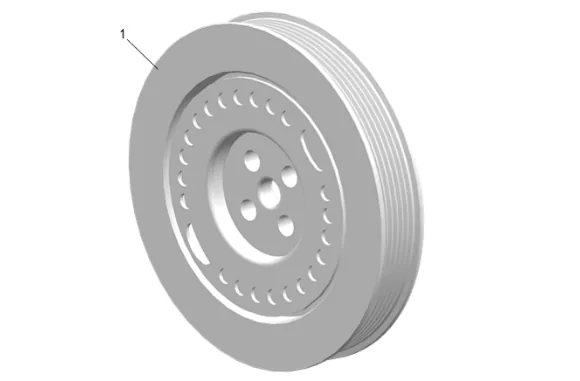
- Clean the crankshaft pulley (1).
- Inspect the crankshaft pulley (1) for damage to belt drive surface and to crankshaft pulley hub.
- Inspect the crankshaft pulley (1) hub groove for damage or wear.
- Replace the crankshaft pulley (1) if any damage is found. Installation Procedure
- Clean all sealing surfaces.
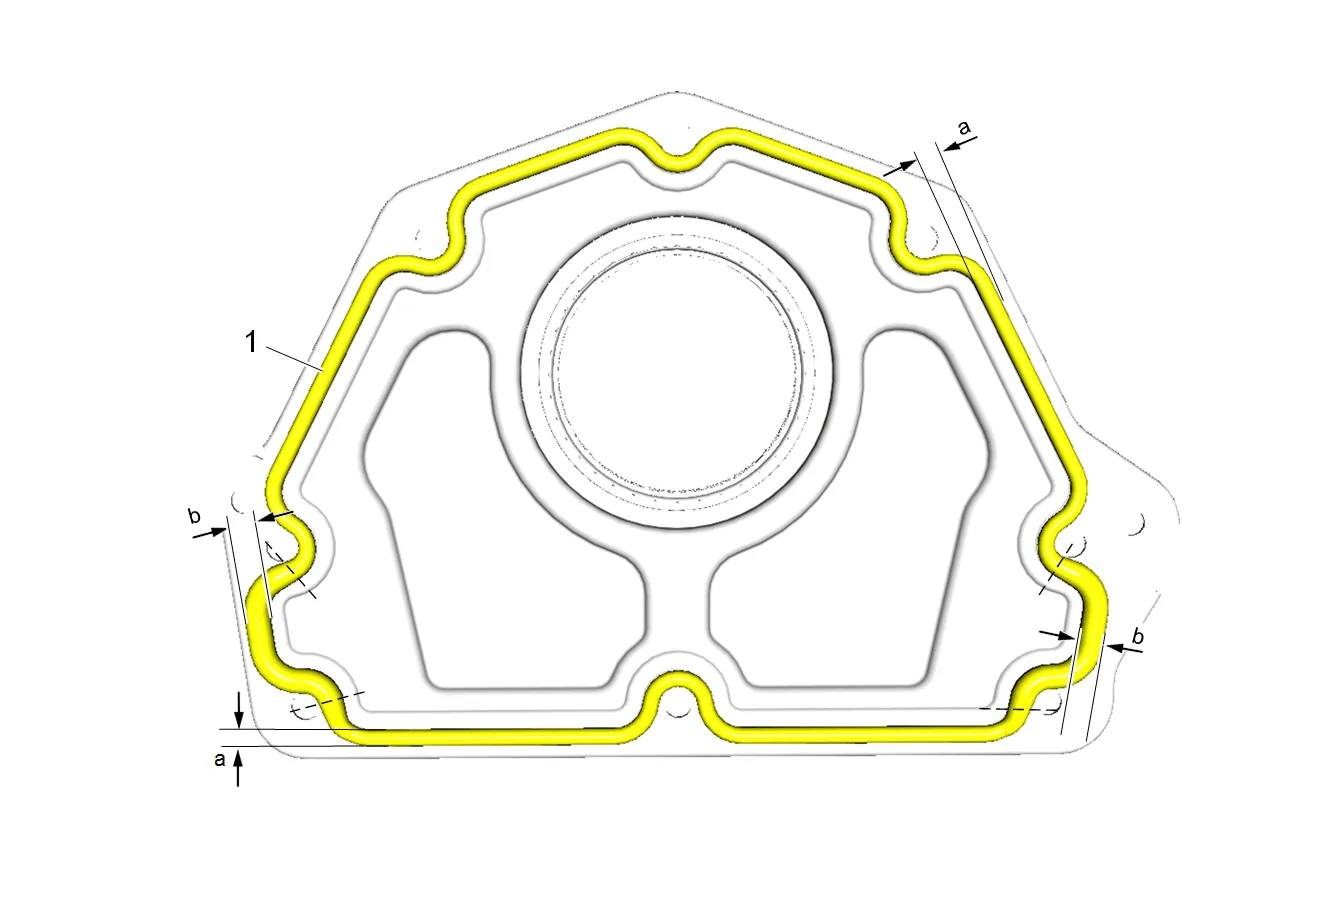
- Apply a 4.0 mm (0.157 in) bead of sealer along the crankshaft front oil seal sealing path (1), dimension a. Increase the bead to 6.0 mm (0.236 in) at the two locations b. Adhesives, Fluids, Lubricants, and Sealers
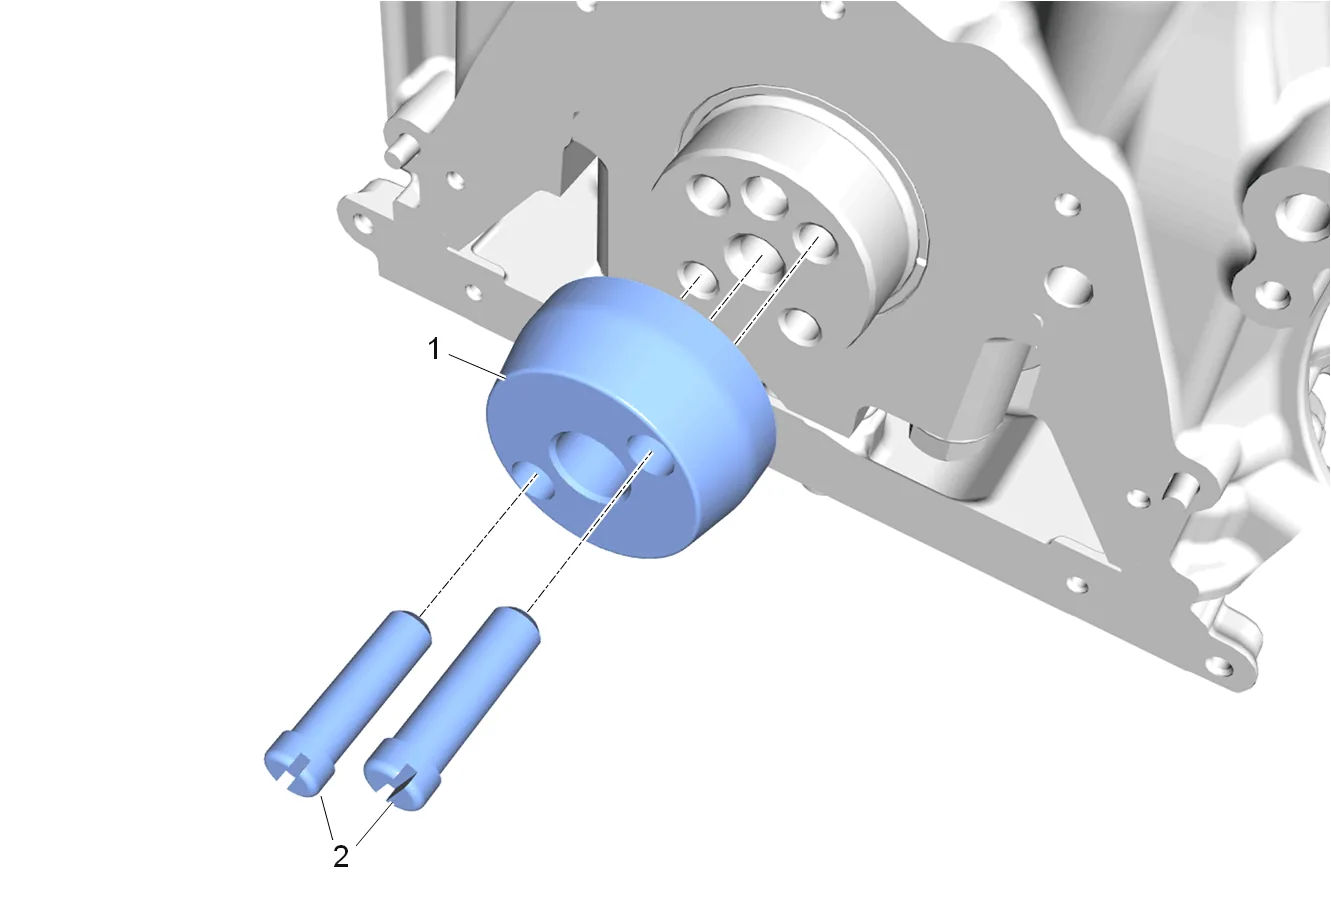
- Install the EN-52452 Front Crankshaft Seal Installer (1) to the crankshaft.
- Install and hand tighten the 2 bolts (2) of the EN-52452 Front Crankshaft Seal Installer (1).
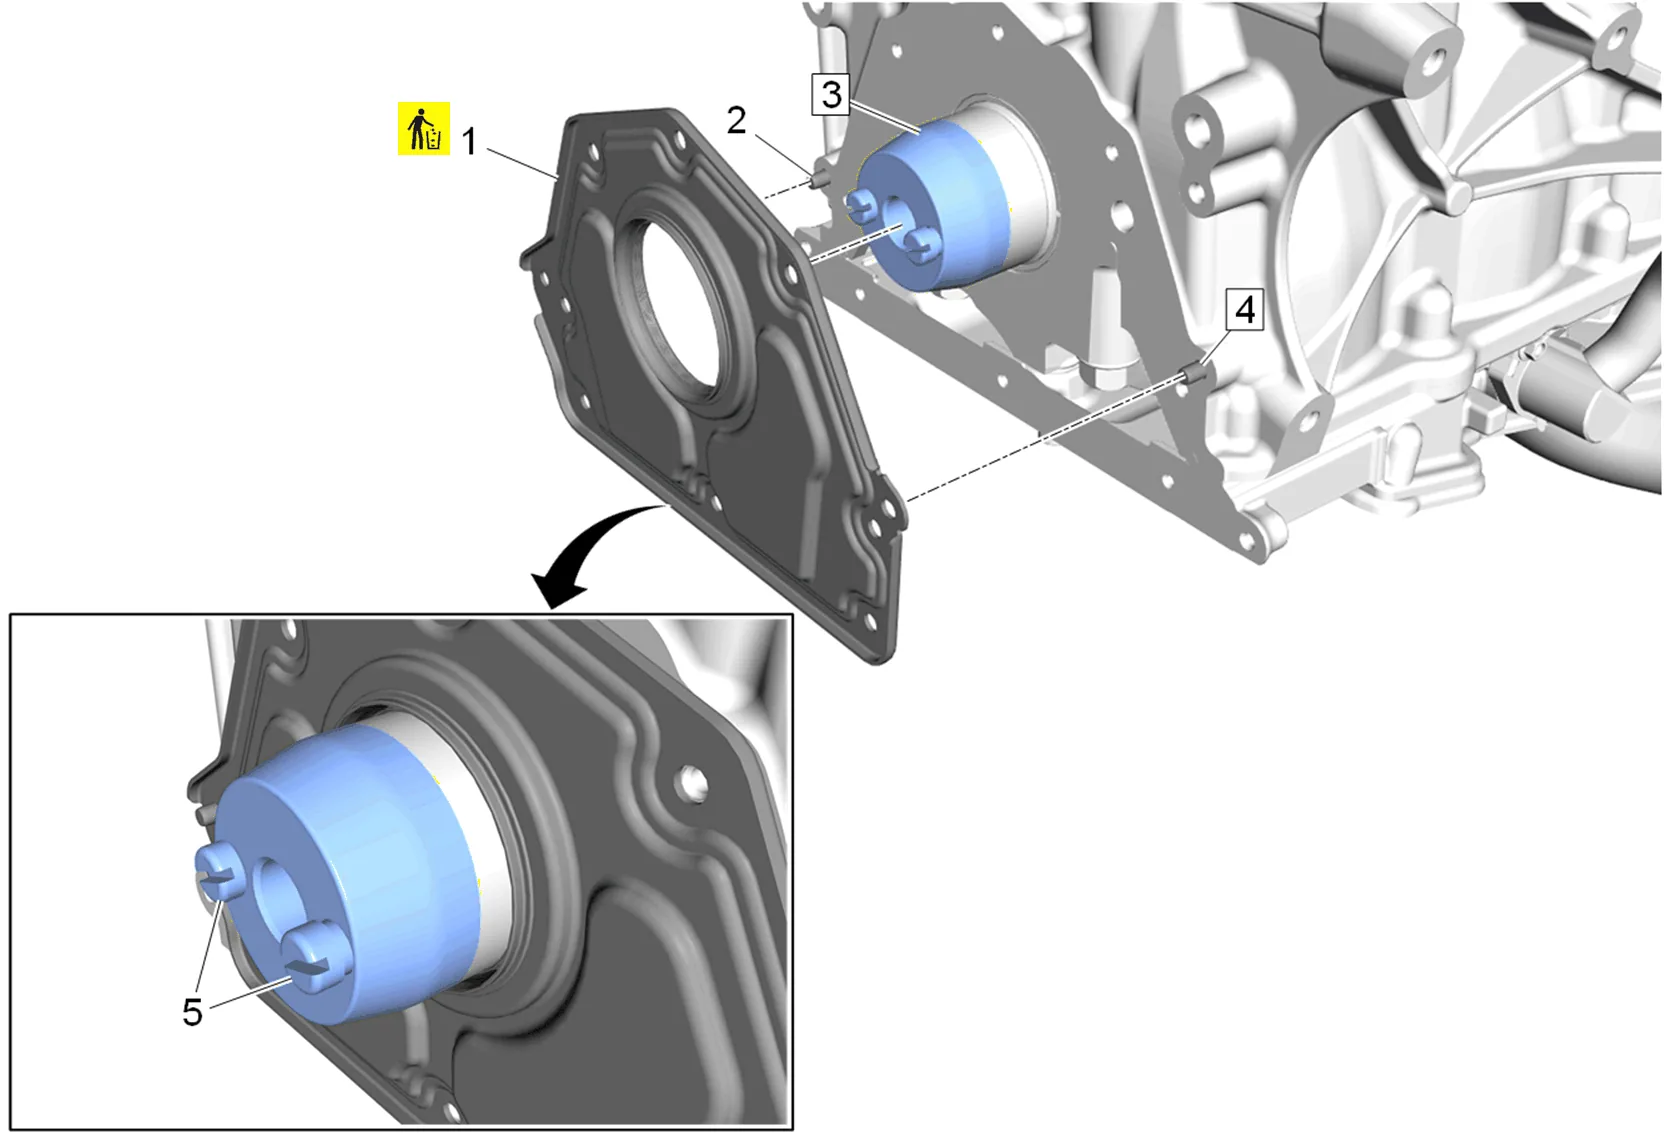
-
Crankshaft Front Oil Seal (1) » Install NEW
-
Check that the crankshaft front oil seal (1) sits correctly on the crankshaft and the 2 pins (2, 4).
-
Remove the 2 bolts (5) from the EN-52452 Front Crankshaft Seal Installer (3).
-
Remove the EN-52452 Front Crankshaft Seal Installer (3) from the crankshaft.
-
Engine Front Cover Bolt (1) » Install and tighten in sequence [8x] — Fastener Specifications
-
Crankshaft Pulley (1) » Install
-
Crankshaft Pulley Bolt (2) » Install and hand tighten [4x]
-
Install the EN-49979 Crankshaft Holder (1) with EN-956-1 Extension (3) to the crankshaft pulley.
-
Crankshaft Pulley Bolt (2) » Tighten [4x] — Fastener Specifications
-
Remove the EN-49979 Crankshaft Holder (1) with EN-956-1 Extension (3) to the crankshaft pulley.
-
Install the accessory drive primary belt (2) to the vehicle.
-
Rotate the accessory drive primary belt tensioner (1) clockwise.
-
Install the accessory drive primary belt (2) around all pulleys.
-
Engine Front Cover (2) » Install
-
Engine Front Cover Bolt (1) » Install and tighten — Fastener Specifications
-
Install the charge air cooler, condenser, fan and radiator assembly to the vehicle. Charge Air Cooler, Condenser, Fan Motor, and Radiator Assembly Removal and Installation
-
Check and correct the engine oil level. Approximate Fluid Capacities Adhesives, Fluids, Lubricants, and Sealers