Air Conditioning Evaporator Replacement
Single Use Fasteners and Components Air Conditioning Evaporator Seal - Small Air Conditioning Evaporator Seal - Large
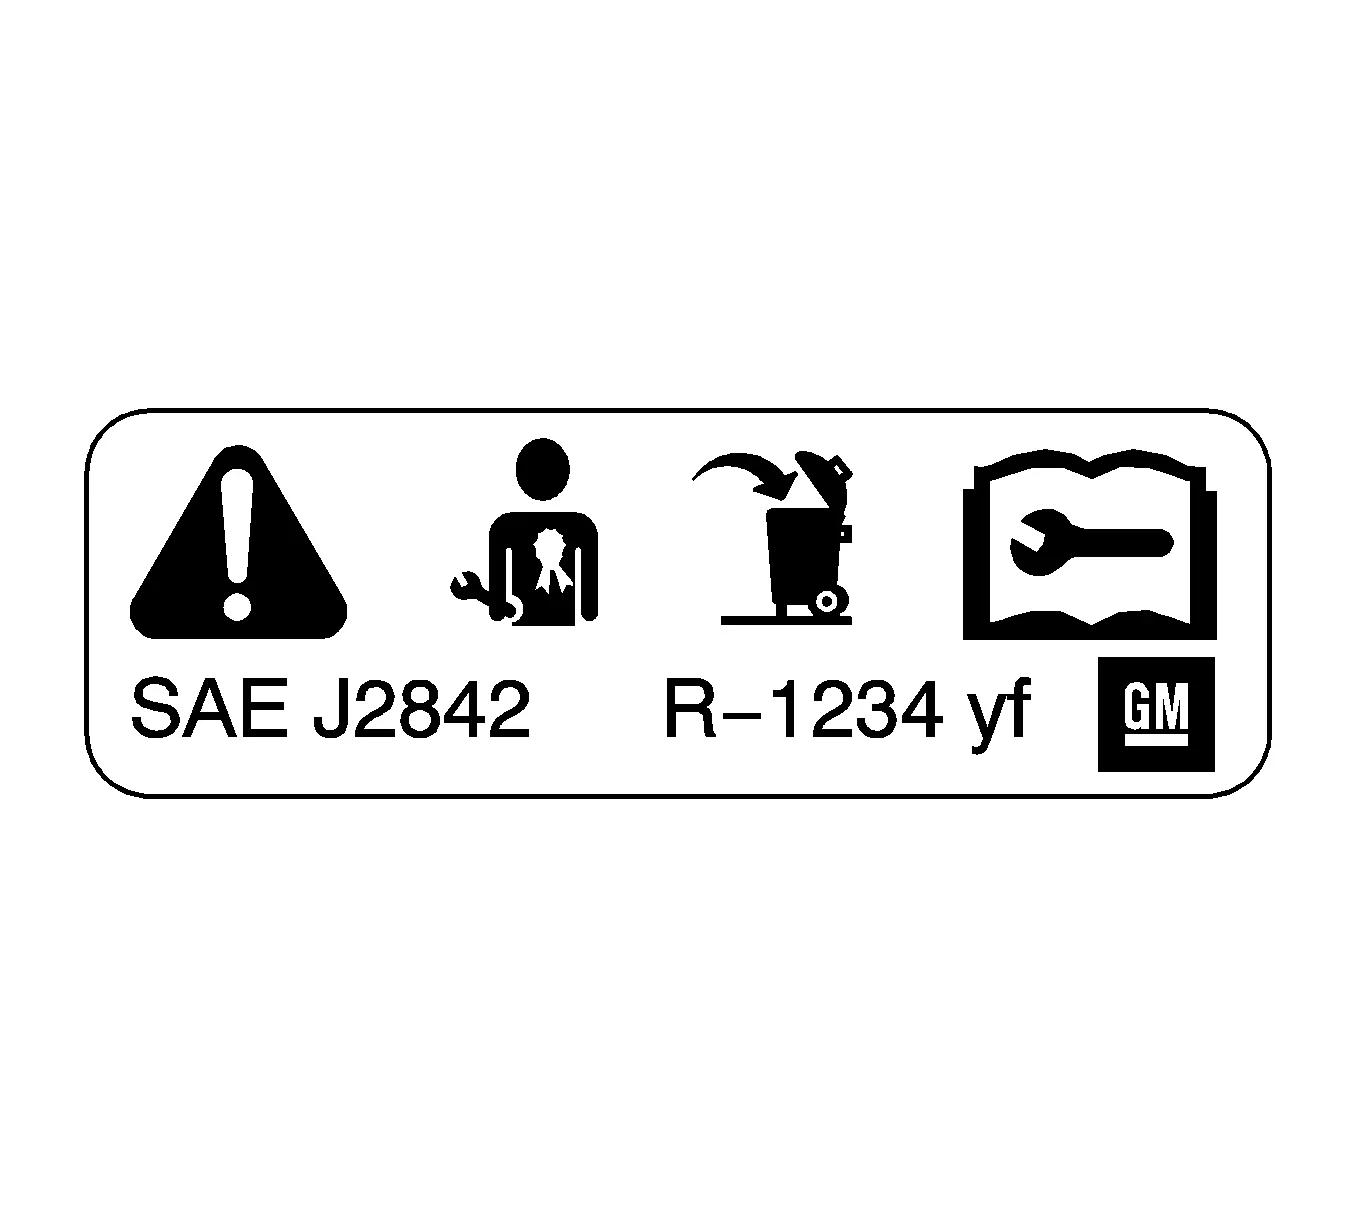
Replacement evaporators shall have a permanent marking (label, stamp, or etching) that indicates that this evaporator design meets SAE J2842 and shall include the wording below or optionally the symbols as shown: Text Only- Label Wording- “Conforms to SAE J2842 (Evaporator Manufacturer’s Name or Trademark) Replace only with new evaporator certified to meet SAE J2842. Leak Free Joints Inside the Passenger Compartment If a refrigerant joint/connection is made or disturbed inside the passenger cabin the following steps shall be followed by the technician to ensure the joint/connection is leak free.
- Shall clean all dirt, grease and debris from and around connection joints before disassembly/assembly of refrigerant connections.
- Shall be advised to carefully inspect the joint/connection seal surfaces for signs of deformation, contamination or damage after disassembly.
- Shall be advised that Seals/O-rings shall never be reused, but replaced with all new parts.
- Shall be advised to ensure proper alignment of male/female portions and seal so there is no misalignment and stress on the fitting connection.
- Shall tighten the joint using the proper torque.
- With full refrigerant charge installed and the vehicles HVAC blower motor set on its lowest speed, A/C switch off and air distribution set to floor. The technician shall insert a SAE J2913 compliant electronic leak detector set to high sensitivity (4 grams/year leak rate) into the center of a floor duct outlet, as far as possible. The technician shall monitor the electronic leak detector for 5 minutes or until the detector alarms. If electronic leak detector alarms, recover the refrigerant and repair the leak. If after 5 minutes there is no alarm, there is no indication of a leak in the passenger compartment and the repair can be completed.
- If vehicle is equipped with an auxiliary evaporator, monitor the air downstream from the evaporator at the outlet duct closest to the auxiliary unit under the same conditions and set up as step 6. Proper Disposal of the Replaced Evaporator The replaced evaporator shall be disabled to ensure that it never be repaired or reused. Disable the replaced evaporator by completing one of the following steps: Using tin snips sever a minimum of 3 of the evaporators tubes. Drill or Punch a minimum of two 25 mm (.25 inch) holes in each end tank. Removal Procedure
- Heater and Air Conditioning Evaporator and Blower Module » Remove — Heater and Air Conditioning Evaporator and Blower Module Removal and Installation
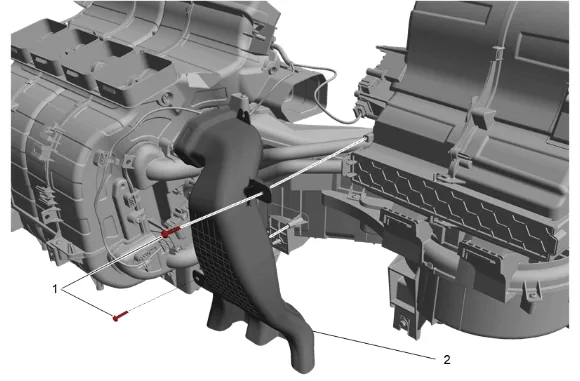
- Heater and Air Conditioning Evaporator and Blower Module Bolt (1) » Remove [2x]
- Floor Front Air Outlet Duct - Right Side (2) » Remove
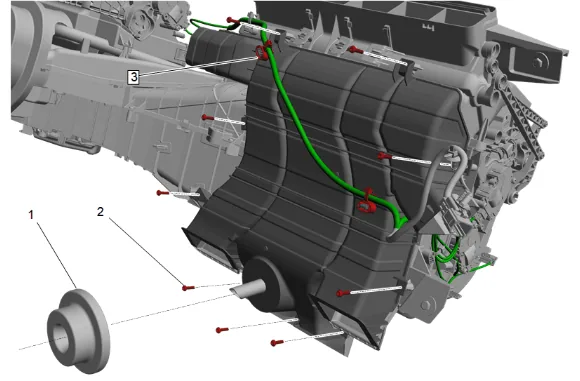
- Air Conditioning Evaporator Case Drain Tube Seal (1) » Remove
- Heater and Air Conditioning Evaporator and Blower Module Bolt (2) » Remove [9x]
- Wiring Harness Retainer (3) » Remove [2x]
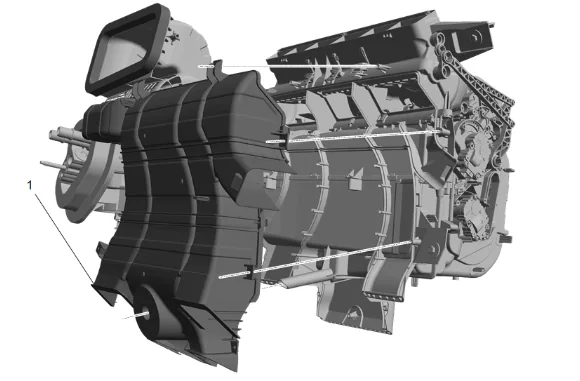
- Heater And Air Conditioning Evaporator Module Cover (1) » Remove
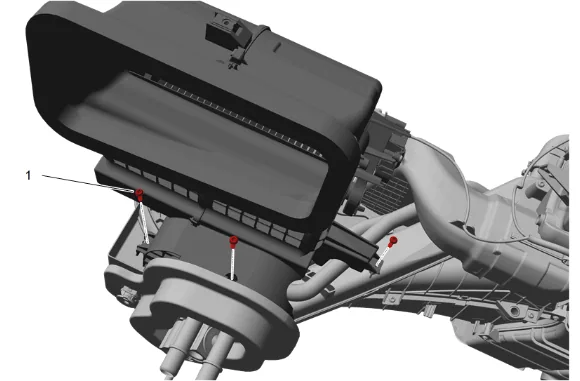
- Air Inlet Housing Bolt (1) » Remove [3x]
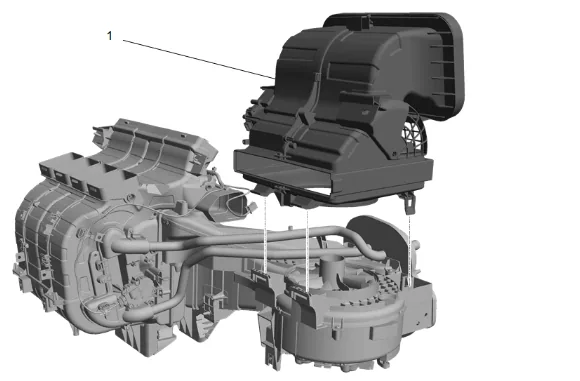
- Air Inlet Housing (1) » Remove
- Disconnect the electrical connector.
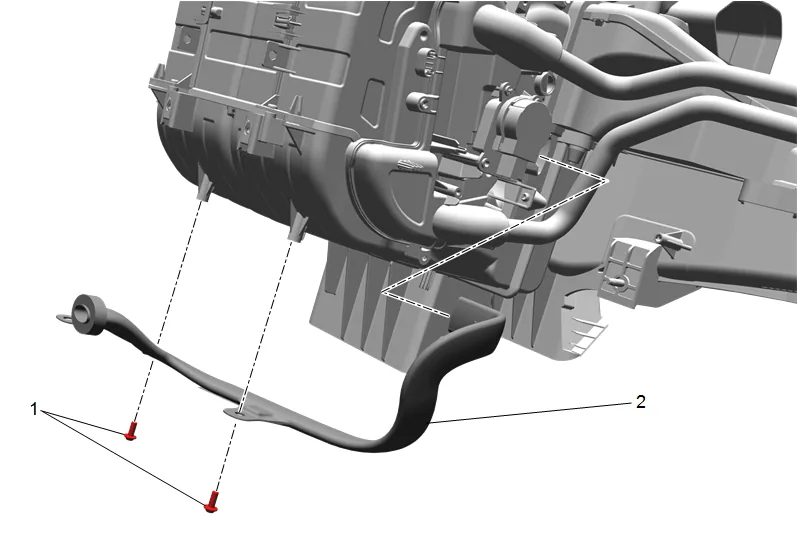
- { If equipped } Front Floor Console Auxiliary Cooling Duct Bolt (1) » Remove [2x]
- { If equipped } Front Floor Console Auxiliary Cooling Duct (2) » Remove
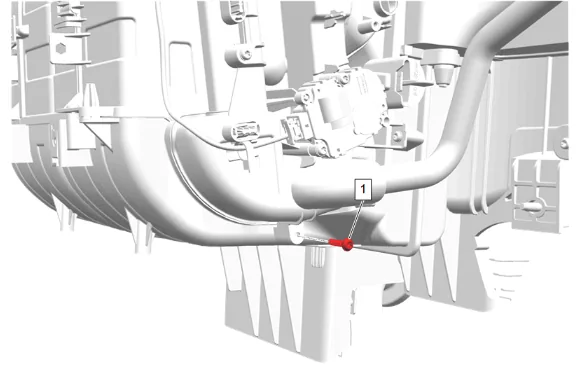
- Heater and Air Conditioning Evaporator and Blower Module Bolt (1) » Remove
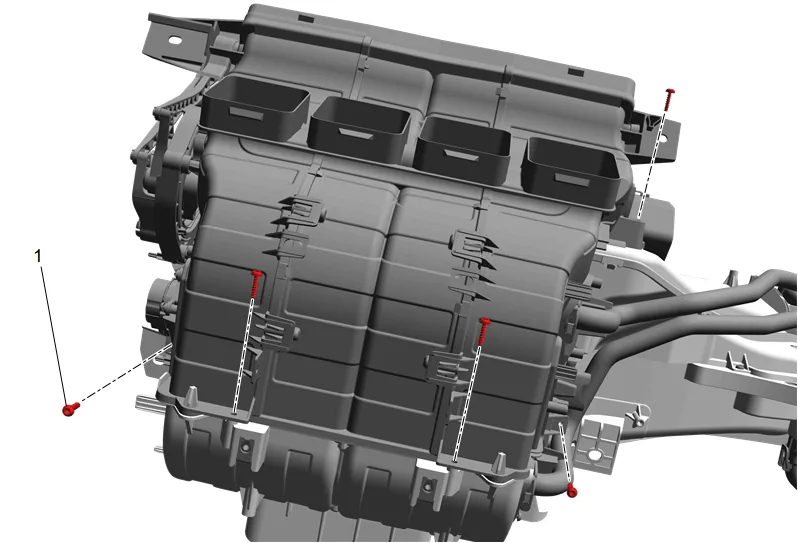
- Heater and Air Conditioning Evaporator and Blower Module Bolt (1) » Remove [5x]
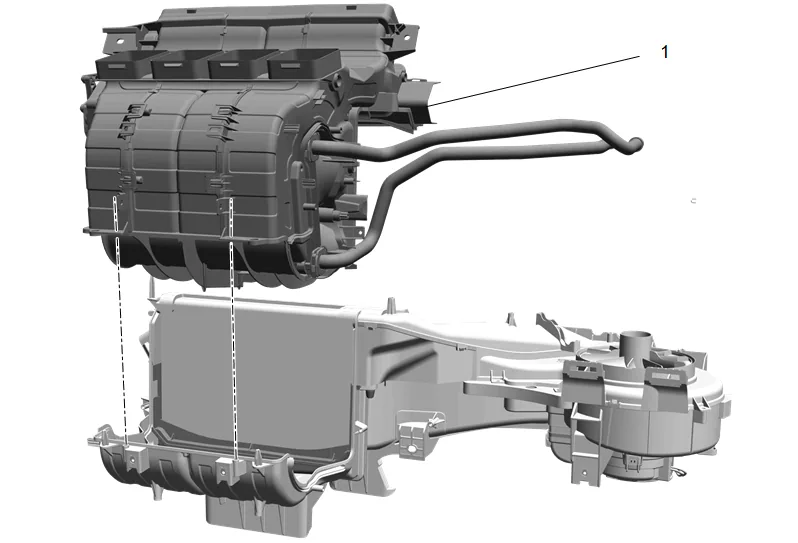
- Heater and Air Conditioning Evaporator Case (1) » Remove
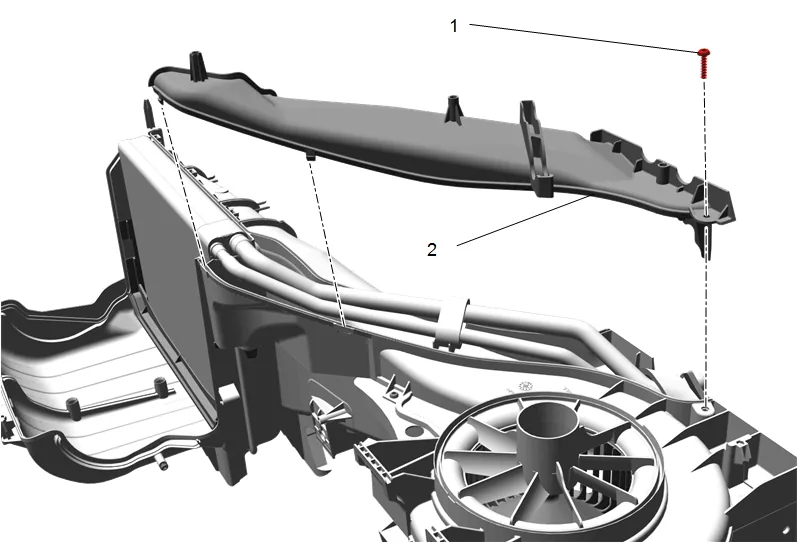
- Heater and Air Conditioning Evaporator and Blower Module Bolt (1) » Remove
- Heater And Air Conditioning Evaporator Module Cover (2) » Remove
-
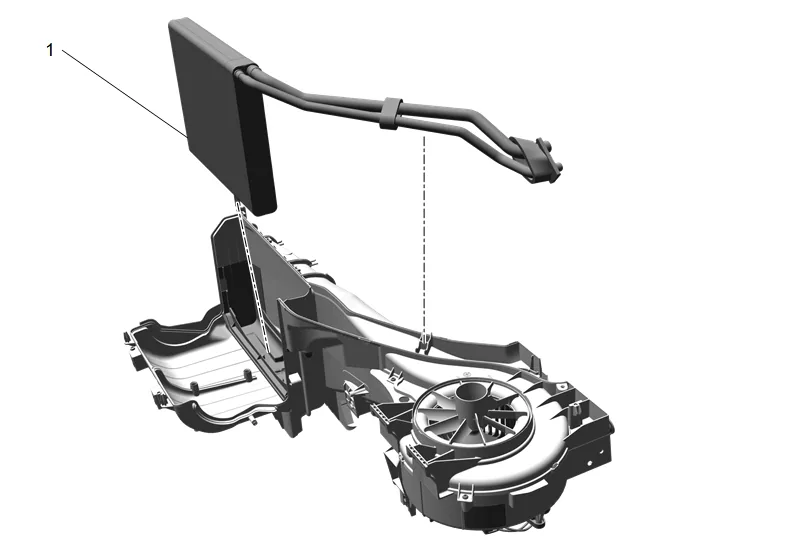
Air Conditioning Evaporator (1) » Remove Installation Procedure
-
Air Conditioning Evaporator (1) » Install
-
Heater And Air Conditioning Evaporator Module Cover (2) » Install
-
Heater and Air Conditioning Evaporator and Blower Module Bolt (1) » Install — Fastener Specifications
-
Heater and Air Conditioning Evaporator Case (1) » Install
-
Heater and Air Conditioning Evaporator and Blower Module Bolt (1) » Install and tighten [5x] — Fastener Specifications
-
Heater and Air Conditioning Evaporator and Blower Module Bolt (1) » Install and tighten — Fastener Specifications
-
{ If equipped } Front Floor Console Auxiliary Cooling Duct (2) » Install
-
{ If equipped } Front Floor Console Auxiliary Cooling Duct Bolt (1) » Install and tighten [2x] — Fastener Specifications
-
Air Inlet Housing (1) » Install
-
Air Inlet Housing Bolt (1) » Install and tighten [3x] — Fastener Specifications
-
Connect the electrical connector.
-
Heater And Air Conditioning Evaporator Module Cover (1) » Install
-
Wiring Harness Retainer (3) » Install [2x]
-
Heater and Air Conditioning Evaporator and Blower Module Bolt (2) » Install and tighten [9x] — Fastener Specifications
-
Air Conditioning Evaporator Case Drain Tube Seal (1) » Install
-
Floor Front Air Outlet Duct - Right Side (2) » Install
-
Heater and Air Conditioning Evaporator and Blower Module Bolt (1) » Install and tighten [2x] — Fastener Specifications
-
Heater and Air Conditioning Evaporator and Blower Module » Install — Heater and Air Conditioning Evaporator and Blower Module Removal and Installation