Front Side Door Lock Cylinder Replacement (without nwm)
Front Side Door Lock Cylinder Replacement (without nwm)
- Disable the SIR system. SIR Disabling and Enabling
- Front Side Door Trim » Remove — Front Side Door Trim Removal and Installation
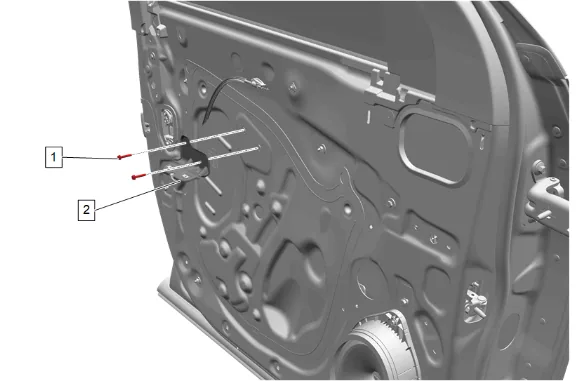
- Front Side Door Armrest Bracket Bolt (1) » Remove [2x]
- Front Side Door Pull Handle Bracket (2) » Remove
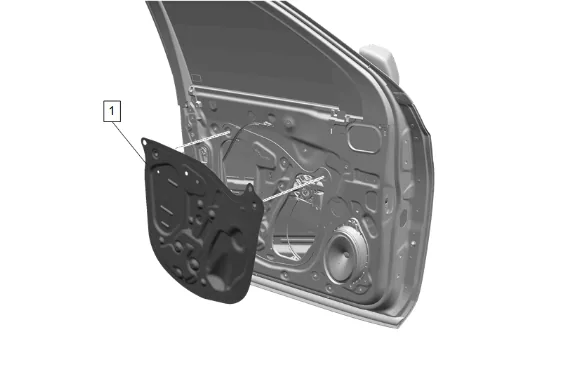
- Route front side door inside handle cable through hole in deflector (1).
- Front Side Door Water Deflector (1) » Remove
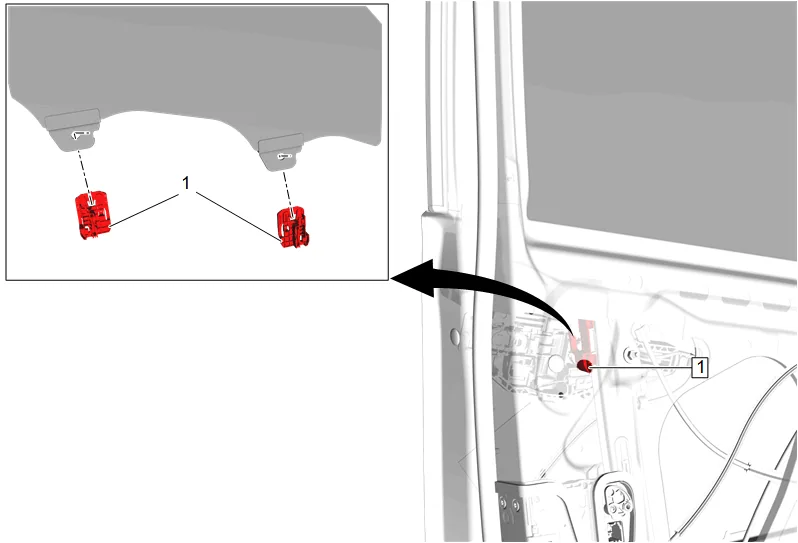
- Place the front side door window in the full up position and tape in place.
- Front Side Door Window Regulator Sash Retainer (1) » Release [2x]
- Place the front side door window regulator in the full down position.
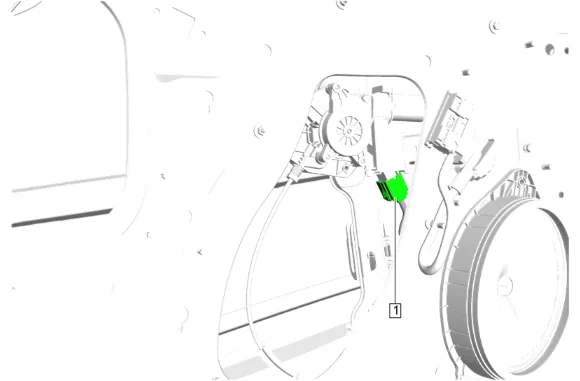
- Disconnect the electrical connector. (1)
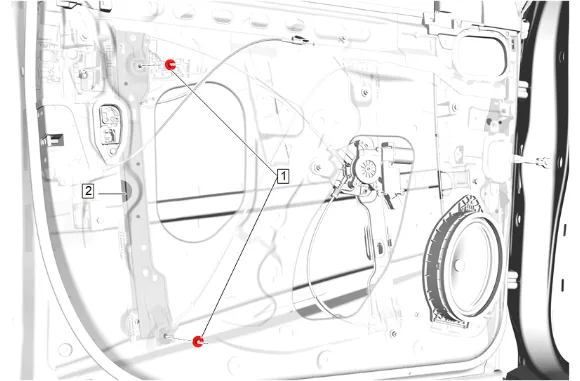
- Front Side Door Window Regulator Nut (1) » Remove [2x]
- Reposition the rear section of the front side door window regulator (2).
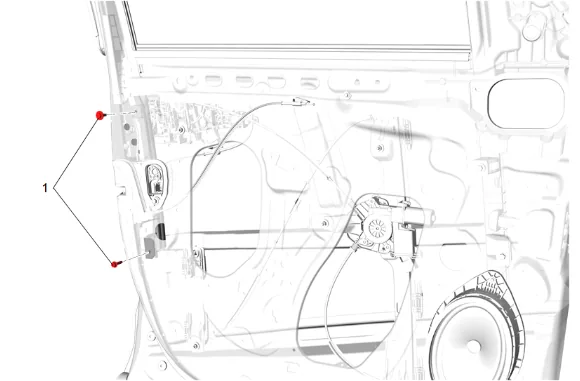
- Front Side Door Window Channel Retainer Bolt (1) » Remove [2x]
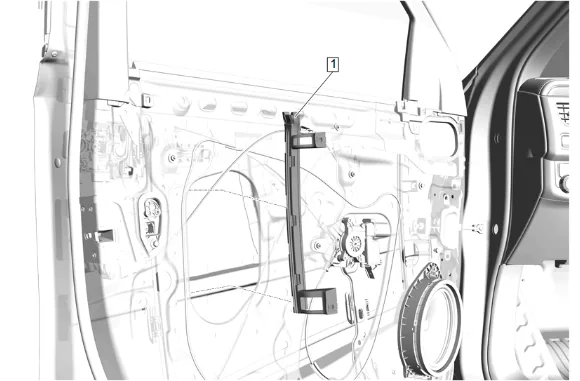
- Front Side Door Window Channel Retainer (1) » Remove
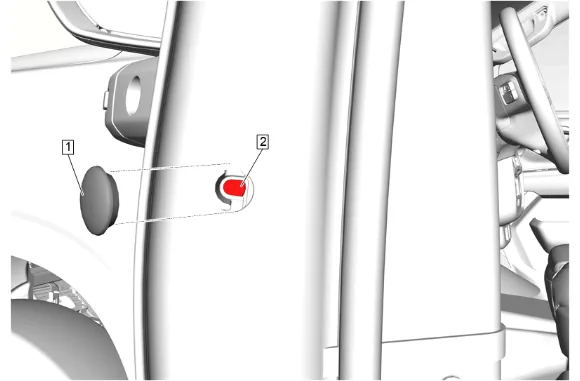
- Front Side Door Outside Handle Access Hole Plug (1) » Remove
- Pull the door handle to the open position then turn the front side door outside handle bracket rear bolt (2) counterclockwise until it clicks.
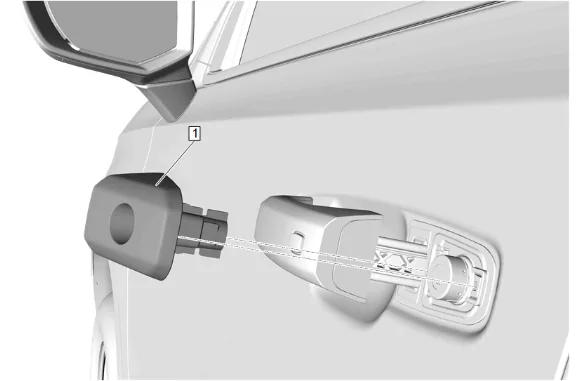
- Front Side Door Lock Cylinder Bezel (1) » Remove
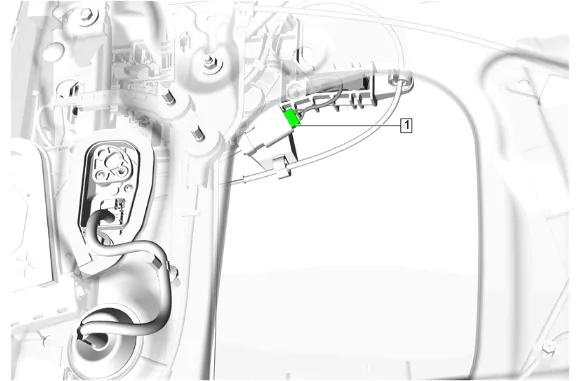
- Disconnect the electrical connector. (1)
- Remove the harness retainers from the front side door outside handle bracket.
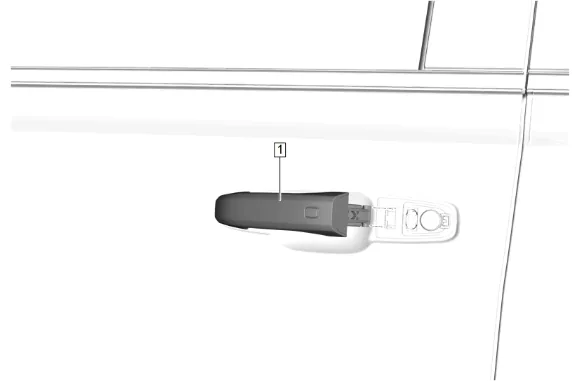
- Slide the front side door outside handle (1) rearward and then outwards in a swing motion releasing the rear part of the handle from the front side door outside handle bracket.
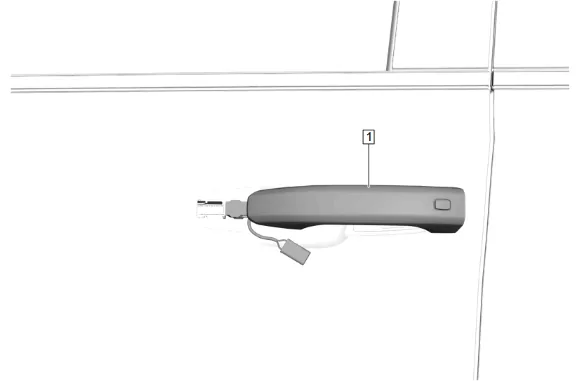
- Swing the front part of the front side door outside handle (1) to remove.
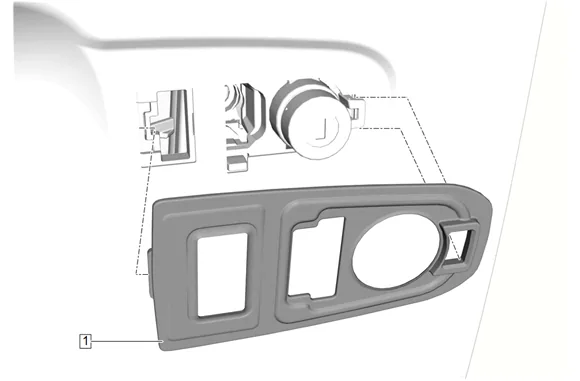
- Front Side Door Lock Cylinder Bezel Insulator (1) » Remove
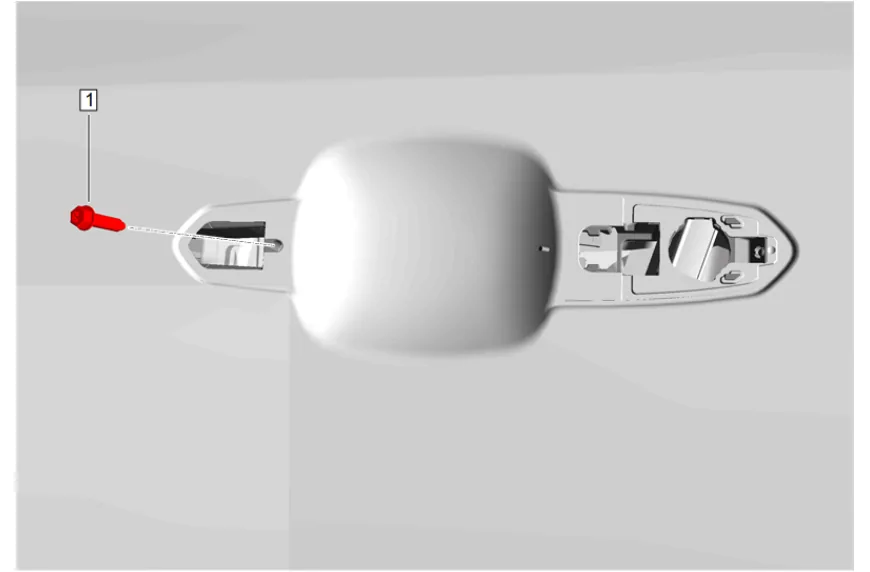
- Front Side Door Outside Handle Bracket Bolt (1) » Remove
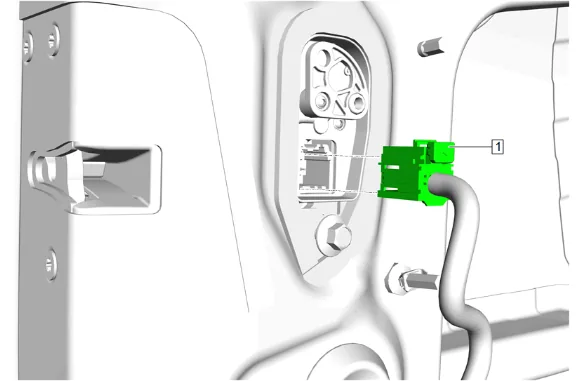
- Disconnect the electrical connector. (1)
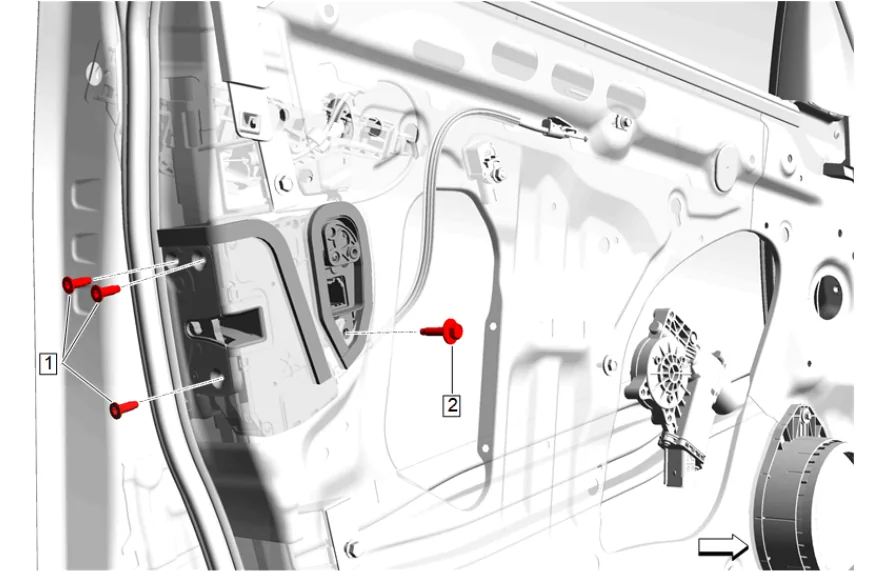
- Front Side Door Latch Bolt (1) » Remove [3x]
- Front Side Door Latch Bolt (2) » Remove
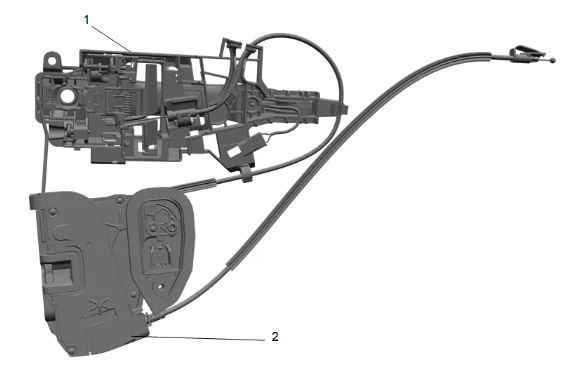
- Remove the front side door outside handle bracket (1) and the front side door latch (2) as an assembly.
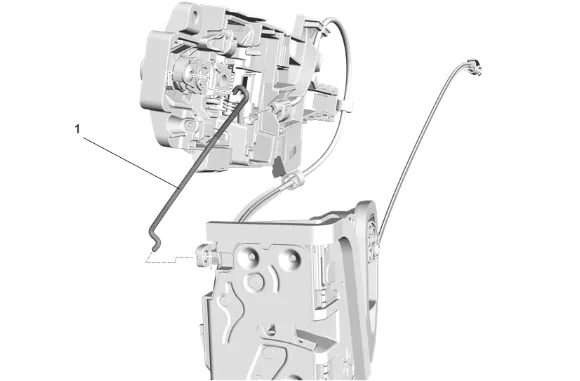
- Front Side Door Lock Cylinder Rod (1) » Remove
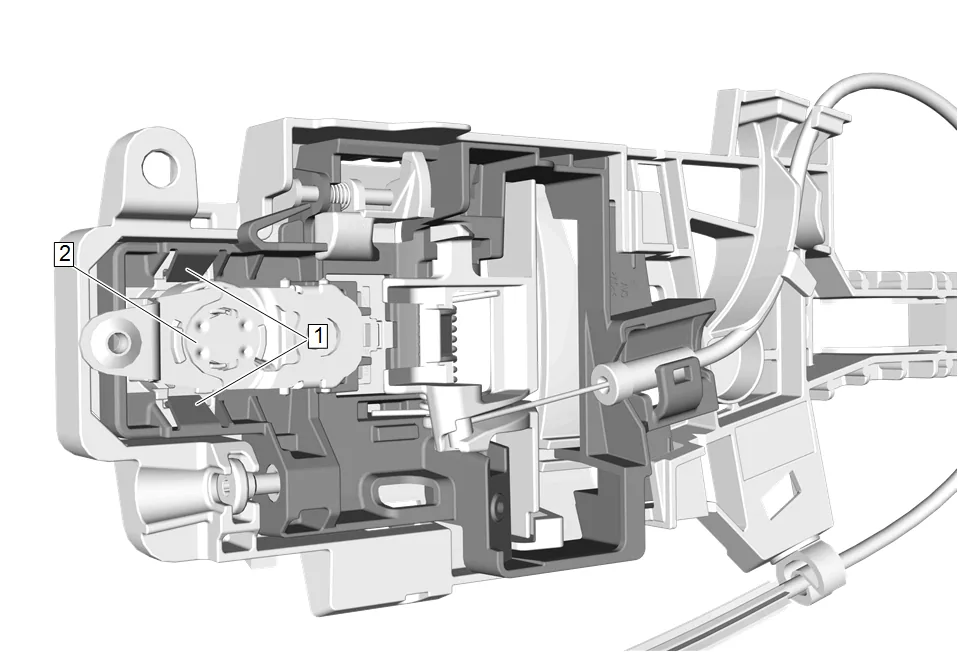
- From the back side of the front side door outside handle bracket, use a suitable tool to push up and down on the door lock cylinder retainers (1) releasing the retainer from the door lock cylinder (2).
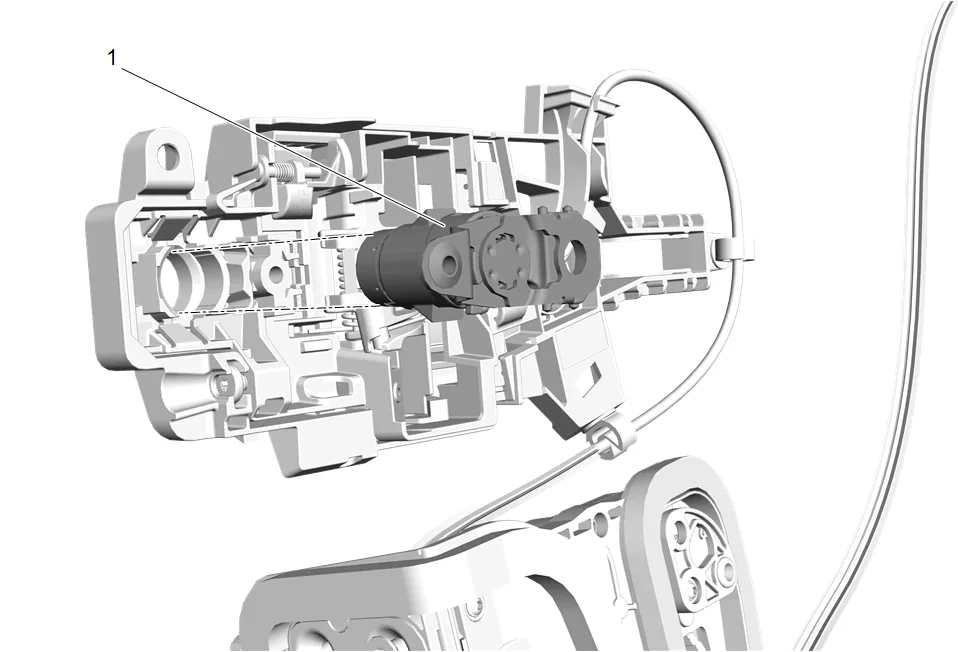
- With the door lock cylinder retainer released, pull the door lock cylinder (1) rearward releasing it from the front side door outside handle bracket. Installation Procedure
-
Install the door lock cylinder (1) into the front side door outside handle bracket, by pushing forward locking the door lock cylinder (1) into the retainer.
-
Front Side Door Lock Cylinder Rod (1) » Install
-
Install the front side door outside handle bracket (1) and the front side door latch (2) as an assembly.
-
Front Side Door Latch Bolt (1) » Install and tighten [3x] — Fastener Specifications
-
Front Side Door Latch Bolt (2) » Install and tighten — Fastener Specifications
-
Connect the electrical connector. (1)
-
Front Side Door Outside Handle Bracket Bolt (1) » Install and tighten — Fastener Specifications
-
Front Side Door Lock Cylinder Bezel Insulator (1) » Install
-
Install the front part of the front side door outside handle (1) into the front side door outside handle bracket.
-
Install the rear part of the front side door outside handle (1) into the front side door outside handle bracket and slide the front side door outside handle forward.
-
Connect the harness retainers to the front side door outside handle bracket.
-
Connect the electrical connector. (1)
-
Front Side Door Lock Cylinder Bezel (1) » Install
-
Hold the front side door outside handle outwards in the open position.
-
Front Side Door Outside Handle Bracket Rear Bolt (2) » Tighten — Fastener Specifications
-
Front Side Door Outside Handle Access Hole Plug (1) » Install
-
Test door handle for correct operation. If handle does not operate correctly, adjust front side door outside handle counterbalance.
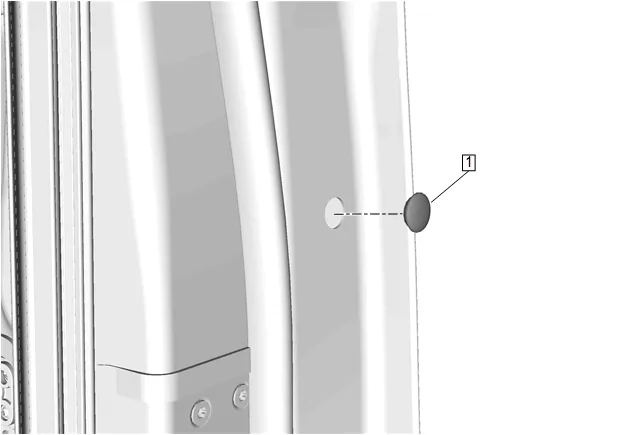
- Front Side Door Outside Handle Access Hole Plug (1) » Remove
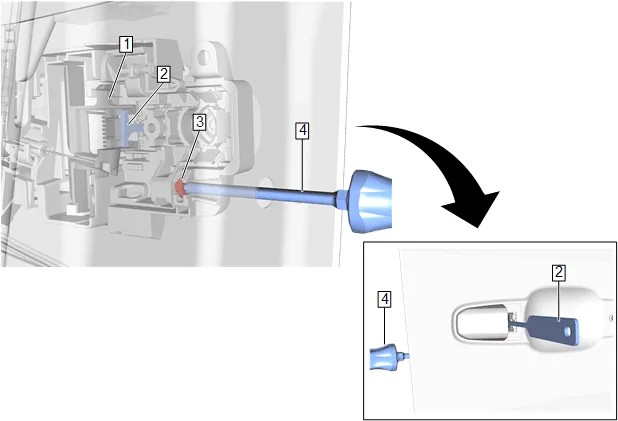
Click Image For Video

Insert theEL-42059 (2) and grasp the counterbalance lever (1) . 20. Pull theEL-42059 (2) until the counterbalance lever (1) is fully rotated and hold in this position. 21. Using a T25 Torx ™ driver(4), turn the front side door outside handle bracket rear bolt (3) counterclockwise until it clicks.
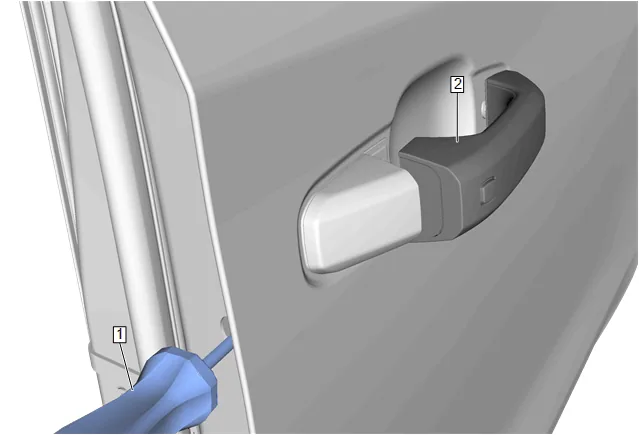
Click Image For Video
Front Side Door Outside Handle (2) » Install 23. Lightly press the front side door outside handle (2) to ensure it is in position. 24. Using a T25 Torx ™ driver (1), turn the front side door outside handle bracket rear bolt clockwise until the handle (2) is fully seated. 25. Front Side Door Outside Handle Bracket Rear Bolt » Tighten — Fastener Specifications
-
Front Side Door Outside Handle Access Hole Plug (1) » Install
-
Front Side Door Window Channel Retainer (1) » Install
-
Front Side Door Window Channel Retainer Bolt (1) » Install and tighten [2x] — Fastener Specifications
-
Position the rear section of the front side door window regulator (2) to the original location.
-
Front Side Door Window Regulator Nut (1) » Install and tighten [2x] — Fastener Specifications
-
Connect the electrical connector. (1)
-
Place the window regulator sash retainer (1) in the full up position.
-
Remove the tape holding the front side door window in the full up position.
-
Ensure the front side door window is properly seated in the window sash.
-
Route front side door inside handle cable through hole in deflector (1).
-
Front Side Door Water Deflector (1) » Install
-
Front Side Door Pull Handle Bracket (2) » Install
-
Front Side Door Armrest Bracket Bolt (1) » Install and tighten [2x] — Fastener Specifications
-
Front Side Door Trim » Install — Front Side Door Trim Removal and Installation
-
Enable the SIR System. SIR Disabling and Enabling