Rear Seat Removal and Installation (Bucket)
Removal Procedure
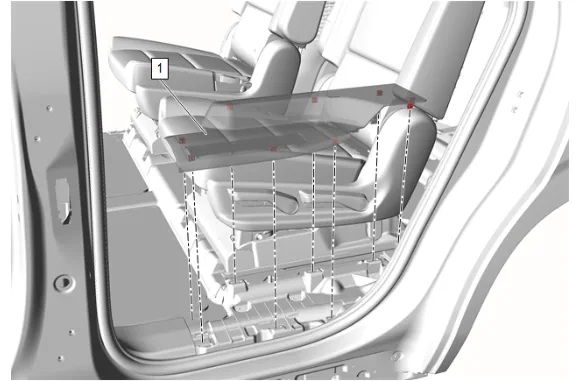
- Using a flat-bladed plastic trim tool, release the retaining clips.
- Pull upward from both sides of the rear side door sill garnish molding (1) to disengage retaining clips front to rear.
- Rear Side Door Sill Garnish Molding (1) » Remove
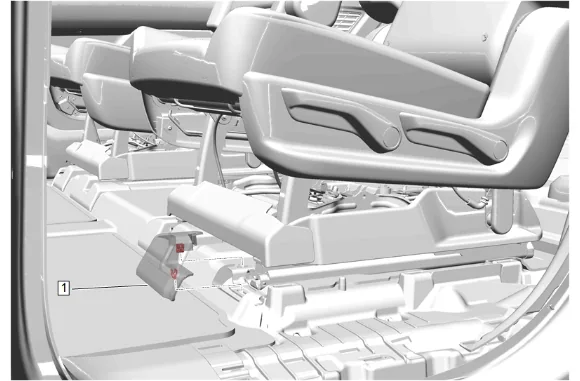
- Using a flat-bladed plastic trim tool, release the retaining clips.
- Rear Seat Track Front Outboard Cover (1) » Remove
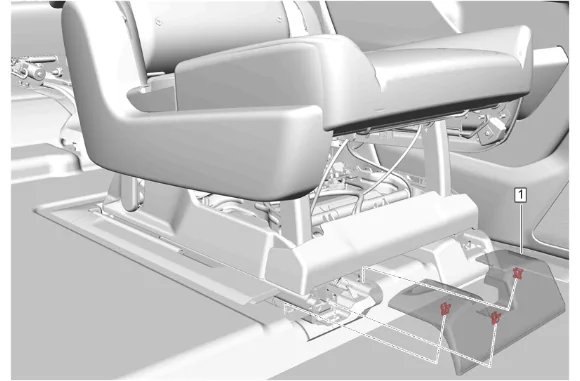
- Using a flat-bladed plastic trim tool, release the retaining clips.
- Rear Seat Track Front Inboard Cover (1) » Remove
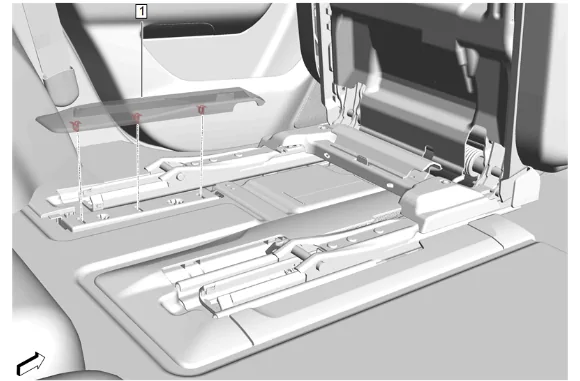
- Place the rear seat in the fold and tumble position.
- Using a flat-bladed plastic trim tool, release the retaining clips.
- Rear Seat Adjuster Track Finish Cover (1) » Remove
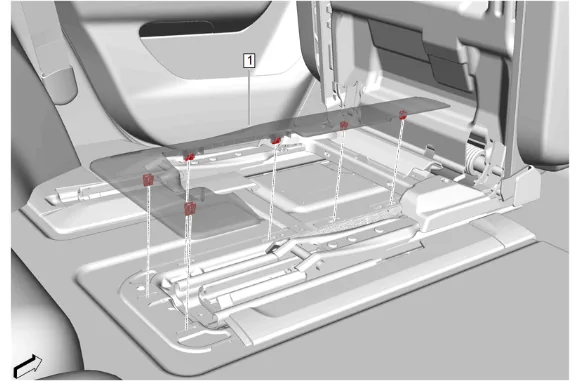
- Using a flat-bladed plastic trim tool, release the retaining clips.
- Rear Seat Track Rear Inboard Cover - Inboard (1) » Remove
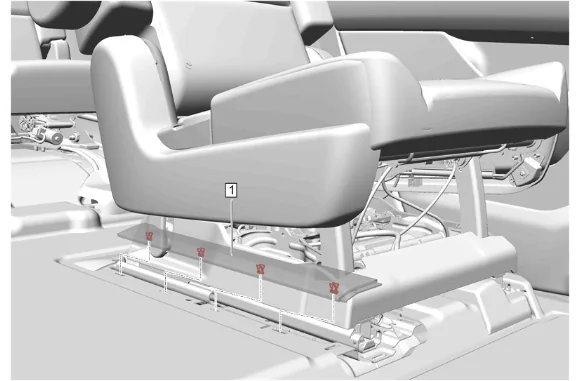
- Using a flat-bladed plastic trim tool, release the retaining clips.
- Rear Seat Track Rear Inboard Cover - Outboard (1) » Remove
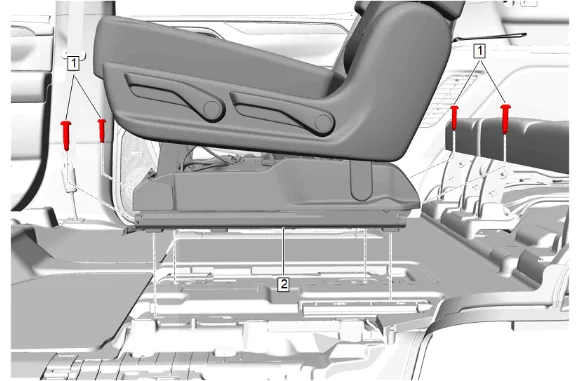
-
Rear Seat Bolt (1) » Remove [4x]
-
Disconnect the electrical connector.
-
Release the wiring harness retainer.
-
Return the rear seat to the original position.
-
Rear Seat (2) » Remove Installation Procedure
-
Rear Seat (2) » Install
-
Connect the electrical connector.
-
Install the wiring harness retainer.
-
Position the seat as necessary to access the seat bolts.
-
Rear Seat Bolt (1) » Install and tighten in sequence [4x] — Fastener Specifications
-
Place the rear seat in the fold and tumble position.
-
Rear Seat Track Rear Inboard Cover - Outboard (1) » Install
-
Rear Seat Track Rear Inboard Cover - Inboard (1) » Install
-
Rear Seat Adjuster Track Finish Cover (1) » Install
-
Return the rear seat to the original position.
-
Rear Seat Track Front Inboard Cover (1) » Install
-
Rear Seat Track Front Outboard Cover (1) » Install
-
Rear Side Door Sill Garnish Molding (1) » Install