Lower Control Arm Ball Joint Inspection
Special Tools GE-8001 Dial Indicator Set Equivalent regional tools: Special Tools
- Raise and support the vehicle. Lifting and Jacking the Vehicle
- Clean and inspect the lower ball joint seal for cuts or tears. If the lower ball joint seal is damaged, replace the front lower control arm. Front Lower Control Arm Replacement
- Support the front lower control arm with a floor stand as far outboard as possible and raise the suspension until the lower control arm moves 25 mm (0.98 in).
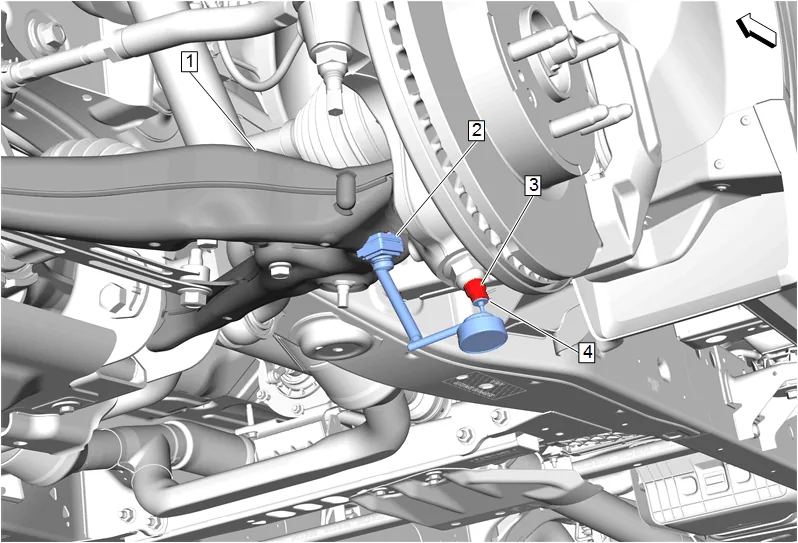
- Install the base (2) of the GE-8001 Dial Indicator Set, or suitable dial indicator to the front lower control arm (1) as shown.
- Install the dial indicator of the GE-8001 Dial Indicator Set with the contact point (4) positioned at the lower ball joint stud (3) as shown.
- Lift the steering knuckle towards the front lower control arm (1) and record the dial indicator measurement.
- If the dial indicator reading is more than 0.50 mm (0.020 in), replace the front lower control arm. Front Lower Control Arm Replacement
- Remove the support and lower the vehicle.