Brake Master Cylinder Reservoir Replacement
Single Use Fasteners and Components Brake Master Cylinder Reservoir Seal [3x]
- Disconnect the battery negative cable. Battery Negative Cable Disconnection and Connection
- Thoroughly clean the brake master cylinder reservoir and the brake master cylinder body to remove any dirt and debris.
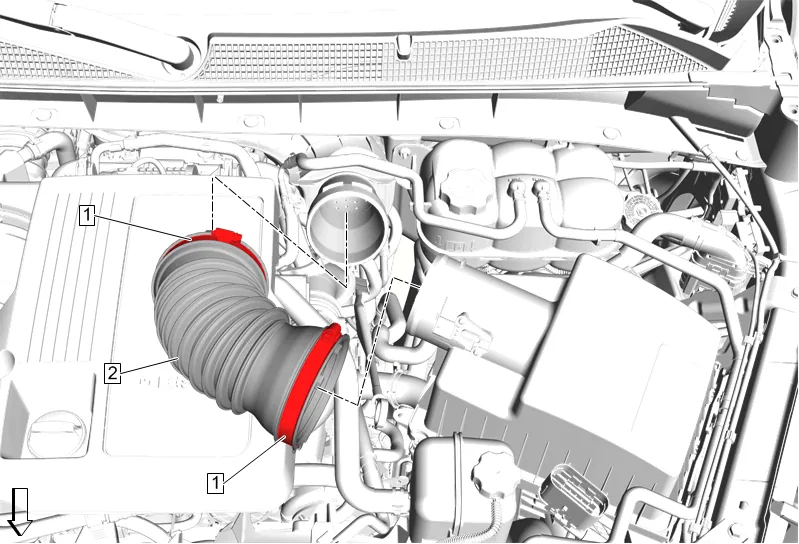
- Air Cleaner Outlet Duct Clamp (1) » Loosen [2x]
- Air Cleaner Outlet Front Duct (2) » Remove
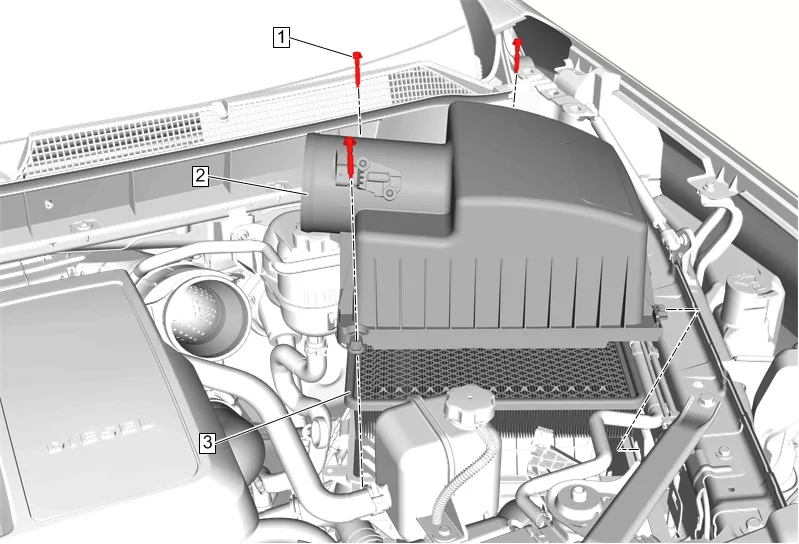
- Disconnect the mass airflow sensor electrical connector.
- Air Cleaner Housing Cover Bolt (1) » Remove [3x]
- Air Cleaner Upper Housing (2) » Remove
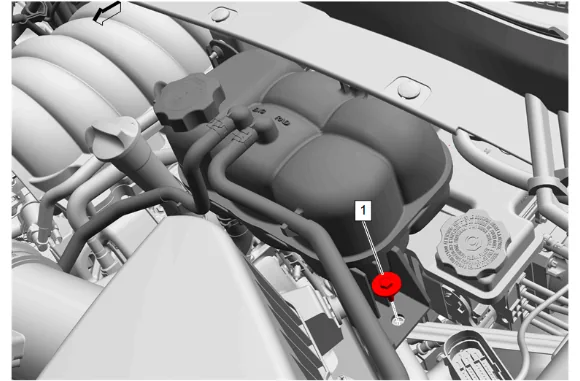
- Radiator Surge Tank Bolt (1) » Remove
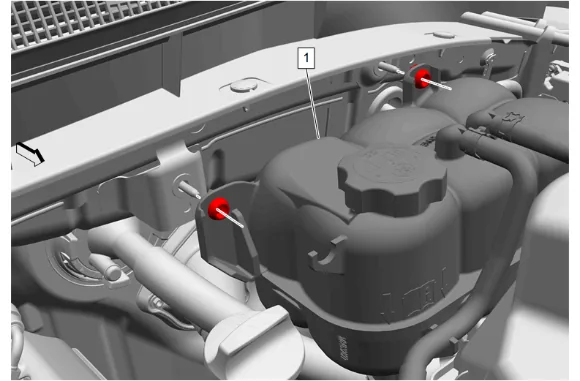
- Without disconnecting the hoses, remove the radiator surge tank and position aside. (1)
- Raise and support the vehicle. Lifting and Jacking the Vehicle
- Remove the left front tire and wheel assembly. Tire and Wheel Removal and Installation
- Front Wheelhouse Liner - Left Side » Remove — Front Wheelhouse Liner Replacement
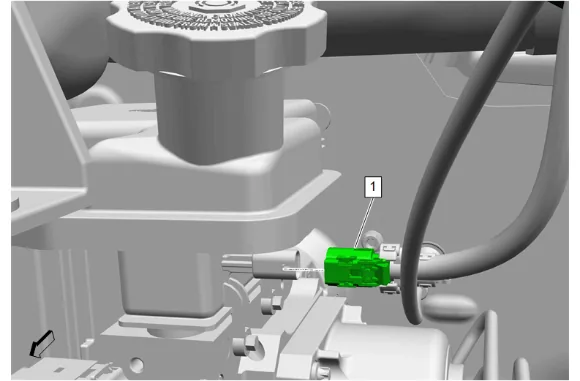
- Electrical Connector (1) @ Brake Fluid Level Indicator Switch » Disconnect
- Place a drain pan under the vehicle.
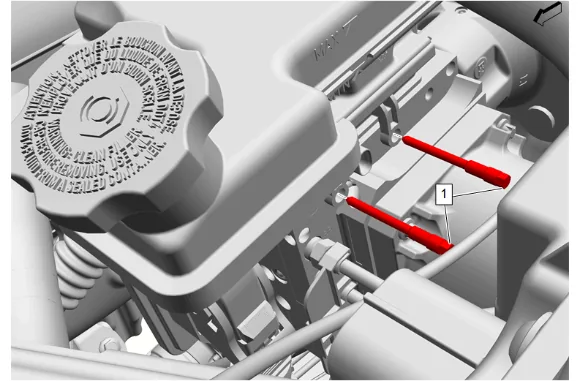
- Brake Master Cylinder Bolt (1) » Remove [2x]
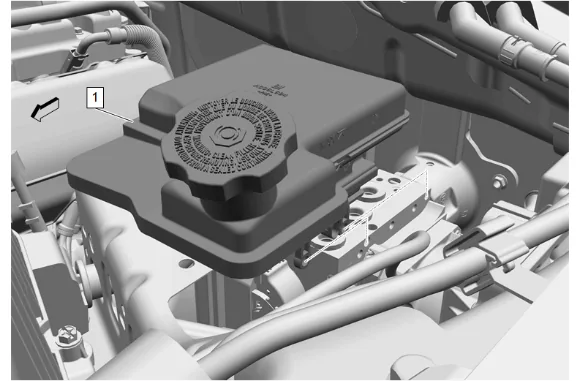
- Brake Master Cylinder Reservoir (1) » Remove
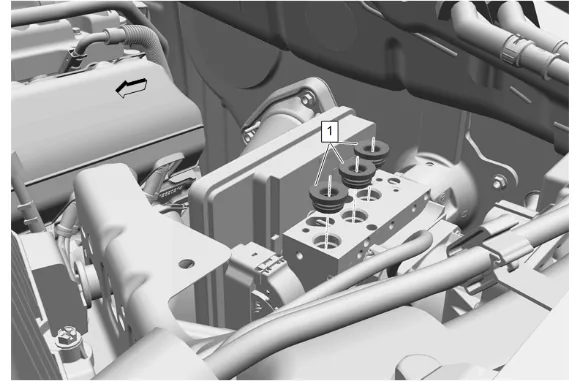
-
Brake Master Cylinder Reservoir Seal (1) » Remove and DISCARD [3x]
-
Transfer components as necessary.
-
Clean any brake fluid from the underbody area and remove the drain pan from under the vehicle. Installation Procedure
-
Lubricate the brake master cylinder reservoir seals (1) with GM approved brake fluid from a clean, sealed brake fluid container. Adhesives, Fluids, Lubricants, and Sealers
-
Brake Master Cylinder Reservoir Seal (1) » Install NEW [3x]
-
Brake Master Cylinder Reservoir (1) » Install
-
Brake Master Cylinder Bolt (1) » Install and tighten [2x] — Fastener Specifications
-
Electrical Connector (1) @ Brake Fluid Level Indicator Switch » Connect
-
Front Wheelhouse Liner - Left Side » Install — Front Wheelhouse Liner Replacement
-
Install the left front tire and wheel assembly. Tire and Wheel Removal and Installation
-
Remove the support and lower the vehicle.
-
Radiator Surge Tank (1) » Install
-
Radiator Surge Tank Bolt (1) » Install and tighten — Fastener Specifications
-
Air Cleaner Upper Housing (2) » Install
-
Air Cleaner Housing Cover Bolt (1) » Install and tighten [3x] — Fastener Specifications
-
Connect the mass airflow sensor electrical connector.
-
Air Cleaner Outlet Front Duct (2) » Install
-
Air Cleaner Outlet Duct Clamp (1) » Tighten [2x] — Fastener Specifications
-
Connect the battery negative cable. Battery Negative Cable Disconnection and Connection
-
Fill the brake master cylinder reservoir to the maximum-full level with GM approved brake fluid from a clean, sealed brake fluid container. Brake Master Cylinder Reservoir Filling