Dash Panel Outer Insulator Replacement (with LM2)
Single Use Fasteners and Components Air Conditioning Evaporator Thermal Expansion Valve Seal - Large Air Conditioning Evaporator Thermal Expansion Valve Seal - Small Removal Procedure
- Recover the refrigerant. Refrigerant Recovery and Recharging
- Drain the coolant. Cooling System Draining and Filling
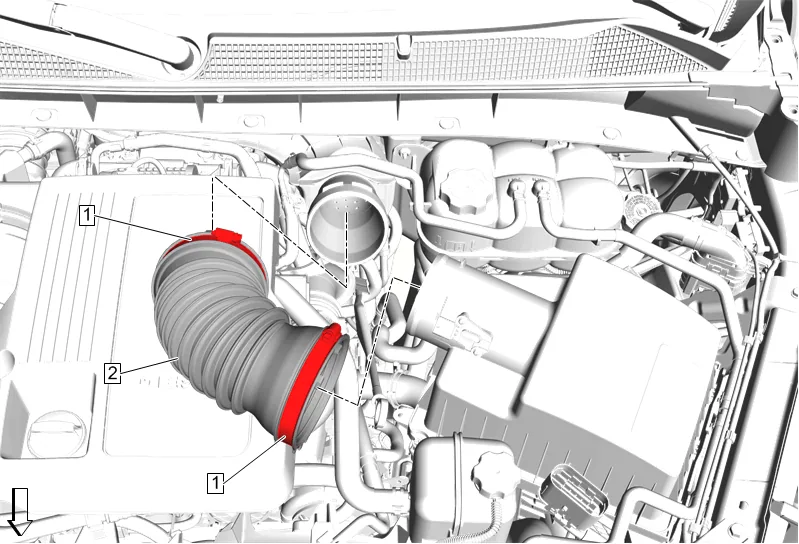
- Air Cleaner Outlet Duct Clamp (1) » Loosen [2x]
- Air Cleaner Outlet Front Duct (2) » Remove
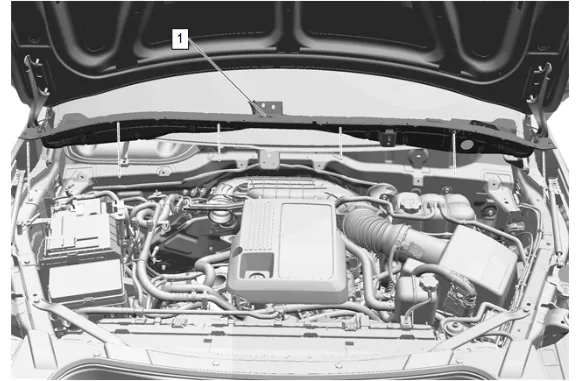
- Plenum Front Panel Outer Reinforcement (1) » Remove — Plenum Front Panel Outer Reinforcement Removal and Installation
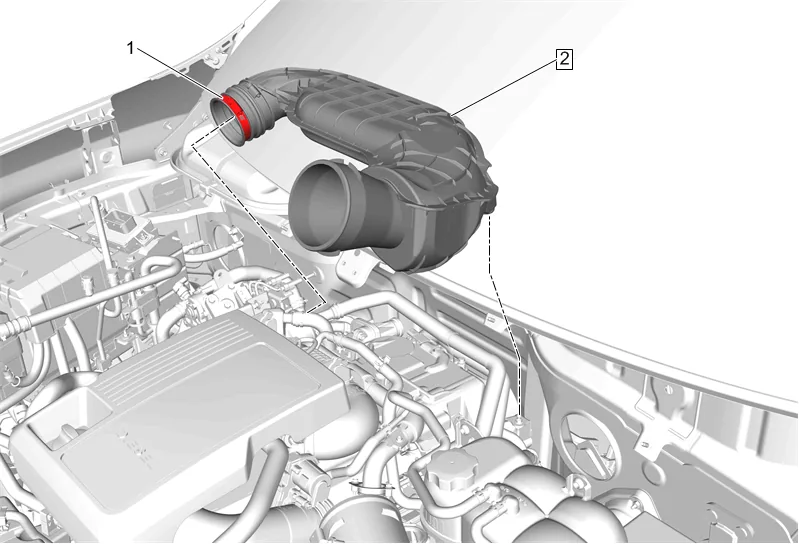
- Air Cleaner Outlet Duct Clamp (1) » Loosen
- Air Cleaner Outlet Duct (2) » Remove
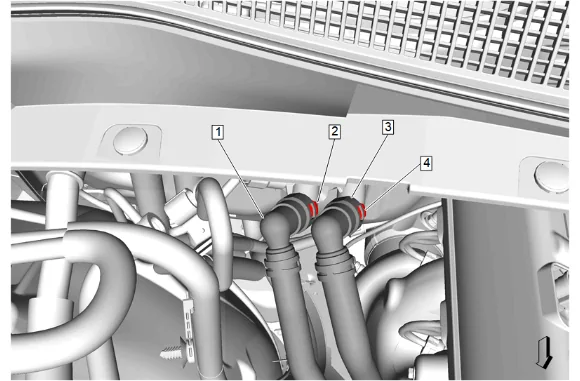
- Heater Outlet Hose Retainer (2) » Disengage
- Heater Outlet Hose (1) » Remove
- Heater Outlet Hose Retainer (4) » Disengage
- Heater Inlet Hose (3) » Remove
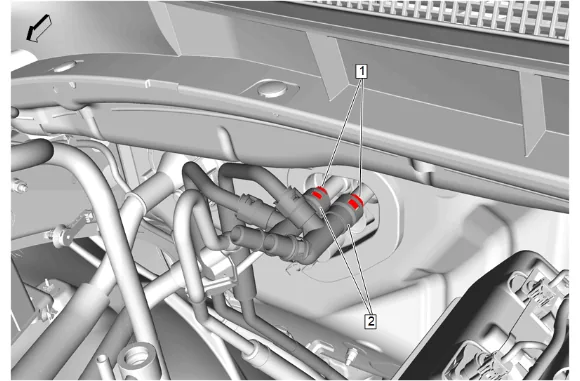
- Retainer (1) » Disengage [2x]
- Auxiliary Heater Inlet and Outlet Hose (2) @ Heater Core » Remove [2x]
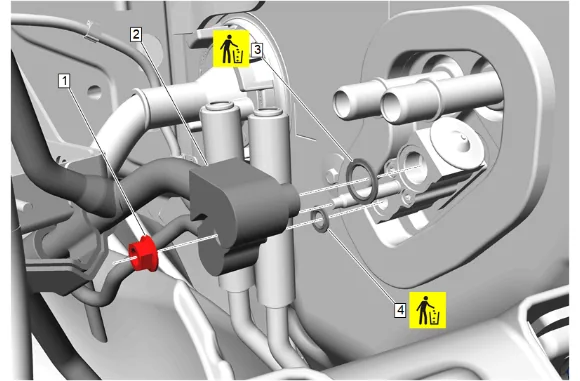
- Air Conditioning Evaporator Thermal Expansion Valve Hose Nut (1) » Remove
- Air Conditioning Refrigerant Heat Exchanger (2) » Remove
- Air Conditioning Evaporator Thermal Expansion Valve Seal - Large (3) » Remove and DISCARD
- Air Conditioning Evaporator Thermal Expansion Valve Seal - Small (4) » Remove and DISCARD
- Raise and support the vehicle. Lifting and Jacking the Vehicle
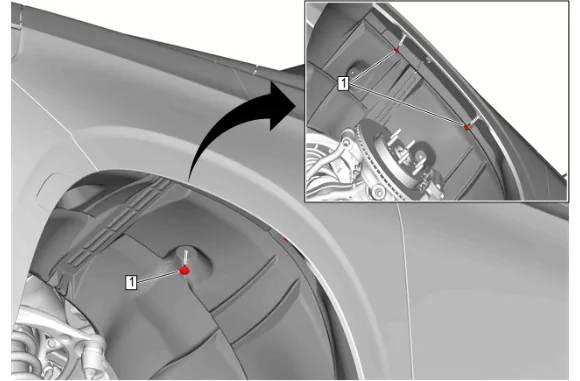
- Front Wheelhouse Liner Bolt - Right Side (1) » Remove [3x]
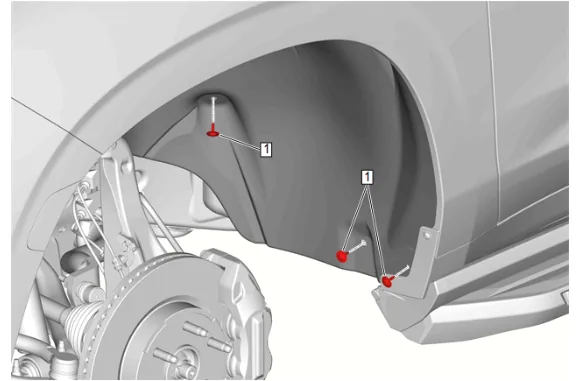
- Front Wheelhouse Liner Bolt - Right Side (1) » Remove [3x]
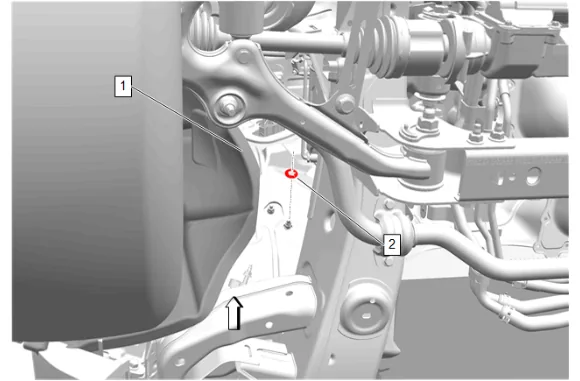
- Front Wheelhouse Front Liner - Right Side (1) » Reposition
- Dash Panel Outer Insulator Retainer (2) » Remove
- Lower the vehicle.
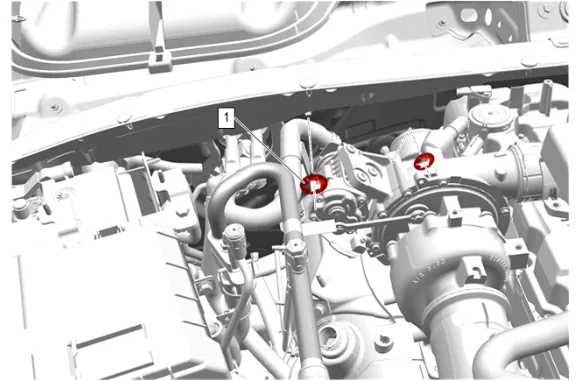
- Dash Panel Outer Insulator Retainer - Right Side (1) » Remove [2x]
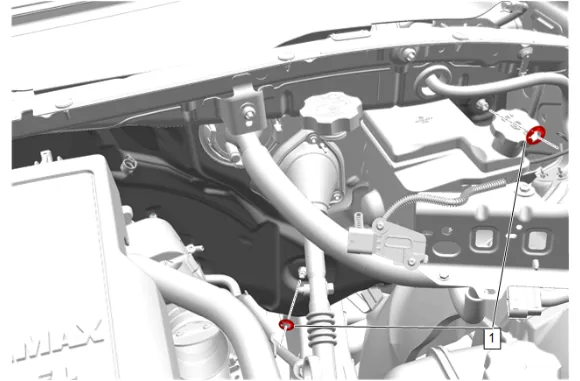
- Dash Panel Outer Insulator Retainer - Left Side (1) » Remove [2x]
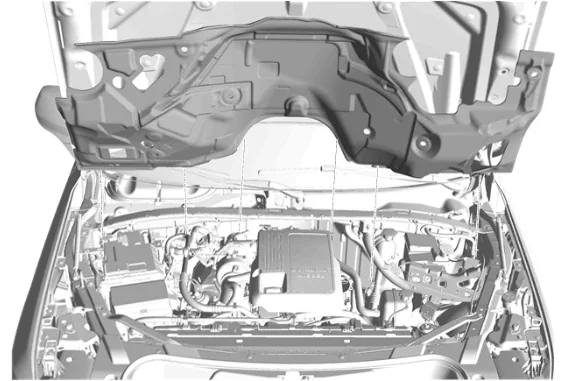
-
Pull the dash panel outer insulator (1) slightly forward and upward to remove. Installation Procedure
-
Dash Panel Outer Insulator (1) » Install
-
Dash Panel Outer Insulator Retainer - Left Side (1) » Install [2x]
-
Dash Panel Outer Insulator Retainer - Right Side (1) » Install [2x]
-
Raise the vehicle.
-
Dash Panel Outer Insulator Retainer (2) » Install
-
Front Wheelhouse Front Liner - Right Side (1) » Install
- Front Wheelhouse Liner Bolt - Right Side (1) » Install and tighten [3x] — Fastener Specifications
-
Front Wheelhouse Liner Bolt - Right Side (1) » Install and tighten [3x] — Fastener Specifications
-
Lower the vehicle.
-
Air Conditioning Evaporator Thermal Expansion Valve Seal - Small (4) » Install NEW
-
Air Conditioning Evaporator Thermal Expansion Valve Seal - Large (3) » Install NEW
-
Air Conditioning Refrigerant Heat Exchanger (2) » Install
-
Air Conditioning Evaporator Thermal Expansion Valve Hose Nut (1) » Install and tighten — Fastener Specifications
-
Auxiliary Heater Inlet and Outlet Hose (2) @ Heater Core » Install [2x]
-
Retainer (1) » Engage [2x]
-
Heater Inlet Hose (3) » Install
-
Heater Outlet Hose Retainer (4) » Engage
-
Heater Outlet Hose (1) » Install
-
Heater Outlet Hose Retainer (2) » Engage
-
Air Cleaner Outlet Duct (2) » Install
-
Air Cleaner Outlet Duct Clamp (1) » Tighten — Fastener Specifications
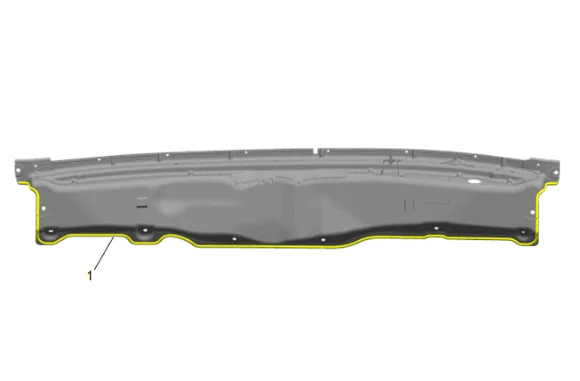
-
Inspect the plenum and the frame surfaces of where the plenum is removed.
-
Clean areas that the bead is broken or damaged with a plastic scrapper on the body and plenum.
-
Apply General Motors recommended Strip-Calk or equivalent to the plenum areas that are needed. Adhesives, Fluids, Lubricants, and Sealers
-
Plenum Front Panel Outer Reinforcement (1) » Install — Plenum Front Panel Outer Reinforcement Removal and Installation
-
Air Cleaner Outlet Front Duct (2) » Install
-
Air Cleaner Outlet Duct Clamp (1) » Tighten [2x] — Fastener Specifications
-
Fill the cooling system. Cooling System Draining and Filling
-
Recharge the refrigerant. Refrigerant Recovery and Recharging
-
Inspect for refrigerant leaks.
-
Inspect for coolant leaks.