Differential Drive Pinion Gear Seal Replacement (G86)
Single Use Fasteners and Components Differential Drive Pinion Gear Nut Differential Drive Pinion Gear Seal Special Tools DT-52506 Pinion Flange Holder and Remover DT-52896 Pinion Seal Installer GE-8092 Driver Handle Equivalent regional tools: Special Tools Removal
- Set the parking brake to service mode. Parking Brake Service Mode Selection
- Raise and support the vehicle. Lifting and Jacking the Vehicle
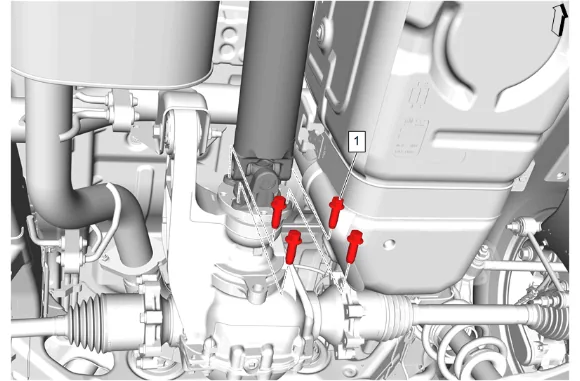
- Rear Propeller Shaft Bolt (1) » Remove [4x]
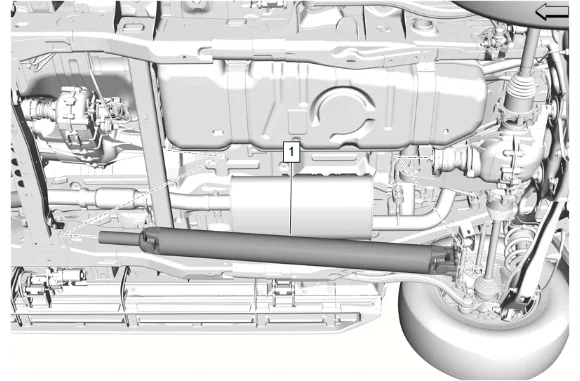
- Propeller Shaft (1) » Remove
- Measure and record the torque required in order to rotate the pinion. Use an inch-pound torque wrench. Record the torque value for reassembly. This will give the combined preload for the following components: The pinion bearings The pinion seal The carrier bearings The axle bearings The axle seals
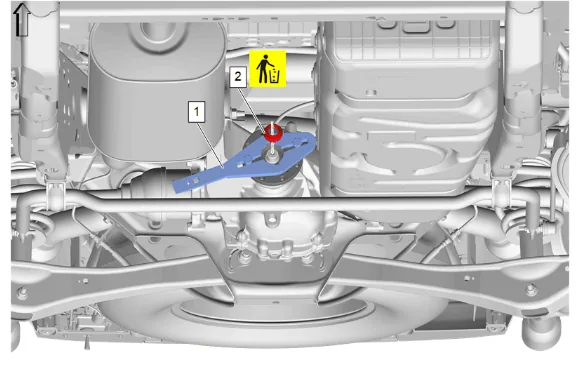
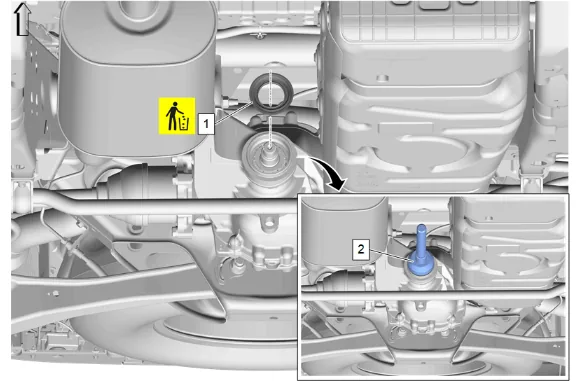
- Using DT-52506 Pinion Flange Holder and Remover (1), Remove and DISCARD the differential drive pinion gear nut (2).
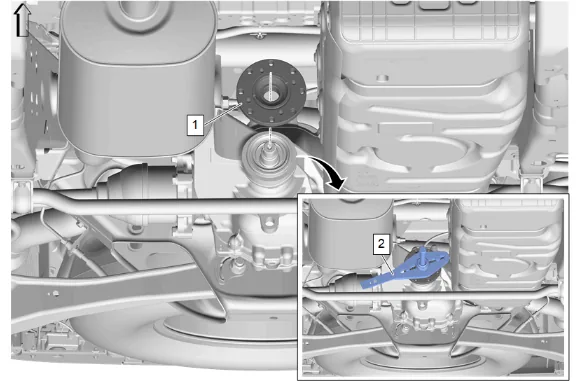
- Using DT-52506 Pinion Flange Holder and Remover (2), Remove the differential drive pinion gear yoke (1).
-
Differential Drive Pinion Gear Seal (1) » Remove and DISCARD Installation
-
Using DT-52896 Pinion Seal Installer and GE-8092 Driver Handle (2) , Install NEW differential drive pinion gear seal (1).
-
Apply sealant to the pinion yoke splines. Adhesives, Fluids, Lubricants, and Sealers
-
Apply grease to the pinion seal where it will contact the pinion gear yoke slinger. Adhesives, Fluids, Lubricants, and Sealers
- Differential Drive Pinion Gear Yoke (1) » Install
- Using DT-52506 Pinion Flange Holder and Remover (1), Install NEW differential drive pinion gear nut (2) hand tight.
- Tighten the differential drive pinion nut (2) until the pinion end play is taken up.
- Measure the rotating torque of the pinion using an inch-pound torque wrench. Continue tightening the differential drive pinion gear nut (2) until specified rotating torque is obtained, refer to Fastener Specifications.
- Once the specified torque is obtained, rotate the pinion several times to ensure the bearings have seated. Recheck the rotating torque and adjust if necessary.
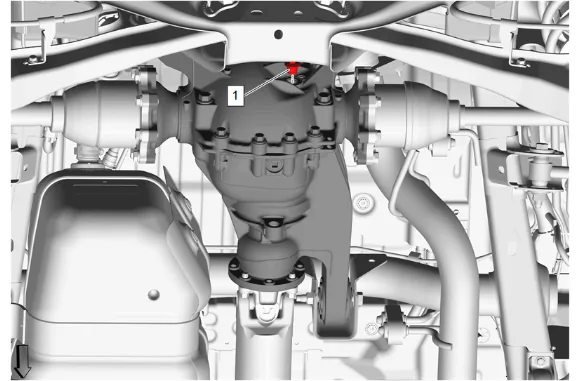
- Rear Axle Housing Fill Plug (1) » Remove
- Inspect the axle lubricant level, it should be 0-5 mm(0.0-0.20 in) below the bottom of the fill plug opening.
- If the level is low, add axle lubricant until the level is 0-5 mm(0.0-0.20 in) below the bottom of the fill plug opening. Use the appropriate axle lubricant: Adhesives, Fluids, Lubricants, and Sealers
-
Rear Axle Housing Fill Plug (1) » Install and tighten — Fastener Specifications
-
Propeller Shaft (1) » Install
-
If NEW threaded components are being installed, loosen the adhesive using a metal pick or similar tool before proceeding. If threaded components are reused, prepare the threaded components using the following steps: 14.1. Remove any loose cured adhesive from the external threads of the components using a lint free cloth. 14.2. Thread the cleaned components into the internal mating threads and remove to loosen trapped cured adhesive. 14.3. Apply thread locking adhesive to the external threads of the components. Adhesives, Fluids, Lubricants, and Sealers 14.4. Ensure there are no gaps in the thread locking adhesive once applied to the component.
-
Rear Propeller Shaft Bolt (1) » Install and tighten [4x] — Fastener Specifications
-
Remove the support and lower the vehicle.
-
Release the parking brake from service mode. Parking Brake Service Mode Selection